Category Archives: green

An Alternative Menu for Thanksgiving

The other day I put together an alternative Thanksgiving menu together with Anna Brones, just because we like to share great recipes from some of our favorite food sites (check out the links below). I also suggest you read the story about Anna’s turkey struggles last year over at Foodie Underground.

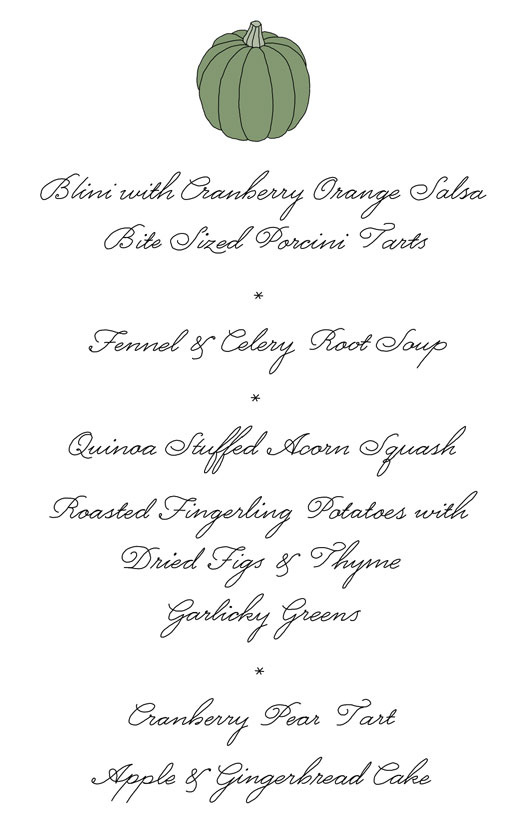
The Complete Foodie Underground Thanksgiving Menu (With or Without Turkey)

Blini with Cranberry Orange Salsa
Bite-sized Porcini Tarts
Roasted Fingerling Potatoes with Dried Figs and Thyme
Fennel and Celery Root Soup
Garlicky Greens
Quinoa Stuffed Acorn Squash Rings
Cranberry Pear Tart
Apple & Gingerbread Cake

Happy Thanksgiving!

This list was first published at Foodie Underground, 19 November 2012

Autumn Foraging: Apples

In my neighbor’s garden there is an old apple tree. The tree and the garden is in need of care. It always hurts my heart when I see fruit of any kind fall to the ground before anyone even thinks of taking care of them. As nobody actually lives next door I think its ok to pick them. So I went over there to have a look. The apples didn’t look that great and they would probably be terrible in most things, I thought. I took a bite and smiled. It was a crisp bite and the taste was sweet and sour at the same time. This abandoned tree was in fact a Granny Smith or at least something very close to it. Granny Smith may not be my absolute favorite but an apple like this is excellent in an apple tart or a nutty manchego salad.

Apples in general are very useful in cooking, for both savory or sweet dishes. A chicken for example is really flavorful when roasted whole filled with apples and prunes. Different kinds of preserves such as apple compote, apple butter and apple chutney are fantastic treats that can be served with many different things, such as a sweet flavor in oatmeal, as a side to meat or together with cheese on bread. While growing up I remember having only apple compote with cold milk as an afternoon snack.

Then there are endless amazing cakes and pies that can be baked with apples. There is of course always the classic Tarte Tartine that was created by two sisters after a successful accident in the kitchen. A more unusual apple pie is the south Swedish version (Skånsk Äpplekaka) that is made with rye bread crumbs. It may sound strange but its absolutely delicious served with vanilla sauce.

If you have a lots of apples you should really consider making your own apple juice or cider. If my neighbor’s tree would give me more apples, I would definitively brew hard apple cider. Sandor Ellix Katz says, in his book “wild fermentation”, to brew apple cider is one of the simplest alcohol fermentation you can make. You just need fresh good quality apple juice (preferably juiced by yourself), a jug, a cheese cloth and a rubber band. He calls it Spontaneous Cider.

Last year I got really inspired by Joanna at Zeb Bakes when she made apple cider vinegar with the scraps and pieces that were left over after making apple cake. I think it’s really clever to use something that normally would be thrown away. Joanna’s vinegar was inspired by Carl Legge‘s experiments which he describes very well in his post Fermenting Revolution 2 – Apple cider vinegar. The below recipe is pretty much the same as Carl’s formula (Sandor Katz suggests less sugar in his book).

I think my neighbor’s Granny Smith are perfect for this recipe.

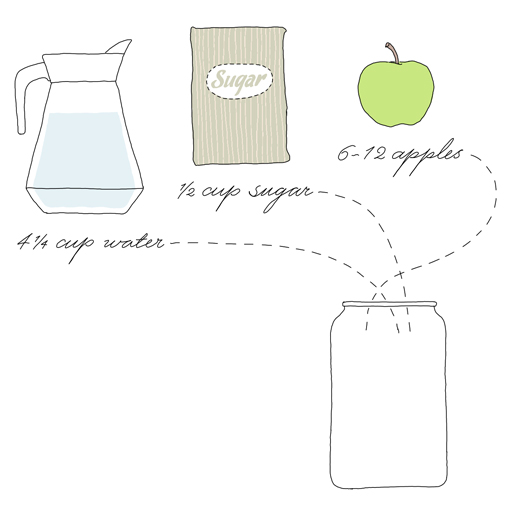
Granny Smith Cider Vinegar

  • ½ cup (about 120 ml) sugar (I used half regular sugar and half brown)
  • 4 ¼ cup (one liter) water
  • 6-12 small Granny Smith apples* (more or less if you are using scraps or whole apples)

Heat up the water together with the sugar. When the sugar has dissolved into the water take off the heat and let cool. This is important as hot liquid will not let the natural yeast start the process. During this time you can prepare the apples. I used whole apples, which I rinsed and cut into one inch (2-3 cm) pieces. But you can use leftover bits and pieces as well. Place the apples in a large glass jar or other suitable container. It’s good if the jar has a wide opening, according to Sandor Katz a larger exposure to air helps the process.

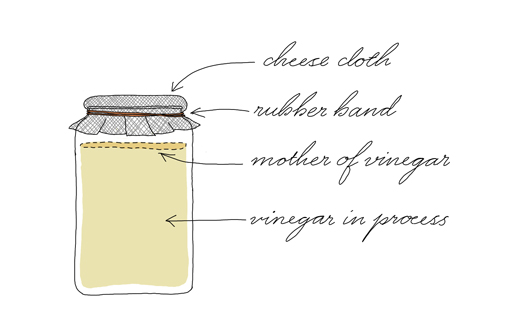
When the sugar solution is cool enough (about room temperature) pour it over the apple pieces. Place a plate on top to weigh down the apples (I took a bowl and a mortar). Place the container in a warm place. To avoid flies etc cover with a cheesecloth or kitchen towel (fastened by a rubber band). Stir and taste the apples every day. (After about 3 days I could see small bubbles and the flavor was sweet and fizzy. This as a good sign, the fermenting process is doing what it should do).

After 7-10 days, the apples have done their job and you will need to strain them through a sieve. Pour back into the jar and let stand for another 7-14 days. Continue to taste your batch regularly. It will soon start to taste more like vinegar than cider. When you are happy with the flavor, strain the liquid again and pour the liquid into sterilized bottles and seal them properly. The film that will be created on top is called “Mother of Vinegar” that can be used as a starter for your next vinegar.


* You can of course use any other kind of apple in this recipe. You can also make vinegar with other kinds of fruit and berries. Sandor Katz mentions in his book that almost any fruit scraps and peels etc can be used for making vinegar. He suggests pineapple, grapes or even overripe bananas.

This article was originally published at EcoSalon, 2 October 2012.

In this Autumn Foraging series see also Autumn Foraging: Rose Hips with a recipe of Rose Hip Sherry.


Autumn Foraging: Rose Hips

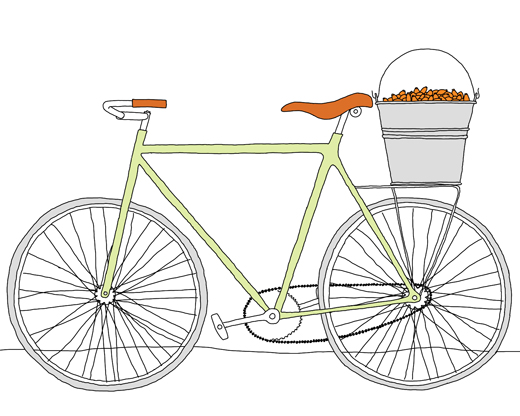
The other day I took my bike on a long long bike ride  to get to the sea through neighborhoods I never new existed. The idea was to get away from the city to breath fresh salty air and eat some newly caught clams. The bonus was that I got to pick ripe rose hips. The rose bushes where growing in the sand just at the edge of the beach. As a rose hip loving Swede, this was a happy moment and I picked as many as I could find.

Rose hips are very high in vitamin C and there are plenty of things to make with it. For example, the outer fruity part of the rose hip (often orange or red) can be dried and used for soup and tea (which can be done with the fresh fruit as well). A rose hip soup is very popular in Sweden especially among children. I love it. The soup can be eaten warm or cold, with ice cream or tiny almond cookies (mandel biskvier) that are best soaked in the soup. My favorite is to serve the soup while cross-country skiing, smoking hot directly from a thermos. I can’t think of a better energy treat than that!

If you ever have split open a rose hip you probably know that the hairy part that surrounds the seeds creates itchiness on your skin. Its annoying but totally harmless. (It’s actually used as an itching powder).

Fresh rose hips are often used to make jam, marmalade or jelly. You can also make schnapps, liqueur or, why not some rose hip sherry? My sister Anna Kindvall has become sort of an expert at making sherry out of rose hips. So well that a restaurant recently wanted to put it on their dessert wine list. In her wine cabinet you can find different vintages of the wine and like many other wines this wine gets better with age. The wine is sweet and flavorful. It works well with desserts or different kinds of cheeses. It’s also great in cooking and, I agree with my sister, a dash of rose hip sherry in a chantarelle sauce is heavenly.

My sister (and others) claims that the most flavorful rose hips are the once with long narrow fruits. I have also heard that the best time to pick them is after the 1st frost (however my sister picks them always before). Here in Brooklyn it’s still summer and the once I picked were all small and round (with a really nice aroma). I couldn’t get hold of winemakers yeast so I’m using instant yeast. Oh well, in time we will see how my batch of  wine will turn out.

Anna’s Rose Hip Sherry

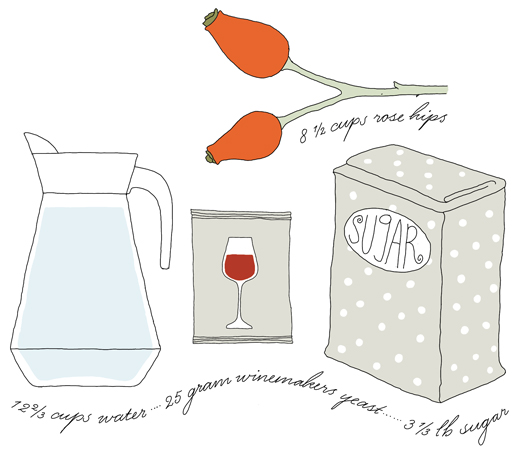
  • 8 ½ cups (2 liters) rose hips (preferably the long narrow fruits)
  • 3 1/3 lb (1 ½ kg) sugar
  • 12 2/3 cups (3 liter) water
  • 25 gr wine maker’s yeast (or fresh yeast, it might even work with instant yeast)

Roughly trim the rose hips but don’t rinse them with water as the surface contains natural yeast that are useful in the process (or that’s what I’ve heard). Make a sugar syrup by heating up the sugar together with the water. When the sugar has dissolved let it cool. Use some of the liquid to dissolve the yeast. Let the yeast start (there will be bubbles on the surface) before mixing with the rest of the sugar liquid and the rose hips in a bucket or a glass carboy. Cover the jar and let the wine sit still for three months. At this time the liquid should look clear and the rose hips have fallen to the bottom of the jar.

Tap the sherry into dark bottles (for example on 12 fl oz (33 cl) beer bottles). To avoid the sediment at the bottom Anna recommends spooning up the sherry instead of pouring (can be hard with a carboy). Seal with a suitable cork or cap. Let the sherry stand for at least one more month before drinking.

If you are patient enough to store it, or at least with some of it, my sister thinks it’s best to drink after 5 years.

This article was originally published at EcoSalon, 13 september 2012

In this Autumn Foraging Series also check out, Autumn Foraging – Apples with an Apple Cider Vinegar recipe

Fresh Tomatoes for Pasta

One of the best things about summer are the variety of fresh tomatoes that are available at the food markets right now. My favorite tomato is the local Beefsteak tomato. The may look ugly but the taste is rich and flavorful.

I can’t get enough of them so I eat tomatoes almost every day, preferably with just a simple vinaigrette on a slice of homemade sourdough bread topped with mozzarella. The tomatoes are also great in a watermelon salad with feta cheese. Another of my recent favorites is a tomato salad with red onions, celery and middle eastern string cheese. The string cheese is often spiced with black cumin (Nigella sativa) which gives this pleasant cheese an interesting flavor.

As an appetizer, a fresh tomato salsa, spiced with cilantro, chili and garlic is never wrong. If I’m starving and too lazy in the summer heat I turn pretty much the same thing into a cool tomato sauce for pasta.

Fresh Tomato Sauce
(serves two persons)

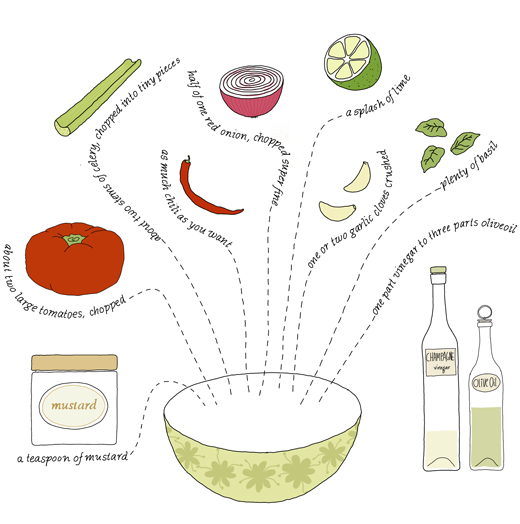
2 large tomatoes
½ red onion
Fresh chili pepper (amount depends on how spicy you want it)
Plenty of chopped fresh basil
2 garlic cloves
1 tablespoon champagne vinegar *
3 tablespoons olive oil
A dash of lime juice
One teaspoon mustard
Salt & pepper
Honey (optional)

Topping (suggestions)
Freshly grated Parmesan
Toasted sunflower seeds

Wash the tomatoes and chop them into smaller pieces. Chop the onion and the chili (adjust the strength to your own liking) into tiny tiny bits and pieces. Rinse the basil and chop the leaves roughly. Place all the prepared ingredients in a bowl and squeeze in 1-2 garlic cloves. Mix together vinegar, olive oil and mustard. Season with lime juice, salt & pepper. If you like you can also add some honey to the dressing but if you are using a sweeter mustard that may not be necessary.

Serve this cold tomato sauce on your favorite pasta topped with freshly grated parmesan and toasted sunflower seeds.

* It works perfectly well with other kinds of vinegar such as balsamic, apple cider or white whine vinegar.

This article was originally published at EcoSalon, August 21 2012 

See related recipe, Tomato sauce


Lentil Dip


It may be silly to suggest cooking dried legumes when you can get them ready to eat in a can. But I still insist that there are so many benefits to cooking them yourself that it’s worth every step. And it’s pretty easy to do. You can also cook large quantities at a time and store smaller portions in your freezer.

Legumes like lentils or beans work all year round in different ways. Cold in salads and warm as a side to eggs, beets or with any green vegetable. Chickpeas are wonderful as a starter together with toasted almonds. Green lentils with beets, feta and parsley create a simple and delicious salad alone or together with baked vegetables or meat. Hummus or any other dip (see below) are perfect treats and easy to whip up with any fresh produce that the summer can provide.

I always cook my legumes together with some herbs, vegetables and salt (see simple version below). Sometimes I add bones or small pieces of meat when cooking the legumes. It gives a specific flavor but it’s far from necessary. Cooking time depends on what type of legumes you have, for example cooking lentils is far quicker than chickpeas. It also depends what you are planning to do. If you are making hummus you may want to cook the chickpeas until they are almost mushy but for a salad they should just be soft.

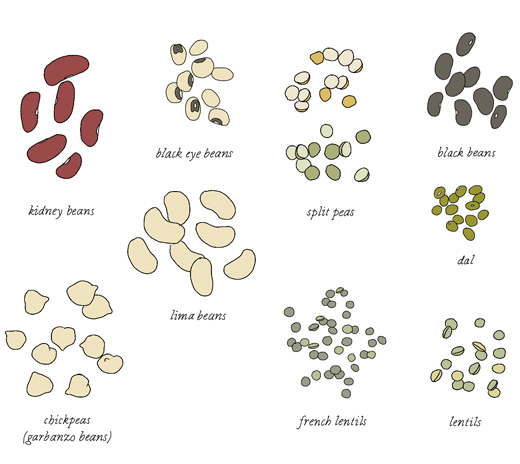
Some legumes such as most beans and chickpeas you will need to soak for at least 8-10 hours (but longer is better). Change the water a couple of time to keep them fresh (it can smell really bad). Lentils, split peas and mung beans do not need soaking.

The lentil dip below can be served together with fresh vegetables such as raw carrots, cucumber and celery. Slightly cooked cauliflower and broccoli also work well. You can also use the dip as a spread on freshly baked bread and crackers. Enjoy!

lentil dip
(Plenty of dip)

one cup dried french lentils (almost 2 cups cooked)
1-2 bay leaves
A sprig of sage
½ onion (and/or other vegetable scraps such as carrot, celery or fresh fennel)
about one tablespoon of salt

for the dip
about 2 cups cooked lentils (as above)
one shallot
chili (more or less depending on how spicy you want it)
2-3 garlic cloves
2 teaspoon coriander*
2 teaspoons cumin*
one teaspoon fennel*
reserved lentil liquid
juice from a ½ lime

seasoning
smoked paprika powder (e.g. bittersweet Pimentón de la Vera)
sea salt
some olive oil
cilantro

First step is to cook the lentils. Rinse the lentils and cook them gently together with about two cups water, bay leaves, sage, salt and onion (etc) until soft (about 15-20 min). You may need to add a little more water. It’s important that you don’t cook the lentils dry and there should be about a cup of tasty liquid left when the lentils are done. When done reserve the liquid as it will be used later. Let the lentils cool and remove all bits and pieces of the sage, bay leaves, onions etc.

Chop the shallot into tiny pieces. Saute on very low heat until it starts to caramelize. Raise the temperature a little and add chili together with the spices. Stir everything together and add the lentils to the pan. Poor some of the water over and let cook for just a little bit. (You could stop the cooking here and just enjoy the lentils as a side to eggs, meat or vegetables).

Let the lentils cool a little before blending together with garlic in a food processor. Add lime juice plus some of the reserved lentil liquid to create a smooth texture. Season with flakes of sea salt and smoked paprika powder. Lastly add as much cilantro as you wish. Just before serving add some olive oil and a splash on top.

* I prefer to toast whole coriander, fennel and cumin in a skillet at high heat. When they start to “pop” remove them immediately from the pan into a mortar and pestle. Grind until fine. The flavor will be richer.

 This article was originally published at EcoSalon on 10 July 2012.