Tag Archives: kokblog recipe

Roasted Acorn Squash Spread

kokblog-acorn-squash2

The reason for my silence here on kokblog is simple, I have been extremely busy with a number of exciting projects in the kitchen as well as in my drawing studio (about which I’m hoping to share with you soon). I’m also recovering from a long lasting and painful frozen shoulder. Luckily it hasn’t stopped me from creating stuff but it surely has slowed me down a little. One good thing is that it has encouraged me to take exercising more seriously and daily walks in the neighborhood.

Well, it’s getting freezing out there so I’m enjoying cozy nights in front of our fireplace with warming dishes like mushroom risotto or polenta with hearty ragu. If I want something simple I make Äggakaga a pancake like dish from South Sweden. Traditionally it’s served with bacon but it’s delicious with Andrew Janjigian’s mushroom confit too.

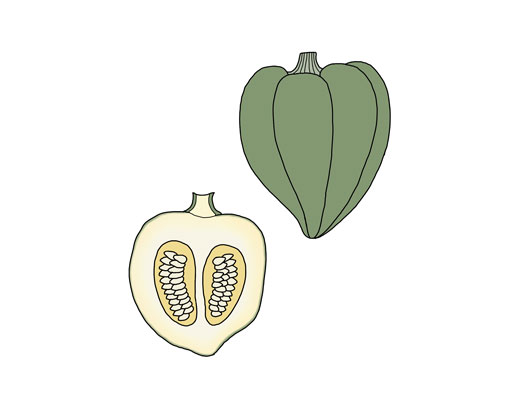
Lately I have been developing several new bread recipes. Instead of the normal spreads like cheese, charcuterie and pickles, I  enjoy having bread with slices of avocado or hummus with roasted peppers. I have also been savoring it with roasted acorn squash, as in the recipe below. Typically, this is a side dish but I think it really works well on slices of toasted sourdough bread. If you like, add some goat cheese but it’s pretty good just as it is.

Roasted Acorn Squash Spread
serves 2 to 4

1 acorn squash, approximately 1 pound
about 3 tablespoons extra virgin olive oil, plus extra if needed
1 to 2 teaspoons maple syrup (or brown sugar)
rosemary, fresh or dried, chopped or crushed
salt and freshly milled pepper, for seasoning

Preheat the oven to 400°F (200°C)

With a sharp heavy knife cut the acorn squash lengthwise. Remove the seeds (which are delicious roasted) and all the stringy pulp with a small knife and a spoon.

Arrange the halves in a baking pan, with cut side up. Pour the olive oil into the center of both halves. Add the syrup, rosemary and a dash of salt.

Roast the squash until very very soft and with a nice caramelized top. Remove from the oven and let cool slightly.

Scope out the flesh into a medium bowl including any remaining olive oil. Mash it all together with a fork. If it feels too dry, add more olive oil. Season with salt and pepper.

Serve immediately with toasted sourdough bread.

kokblog-winter-squash

Related links

Acorn Squash Crostini with Crispy Bacon and Sage Recipe – Serious Eats

Butternut Squash and Sage Latkes by Martha Rose Shulman, NYTimes

Yotam Ottolenghi’s butternut squash and tahini spread, The Guardian

*

illustrated by me

Adventures in Vegetables
Interview with Dennis Cotter by Killian Fox at The Gannet Magazine

Pumpkin artwork

Ceviche with Mango and Avocado

Ceviche has been one of those dishes I have wanted to make for a very long time. And now I can’t stop. I like it as the illustrated recipe above, which has a great balance of spice and fruitiness. I have tried other versions as well but this one is so far my favorite.

My recipe is based on a ceviche I was treated to on my last day of 2013. The host made it with cod, which was excellent and he also included freshly cooked shrimps, which I haven’t. The lime ratio I got from Michael Ruhlman’s gorgeous looking Red Snapper Ceviche recipe as it sounded like a good measure. My recipe suggests monkfish but it works with any other white firm sea fish such as cod, tilapia, halibut etc.

1 lb (about 1/2 kg) fresh monkfish*, whole or fillets
1/2 cup (120 ml) lime juice (4-6 limes, dep. on the fruit’s juiciness you might need more or less)
1/2 shallot
one jalapeño
one mango
one avocado
cilantro
salt

If not using fillets, bone and remove skin from the fish. Rinse. Cut the fillets into small pieces (approximately 1/2″ cubes). Chop the shallot very fine.  Place fish and shallots in a bowl and cover with lime juice. Make sure everything is evenly coated. The process can go quite quickly and some say it may be done in 10 minutes. All depends on how thin or thick your pieces are. I often let it marinate for 2-3 hours before I serve it. During this time, keep it cool in the refrigerator. You may check on it and stir it around a little every so often. When ready, the fish should be white and not translucent.

Just before serving: remove the seeds and chop the jalapeño finely. Cut the mango and avocado into small cubes. Place everything including the fish in a large serving bowl. Season with salt. Decorate with plenty of fresh cilantro. Serve with tortilla chips or as I sometimes do, thin knäckebröd.

* To be on the safe side it’s a good thing to get frozen fish or even freeze the fish for 2 – 3 days before making ceviche. The freezing will kill any possible parasites in the fish. I have had good results both ways. Please note that the fish, frozen or not still has to be of good quality. Here is an old article at New York Times about it.

Before buying any fish check with Seafood Watch for the most sustainable options.

*

Other ceviche recipes
Swordfish Ceviche with an Asian Flair by Winnie Abramson at Food52
Sea Urchin Ceviche by norecipes

Toscakaka med Apelsin (Swedish Almond Cake with Orange)

Toscakaka med Apelsin (Swedish Almond Cake with Orange)
by Anna Brones

When spring rolls in, I always think of my mother giving me a package of pink, yellow and blue feathers. They had thin metal wire at the tips, to be wrapped around branches. From the kitchen window I could see my mother cutting thin branches from the birch tree. She would bring them inside, set them in a large glass vase, and I would get to work attaching the feathers.

In Sweden, just like at Christmas you decorate a tree, at Easter time you get out the påskfjädrar and decorate a collection of branches, a tradition that dates back to the late 1800s. And my mother was sure that we always had a few bags of påskfjädrar on hand so as to make our house a colorful celebration of the season.

Many people in Sweden celebrate Easter, whether or not they have religious leanings. In fact, today it’s mostly celebrated as a secular holiday, one where everyone gets time off to celebrate the long weekend. Easter weekend is a time to gather with friends and family and eat good food together. There are the traditional Swedish holiday dishes like pickled herring, but whatever is served on the table is always an indicator of the season, with spring-friendly foods. And there are eggs of course. After a winter of heavy foods, the Easter celebration can be refreshing.

If you’re lucky, you may be gifted a cardboard egg, full of sweets, and if that isn’t enough for you, there’s sure to be an assortment of cakes to go with coffee. Because in Sweden, there is always cake and coffee.

Which brings us to the question: what kind of cake to serve?

Toscakaka is a classic Swedish recipe; you’ll find it in many an old cookbook, and it’s often an option at pastry shops. Its almond and caramel top makes it a step above ordinary cakes, which makes it a good option for a festive and celebratory meal. But the magic of this recipe is when the caramel seeps into the cake during baking, making for a moist and flavorful cake.

As we come out of the winter and citrus season, we thought it only fitting to celebrate the arrival of spring with an infusion of orange. The orange zest and juice in the cake pair well with the rich caramel on top, and giving it the perfect balance of flavors. You’ll often find this type of cake made with baking powder, but we opted to make it rise by separating the eggs and whisking the egg whites, similar to making a meringue.

Glad påsk!

Anna & Johanna’s Toscakaka with Orange

one 9” cake

cake
3 ½ oz (100 grams) unsalted butter, room temperature
¾ cup (3 ¾ ounces, 106 grams) blanched almonds
3 egg yolks, room temperature
3 egg whites, room temperature
1/2 cup (3 ¾ oz, 106 grams) brown sugar
1/2 cup (3 ½ oz, 100 grams) natural cane sugar
1/2 cup (2 1/2 ounces, 71 grams) all-purpose flour
3 tablespoons milk
1 tablespoon orange zest + 3 tablespoons orange juice

almond & caramel topping
3 ½ oz (100 grams) butter
1/3 cup (2 ½ ounces, 71 g grams) brown sugar
3/4 cup (3 ¾ ounces, 106 grams) blanched almonds

Preheat the oven to 350°F (175°C).

Grease a 9” spring form pan and sprinkle some breadcrumbs evenly.

Grind the blanched almonds for the cake in a food processor until almost finely ground; there could still be a little chunks of almonds left.

Cream together butter and brown sugar until well blended and creamy. Add one egg yolk at the time and mix it well together. Sift in the flour and carefully fold it into the batter together with the ground almonds. Add in the milk and orange zest. Stir as little as possible until you get an even and sticky batter.

In a grease-free bowl, whisk the egg white with an electric whisk (or by hand). When soft peaks forms add in the cane sugar little by little. Whisk until stiff peaks forms. Carefully fold the sugar and egg white mixture into the batter and keep folding until the batter is evenly blended. Be careful not to over stir.

Pour the batter into the greased and breaded spring form pan.

Bake at 350°F (175°C) for 25 minutes at the lower part of the oven. While cake is baking prepare quickly the almond & caramel topping.

Melt the butter together with the brown sugar. In the mean time chop the rest of the blanched almonds roughly. When the butter and sugar is melted add the almonds and stir together until it thickens.

Take out the cake from the oven (if the cake feels too wobbly let it bake a little longer). Poor the almond & caramel over, carefully spread it evenly. Bake the cake for another 10 – 15 minutes or until cake had got a nice color and a toothpick comes out clean when inserted to the thickest part of the cake.

Remove the cake from the oven and let cool. Once cool, remove the cake from the pan.

*

This post was also published at Foodie Underground.


Other articles by Anna & Johanna

Mazainer – Swedish Pastry Classic
Lussebullar – Swedish Saffron Buns
Kanelbullar & kardemummabullar
and
Anna is also my partner for my 1st book (Ten Speed Press, Spring 2015)

Pernod & Herb Risotto

Now, in the beginning of summer, there is not much I can harvest in the garden. But there are a few things like rhubarb, mint, black currant leaves, thyme, sage, oregano, tarragon and parsley etc. The sage and the tarragon are  doing well, so the other day they were successfully used in a simple risotto together with some Pernod that I found in my liquor cabinet. The risotto was served with just an apple and carrot salad, however I can imagine it will work as a side dish with  many other things.

This is pretty much how I put it together: Start by sauteing some chopped onion at low heat with a generous amount of butter until soft and golden in color. Raise the heat and brown the rice for a bit before adding a little Pernod. When it starts to caramelize pour in enough vegetable stock (homemade) to cover the rice. Add fresh sage and thyme. Stir and feed with more stock whenever you need to until the rice is tender but still a little al dente. The risotto should feel thick and creamy. Add a lump of butter and freshly grated Parmesan. Stir carefully. Remove from heat and let the risotto rest covered for a couple of minutes. Decorate with fresh tarragon before serving.

Later on I will have lettuce, mustard greens, kale, spinach,beans, zucchini, carrots, beets, coriander, dill, strawberries, raspberries, gooseberries, elderflower, black & red currants and many other things in my garden. Down the road there will be wild apples and black cherries. But until then I’m pleased with what I have already.

More Risotto links

My Mushroom Risotto
Squid Ink Risotto by Hank Shaw
Spring Lemon Risotto with Asparagus and Fiddlehead Ferns from theKitchn
Cheddar Risotto Cakes from Vintage Kitchen

How to Make Kefir

My temporary landlord Russell Busch, who is also a good friend, just introduced me to kefir making. Kefir is a fermented milk drink that contains plenty of healthy probiotics. To make kefir from milk you need kefir grains which are a live and active culture of yeast and bacteria.

Kefir is a very common drink in Eastern Europe and the Nordic countries. I grew up with it and if I remember correctly, the Swedish kefir is thicker, more sour and has a slightly carbonated feel to it. Swedes often eat kefir (with a spoon) together with muesli, cornflakes, fruit or just with sugar and cinnamon. I like my kefir best just plain with fresh fruit or berries. Others prefer making smoothies with frozen berries and fruits as it takes off some of the strong sour flavor. Luckily Kefir has become increasungly common here in the US.

The kefir making process is super easy and you don’t really need to do much as the kefir grains do most of the work.

to make kefir you will need:

  • kefir grains (which you order online here or here or somewhere else)
  • organic whole milk from cow, sheep or goat
  • glass jar
  • small piece of cheese cloth + rubber band (or similar)
  • wood or plastic spoon/ spatula
  • fine mesh plastic strainer (or stainless steel)

note: no metal such as aluminum etc can be used as it will react with the kefir grains. Although, for some reason stainless steel seems to be OK.

Place the new kefir grains in a clean glass jar (about two tablespoons). Pour about 1 cup organic whole milk over the grains. Cover with the cheesecloth and fasten it with a rubber band to avoid flies (I actually just use a plastic lid that is just placed on top). Leave the jar on the counter in room temperature away from any sun.

When the kefir has got thicker the kefir is probably done. It should smell pleasantly and have a mild sour taste. At this stage you will have a drinkable kefir. If it stays longer the kefir will start to separate the curdled milk from the whey. Don’t worry, the kefir is still fine, however it will be slightly thicker and have a richer taste. A longer fermentation will also create more probiotics and less lactose. The fermentation will take about 12-36 hours.

When you think you are ready, give the jar a shake and drain it through the plastic strainer to separate the kefir from the grains. It’s important to be gentle with the grains so don’t press them too hard. The kefir grains don’t have to be totally clean from curds for the next batch. The ready-made kefir can be stored in the fridge, preferably in a glass container. It will keep fresh for awhile. If you think the kefir is too loose you can strain it to reduce some of the whey. Leftover whey can be used for many things (see below).

next batch
Prepare the next batch by placing the strained kefir grains into a clean glass jar. This time you should add a little more milk and the fermenting process will probably go faster as the grains have grown larger and become more active.

The more kefir you make the bigger the grains will grow, you will therefore need to adjust the amount of milk depending on their size. At some point you need to split the grains up as there is a limit on how much kefir you can make. I suggest giving some grains to a friend or start making other things with it. You can, for example, make kefir drinks by using almond, soy or coconut milk instead of regular milk. In this kind of process the grains will not grow and therefore not last as long. I haven’t tried it yet but my landlord makes coconut kefir drinks daily.

what to do with the kefir
There are many other things you can do with the kefir if you don’t just want to drink or eat it. Kefir is excellent in dips, dressings, cakes and bread. It can also be used instead of yeast when baking bread or at least that’s what I’ve heard.

Recently I made my own cream cheese or rather fresh cheese by straining the kefir from the whey through a clean kitchen towel or several layers of cheese cloth (takes about 24 hours). This creamy cheese can be served plain or flavored with fresh herbs, garlic or anything you like. Its also great to make pierogi leniwe (Polish lazy pierogi).

You can do many things with the whey such as ferment vegetables, sauerkraut (cabbage) and when diluted 5 times with water it can be used as a fertilizer for your plants. For about a week I collected the leftover whey to make ricotta. I was amazed how well it worked out as the whey just looks like cloudy water.

storing the kefir grains
At some point you may want to have a break in your kefir making and it’s actually possible to store the kefir grains with some milk in your fridge. Just feed them with new fresh milk every now and again. When you start again the grains may not be as active as before the break, so you probably have to start again with just a small amount of milk.

 This article was 1st published at EcoSalon, 31 July 2012