Fresh Tomatoes for Pasta

One of the best things about summer are the variety of fresh tomatoes that are available at the food markets right now. My favorite tomato is the local Beefsteak tomato. The may look ugly but the taste is rich and flavorful.

I can’t get enough of them so I eat tomatoes almost every day, preferably with just a simple vinaigrette on a slice of homemade sourdough bread topped with mozzarella. The tomatoes are also great in a watermelon salad with feta cheese. Another of my recent favorites is a tomato salad with red onions, celery and middle eastern string cheese. The string cheese is often spiced with black cumin (Nigella sativa) which gives this pleasant cheese an interesting flavor.

As an appetizer, a fresh tomato salsa, spiced with cilantro, chili and garlic is never wrong. If I’m starving and too lazy in the summer heat I turn pretty much the same thing into a cool tomato sauce for pasta.

Fresh Tomato Sauce
(serves two persons)

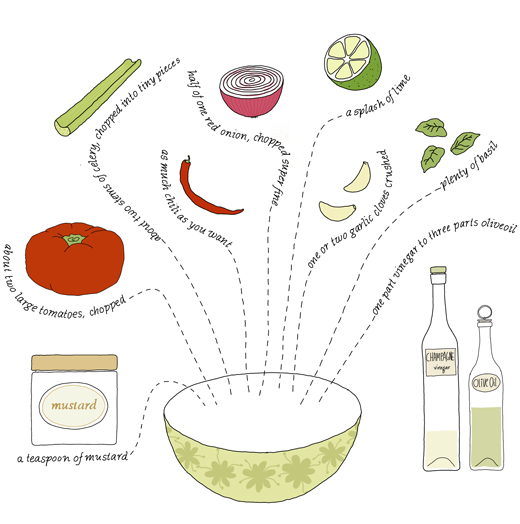
2 large tomatoes
½ red onion
Fresh chili pepper (amount depends on how spicy you want it)
Plenty of chopped fresh basil
2 garlic cloves
1 tablespoon champagne vinegar *
3 tablespoons olive oil
A dash of lime juice
One teaspoon mustard
Salt & pepper
Honey (optional)

Topping (suggestions)
Freshly grated Parmesan
Toasted sunflower seeds

Wash the tomatoes and chop them into smaller pieces. Chop the onion and the chili (adjust the strength to your own liking) into tiny tiny bits and pieces. Rinse the basil and chop the leaves roughly. Place all the prepared ingredients in a bowl and squeeze in 1-2 garlic cloves. Mix together vinegar, olive oil and mustard. Season with lime juice, salt & pepper. If you like you can also add some honey to the dressing but if you are using a sweeter mustard that may not be necessary.

Serve this cold tomato sauce on your favorite pasta topped with freshly grated parmesan and toasted sunflower seeds.

* It works perfectly well with other kinds of vinegar such as balsamic, apple cider or white whine vinegar.

This article was originally published at EcoSalon, August 21 2012 

See related recipe, Tomato sauce


How to Make Kefir

My temporary landlord Russell Busch, who is also a good friend, just introduced me to kefir making. Kefir is a fermented milk drink that contains plenty of healthy probiotics. To make kefir from milk you need kefir grains which are a live and active culture of yeast and bacteria.

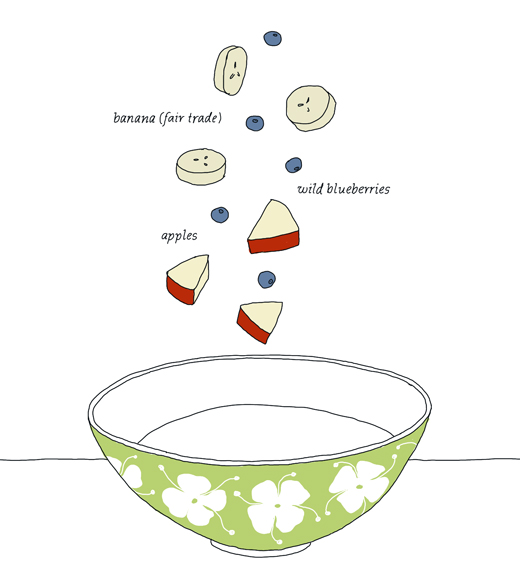
Kefir is a very common drink in Eastern Europe and the Nordic countries. I grew up with it and if I remember correctly, the Swedish kefir is thicker, more sour and has a slightly carbonated feel to it. Swedes often eat kefir (with a spoon) together with muesli, cornflakes, fruit or just with sugar and cinnamon. I like my kefir best just plain with fresh fruit or berries. Others prefer making smoothies with frozen berries and fruits as it takes off some of the strong sour flavor. Luckily Kefir has become increasungly common here in the US.

The kefir making process is super easy and you don’t really need to do much as the kefir grains do most of the work.

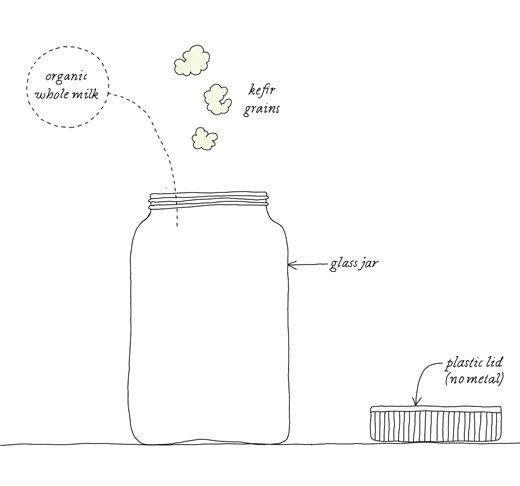
to make kefir you will need:

  • kefir grains (which you order online here or here or somewhere else)
  • organic whole milk from cow, sheep or goat
  • glass jar
  • small piece of cheese cloth + rubber band (or similar)
  • wood or plastic spoon/ spatula
  • fine mesh plastic strainer (or stainless steel)

note: no metal such as aluminum etc can be used as it will react with the kefir grains. Although, for some reason stainless steel seems to be OK.

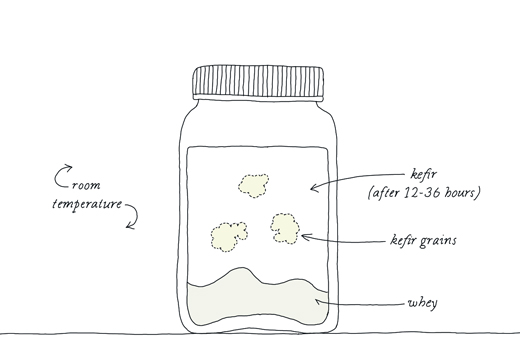
Place the new kefir grains in a clean glass jar (about two tablespoons). Pour about 1 cup organic whole milk over the grains. Cover with the cheesecloth and fasten it with a rubber band to avoid flies (I actually just use a plastic lid that is just placed on top). Leave the jar on the counter in room temperature away from any sun.

When the kefir has got thicker the kefir is probably done. It should smell pleasantly and have a mild sour taste. At this stage you will have a drinkable kefir. If it stays longer the kefir will start to separate the curdled milk from the whey. Don’t worry, the kefir is still fine, however it will be slightly thicker and have a richer taste. A longer fermentation will also create more probiotics and less lactose. The fermentation will take about 12-36 hours.

When you think you are ready, give the jar a shake and drain it through the plastic strainer to separate the kefir from the grains. It’s important to be gentle with the grains so don’t press them too hard. The kefir grains don’t have to be totally clean from curds for the next batch. The ready-made kefir can be stored in the fridge, preferably in a glass container. It will keep fresh for awhile. If you think the kefir is too loose you can strain it to reduce some of the whey. Leftover whey can be used for many things (see below).
next batch
Prepare the next batch by placing the strained kefir grains into a clean glass jar. This time you should add a little more milk and the fermenting process will probably go faster as the grains have grown larger and become more active.

The more kefir you make the bigger the grains will grow, you will therefore need to adjust the amount of milk depending on their size. At some point you need to split the grains up as there is a limit on how much kefir you can make. I suggest giving some grains to a friend or start making other things with it. You can, for example, make kefir drinks by using almond, soy or coconut milk instead of regular milk. In this kind of process the grains will not grow and therefore not last as long. I haven’t tried it yet but my landlord makes coconut kefir drinks daily.

what to do with the kefir
There are many other things you can do with the kefir if you don’t just want to drink or eat it. Kefir is excellent in dips, dressings, cakes and bread. It can also be used instead of yeast when baking bread or at least that’s what I’ve heard.

Recently I made my own cream cheese or rather fresh cheese by straining the kefir from the whey through a clean kitchen towel or several layers of cheese cloth (takes about 24 hours). This creamy cheese can be served plain or flavored with fresh herbs, garlic or anything you like. Its also great to make pierogi leniwe (Polish lazy pierogi).

You can do many things with the whey such as ferment vegetables, sauerkraut (cabbage) and when diluted 5 times with water it can be used as a fertilizer for your plants. For about a week I collected the leftover whey to make ricotta. I was amazed how well it worked out as the whey just looks like cloudy water.

storing the kefir grains
At some point you may want to have a break in your kefir making and it’s actually possible to store the kefir grains with some milk in your fridge. Just feed them with new fresh milk every now and again. When you start again the grains may not be as active as before the break, so you probably have to start again with just a small amount of milk.
 This article was 1st published at EcoSalon, 31 July 2012
Ginger & Lime Tart

Like several other countries Sweden celebrates name days, which means that every single day of the year has a specific name of a person. For some people (for example, my mother in law) the name day is more important than their own birthday. For others it’s just an ordinary day.

In the middle of July, Swedes celebrates fruntimmersveckan (the week of the ladies) which is a week when there are six women’s names in a row. This week is especially interesting if you are into cakes. Traditionally you need to bake a different cake for each woman who has their name-day this week. As I’m one of the six ladies I will celebrate as follows…

Cherry & Almond Clafoutis with Cognac for Sara on the 19 July

Red Currant Tart for Margareta on the 20 July

Lime & Ginger Tart for Johanna on the 21 July (see below)

Rhubarb & Meringue Cake for Magdalena on 22 July

Lemon & Strawberry Cake with White Chocolate for Emma on 23 July

Chocolate Caramel Tart for Kristina on 24 July

Johanna’s Ginger & Lime Tart

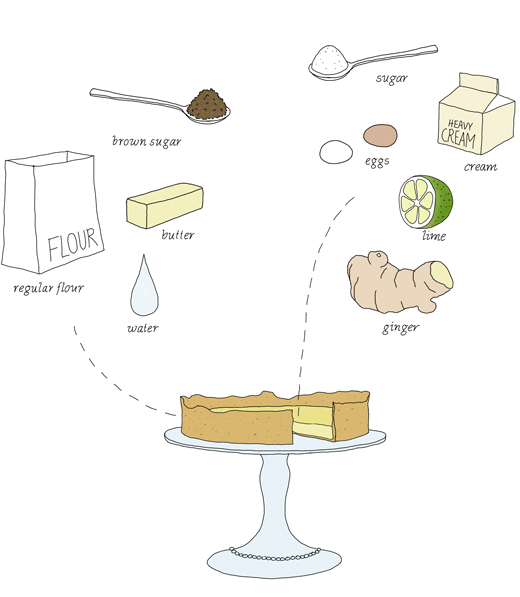
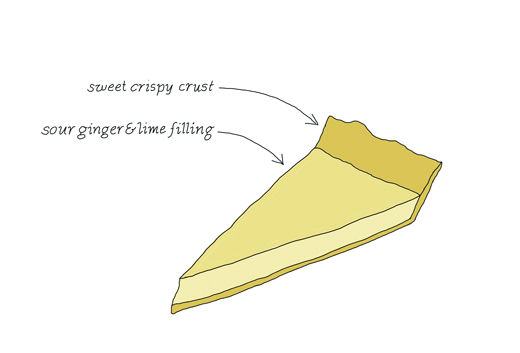
This Ginger & Lime cake has a nice combination of a sweet cookie like pie shell with a sour ginger-rich filling. It can be served as is or with freshly whipped cream.

Dough
1 ¼ cup (170 g) flour
100 g (3.5 oz) butter
4 tablespoon sucanat
a splash of cold water

Filling
3 eggs
2/3 cup (150 ml ) sugar (works with either white or brown)
7/8 cup (200 ml ) cream
Grated peel from one lime
Juice from 2 limes
1 inch (2 ½ cm) piece of ginger

Decoration (optional)
Powdered sugar

Mix together butter, flour and sugar with your bare hands. When the butter is well divided, add a splash of water and work the dough well. After the dough has rested for half an hour in the fridge, line the dough in a 9 ½ inch (24 cm) springform or similar. Bake the tart shell at 400ºF (200ºC) for about 15 minutes. The shell should start to get some nice color.

Let the pie shell cool while you whip together egg and sugar until fluffy. Add the cream and blend well together before adding lime and ginger. Adjust the flavor with more or less ginger and lime to your liking. Pour the filling into the pie shell and bake in the oven at 400ºF (200ºC) for about 20 minutes. The filling should have set. Let the cake cool down before dusting some powdered sugar over. Enjoy!

This article was originally published at EcoSalon on 19 July 2012

Lentil Dip


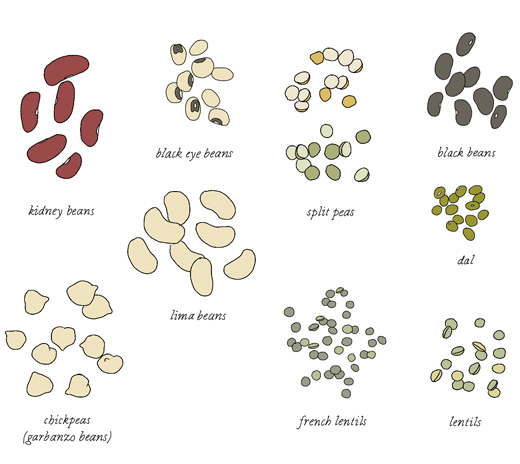
It may be silly to suggest cooking dried legumes when you can get them ready to eat in a can. But I still insist that there are so many benefits to cooking them yourself that it’s worth every step. And it’s pretty easy to do. You can also cook large quantities at a time and store smaller portions in your freezer.

Legumes like lentils or beans work all year round in different ways. Cold in salads and warm as a side to eggs, beets or with any green vegetable. Chickpeas are wonderful as a starter together with toasted almonds. Green lentils with beets, feta and parsley create a simple and delicious salad alone or together with baked vegetables or meat. Hummus or any other dip (see below) are perfect treats and easy to whip up with any fresh produce that the summer can provide.

I always cook my legumes together with some herbs, vegetables and salt (see simple version below). Sometimes I add bones or small pieces of meat when cooking the legumes. It gives a specific flavor but it’s far from necessary. Cooking time depends on what type of legumes you have, for example cooking lentils is far quicker than chickpeas. It also depends what you are planning to do. If you are making hummus you may want to cook the chickpeas until they are almost mushy but for a salad they should just be soft.

Some legumes such as most beans and chickpeas you will need to soak for at least 8-10 hours (but longer is better). Change the water a couple of time to keep them fresh (it can smell really bad). Lentils, split peas and mung beans do not need soaking.

The lentil dip below can be served together with fresh vegetables such as raw carrots, cucumber and celery. Slightly cooked cauliflower and broccoli also work well. You can also use the dip as a spread on freshly baked bread and crackers. Enjoy!

lentil dip
(Plenty of dip)

one cup dried french lentils (almost 2 cups cooked)
1-2 bay leaves
A sprig of sage
½ onion (and/or other vegetable scraps such as carrot, celery or fresh fennel)
about one tablespoon of salt

for the dip
about 2 cups cooked lentils (as above)
one shallot
chili (more or less depending on how spicy you want it)
2-3 garlic cloves
2 teaspoon coriander*
2 teaspoons cumin*
one teaspoon fennel*
reserved lentil liquid
juice from a ½ lime

seasoning
smoked paprika powder (e.g. bittersweet Pimentón de la Vera)
sea salt
some olive oil
cilantro

First step is to cook the lentils. Rinse the lentils and cook them gently together with about two cups water, bay leaves, sage, salt and onion (etc) until soft (about 15-20 min). You may need to add a little more water. It’s important that you don’t cook the lentils dry and there should be about a cup of tasty liquid left when the lentils are done. When done reserve the liquid as it will be used later. Let the lentils cool and remove all bits and pieces of the sage, bay leaves, onions etc.

Chop the shallot into tiny pieces. Saute on very low heat until it starts to caramelize. Raise the temperature a little and add chili together with the spices. Stir everything together and add the lentils to the pan. Poor some of the water over and let cook for just a little bit. (You could stop the cooking here and just enjoy the lentils as a side to eggs, meat or vegetables).

Let the lentils cool a little before blending together with garlic in a food processor. Add lime juice plus some of the reserved lentil liquid to create a smooth texture. Season with flakes of sea salt and smoked paprika powder. Lastly add as much cilantro as you wish. Just before serving add some olive oil and a splash on top.

* I prefer to toast whole coriander, fennel and cumin in a skillet at high heat. When they start to “pop” remove them immediately from the pan into a mortar and pestle. Grind until fine. The flavor will be richer.

 This article was originally published at EcoSalon on 10 July 2012.