Cured Trout for Easter

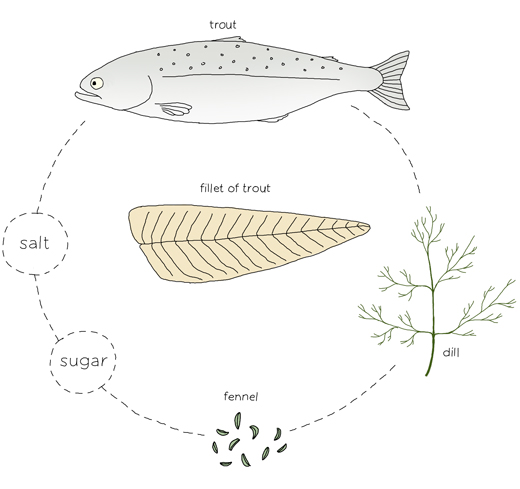
It’s Easter again and I’m planning to treat myself and guests to some cured trout. To cure trout I use the same method and ratio as when I make traditional Scandinavian gravlax. The recipe below is plain and simple. Not much more is needed for this delicate treat, but if you want to try something different you can add other flavors. Ederflower, ginger, crushed juniper or a shot of aquavit work really well. The list is endless.

Besides salmon and trout you can use this same method to cure other types of fish. Mackerel is an excellent option, and Keiko over at food blog Nordljus cured a good looking seabass with a scent of licorice. As I love licorice, I decided to add some toasted fennel seeds to my cure this Easter, which I think will go really well with the mild trout flavor.

for the curing you will need

1 kilo (2 lb) trout fillet
1 teaspoon freshly milled white pepper
4 tablespoons salt
4 tablespoons sugar
bunch of dill

toasted whole fennel seeds (optional)

for decoration
fresh dill
lemon

Note: The trout should be frozen one or two days before you start the curing. The freezing will eliminate unnecessary bacteria.

It’s not hard to fillet your trout yourself. The benefit is that you can use the remaining parts (except for the guts) to make an excellent stock together with bay leaves, carrot, celery, onions, dills stalks, some herbs like thyme, salt and pepper.

If you still think this is too messy, ask your fishmonger to fillet the fish for you but remind them that the skin should be kept on.

When you have your fillets ready. Rinse them in some cold water and pull out, if there are any, remaining bones with a pair of pliers.

Mix together salt, sugar and pepper. Rub the fillet with some of the mixture and sprinkle the rest on top of the fillets. Wash the dill and chop finely. Put the fillets together, meat against meat with the chopped dill and (if you like) some toasted fennel seeds (slightly crushed) in between. Wrap the fish in a plastic foil. Let the fish cure in the fridge with something heavy on top for 48 hours. Turn them now and again.

After two days, unwrap and clean the fillets. Start to slice the trout at the end of the fish into thin diagonal slivers using a fillet knife (or any other suitable knife). Garnish with some dill branches and slices of lemon. They can be served on toast or dark bread. However this fish is sensational on a thin “knäckebröd” topped with a drip of Hovmästarsås. Enjoy!

Hovmästarsås
Stir together 3 tablespoons mustard, 1 egg yolk, 1 tablespoon apple cider vinegar, 1 tablespoon brown sugar with plenty of chopped dill. Slowly start dripping in a little less than a 1/2 cup of olive oil into the mixture while stirring continuously (just like you make mayonnaise). If you add the oil too quickly the mixture can separate. The result should be a thick sauce. Season with salt and fresh ground pepper.

Before buying any fish check with Seafood Watch (US) for the most sustainable options.


This article was originally published at Ecosalon, 5 April 2012

Minty Zucchini Salad

Every summer I enjoy fresh mint from my own little garden. I grow three quite common types: pepper, lemon and water mint. All three work really well for cooking and I use them regularly in teas or as a flavor in different kinds of drinks. A few crumpled leaves together with elderflower cordial are a perfect match (with or without gin). Crushed with ice and Lime Mint makes for fantastic mojitos or a refreshing ingredient in a Pimm’s Cup.

It’s easy to grow mint but if you’re not careful, mint plants can rapidly take over your garden plot. Their roots are aggressive and hard to exterminate, so best to plant them in pots or at an unused part of the garden where they can grow freely without interfering with other growing treasures.

There are many different types of mint, some more common and others more rare. A more rare example are mint plants that have the scent of different kinds of fruits such as pineapple and strawberries. There is even a mint that has a clear flavor of chocolate. Not sure what I would do with this kind of mints but it’s funny as pineapple, strawberries and chocolate are all great companions to mint. For example in this strawberry salad, you can switch basil for regular mint.

Earlier this year in Marrakesh, I got inspired by the simple way they use mint in different kinds of salads. The salads were often just tomato, peppers and red onion cut into tiny pieces and blended together with finely chopped mint leaves, a squeeze of lemon and olive oil. Simple and delicious.

Anna Brones‘s mother makes a fresh mint pesto and it sounds perfect drizzled over a potato salad or even a grilled lamb chop. When the summer is here you may prefer something cool to eat instead of hot meals from the stove. A fresh red pepper and tomato salsa is an excellent choice. And a watermelon and feta salad makes a perfect starter or as a side for grilled meat and vegetables.

One of my latest treats is this simple and warm Zucchini & Feta Salad that is great to serve together with vegetable patties.

Warm Zucchini & Feta Salad

(for 2-4 people)

one – two zucchini
olive oil
some salt
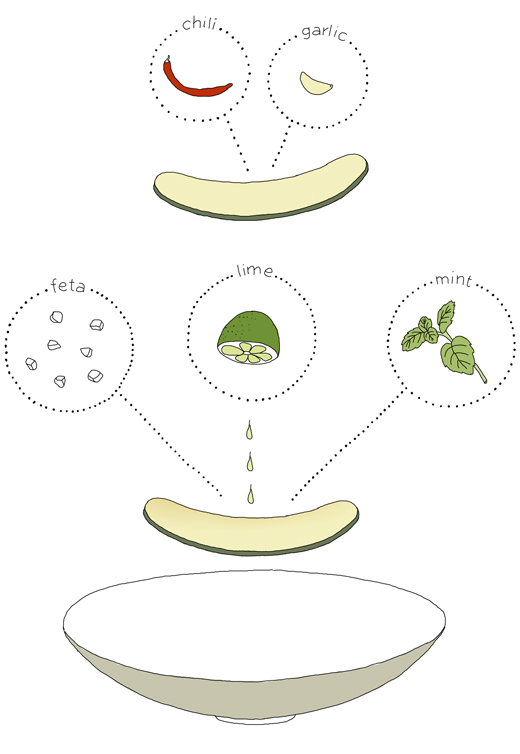
some chili (fresh or flakes)
one or two clove of garlic
lime
¼ lb (100 g) feta
about 10 leaves of fresh mint

Wash the zucchini and cut thin slices along the long side (you may want to cut the zucchini in half crosswise first). Sprinkle some salt and olive oil over. Heat up a pan with some chili and fry the zucchini slices at a semi high heat (you may also put them on the grill or roast them if you like). Just take a few at a time as they shouldn’t touch each other while cooking. When the slices start to brown, turn them over. Just before they are done squeeze some garlic over. When the garlic has melted and the zucchini has a nice color, transfer them over to a serving dish. Repeat until all zucchini slices are done. Squeeze some lime and drip it all over the salad. Cut or crumble the feta and sprinkle it over the salad together with finely chopped mint. Season with salt and pepper if needed. Serve immediately.

 This recipe was originally published at EcoSalon on 22 March 2012

Pump up the Carrots! (by Sofi Meijling)

One of the first times I met Sofi Meijling she treated me to a fantastic eel salad. It was Christmas eve and the salad was blended together with apples and dill. Since then we have become really good friends and she is somebody who I really enjoy having around in the kitchen. Sofi is that kind of person who could turn a catastrophic moment in the kitchen into a culinary adventure. She always has a great idea of how to turn a bland stew into something sensational.

Sofi, who used to be a graphic designer, works as a dramaturge (litterary adviser for theater plays) in both Malmö and Copenhagen. She is an excellent translator and is fluent in both Danish and English. She can also get around with some Russian. Impressive!

For some time Sofi lived without a normal kitchen and instead of getting a microwave she cooked her meals with an electric kettle and a soup thermos. She developed methods to steam different kinds of vegetables, boiled soft eggs and, according to Sofi, made the best couscous ever. She mastered the kettle and thermos so well that she once cooked an entire dinner for 4 adults and two kids.

I hope Sofi one day will start her own blog as I really enjoy her cooking and stories. Until then I’m happy to host her here.

Pump up the carrots!
by Sofi Meijling

This time of year I am getting a bit bored with the old swedes, parsnips and carrots. Roasting them in the oven, blending them in a hot lentil soup, mashing them into a golden puree is all nice and comforting, but now’s the time to wake them from the dead of winter and let the sunshine in! This delicious way of enjoying them raw suits any blend of roots, or carrots on their own. They will keep for several days, so you can make a large batch at a time. (Just make sure to use clean tools when you fish out the portion needed.)

Orange Cured Carrots
Fill a glass storage container with thinly sliced carrots. I recommend the use of a mandolin, if you are not particularly fond of slicing.
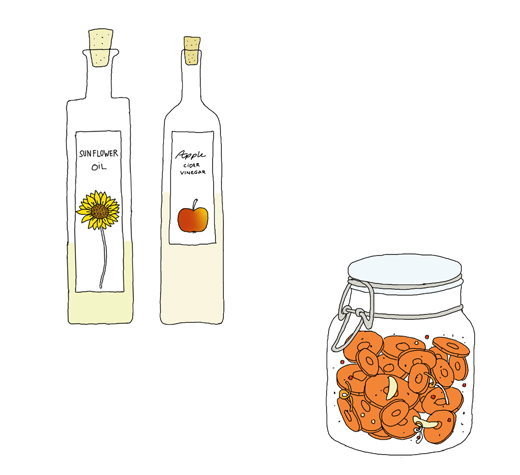
Use one orange per pound of roots to make the marinade. Choose organic oranges, since you want to use the zest, but tart or sweet variety doesn’t matter, the acidity will have to be balanced to taste anyway. Grate the zest off first, then press the juice from the halved fruits. Add double the amount of sunflower oil, a pinch of salt, a pinch of sucanat, a pinch of Korean chili flakes, a little ground black pepper, and a clove of garlic, cut in half but not crushed. Now add your apple cider vinegar, generously if your brand is full-bodied, a little less if the oranges were tart to begin with; the mix should be fresh and pleasantly sour.
Pour the marinade over the carrots and leave in the fridge overnight. Try it as a side dish with pork, with roman lettuce and rocket in a green salad, gently heated with lots of blue poppy seeds for your vegetarian buffet – or as I did last week: add their glory to a fish soup.

Waiting for spring Fish Soup
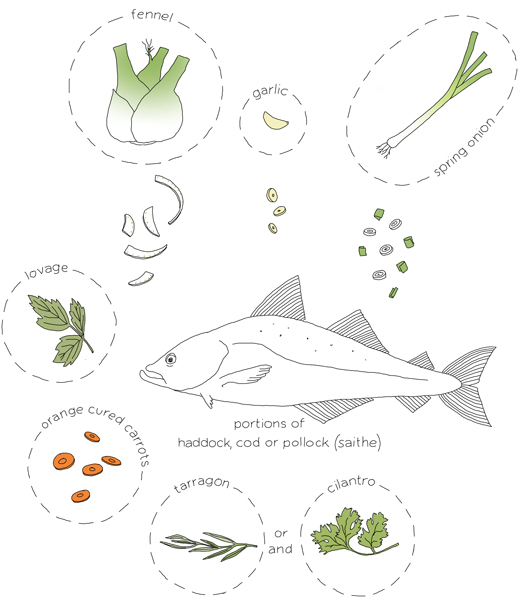
Sweat thinly sliced fennel, coarsely cut spring onion (or the green part of a leek) and a little thinly sliced garlic with olive oil. Season generously with salt, black pepper and some lovage. Set portion-cuts of haddock, pollock (saithe) or cod on top of the vegetables and add boiling water until just covered. Simmer gently for a few minutes. Add the oranged carrots when the fish is almost done, let them get warmed through but not softened. Sprinkle each serving with freshly chopped tarragon and/or cilantro.

(kokblog recommend to always check what fish to buy…
Seafood Watch (US) and WWFs fisk guide (Sweden)

*

related links

Quick Pickled Cucumber

Spätzle – German Egg Noodles

Årsta fältet, a flat field in a suburb of Stockholm, may not be the most exotic place to visit in the capital city of Sweden. But somewhere in that field I had one of my most peculiar food memories ever. It was there I ate spätzle (or maybe it was Hungarian nokedli) for the first time in my life. The spätzle was served with a rich goulash that we made in a hanging cast-iron pot over an open fire. This is that kind of moment that is hard to recreate.

The goulash was amazing but it was the spätzle that won my heart. Since then I’ve been treated to spätzle again and again and I love it as much every single time. However not many cooks have been able to share their recipe as they cook it by instinct without any instructions. Fair enough, I just had to start figuring out my own way.

I started by playing around with different recipes I found online. The result was often not that great which probably had more to do with the choice of flour than the recipe. I discovered that, for example, pastry flour (why use that in the first place?) made the batter taste really floury in an unpleasant way. I also tried adding fresh grated potatoes but then it became halušky (potato noodles). At some point I gave up and started to use just regular wheat flour. The result made me very happy and pleased!

Recently I followed Steen Hanssen’s recommendation to use dinkelmehl (spelt flour). The spätzle became darker and had a slight nutty taste. I liked it.

for the batter
(2-3 people)

3 eggs (depending on size)
¼ cup of lukewarm water
about 1¼  cups of spelt flour or regular flour
pinch of salt
some freshly grated nutmeg
a couple of tablespoons of butter

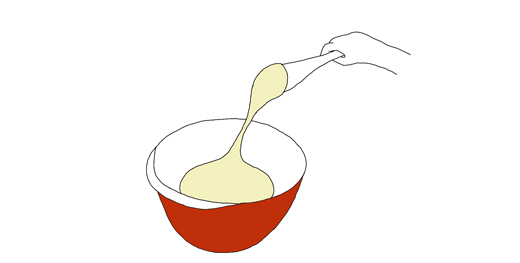
Heat up some water until its just lukewarm. Mix together eggs, water, nutmeg and a pinch of salt. Gradually start adding flour, little by little. Make sure to avoid creating lumps. The dough has got enough flour when its a little stretchy and easily falls off you spatula without breaking. If you get the dough too stiff, just add some more water. Let the dough rest for about half an hour.

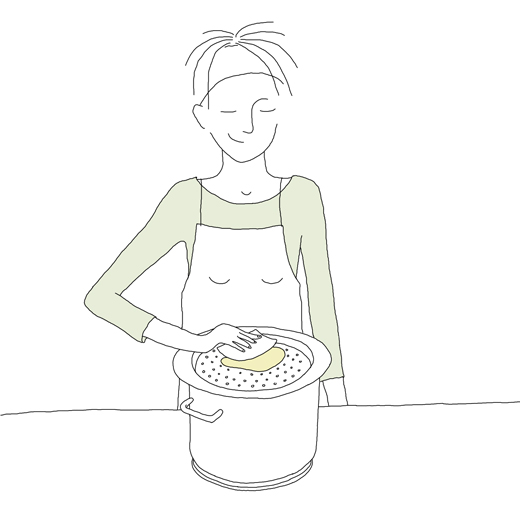
There are many different ways to “form” the spätzle and its probably very individual which method you may prefer. I have tried some techniques with more or less success. I think using a spätzle lid is the easiest and my kitchen doesn’t ends up in a mess (see image above).

Heat up some salted water in a large pot that will fit the spätzle lid nicely (see below for other methods). Bring the water to a boil. Lower the heat. Place the lid on top of the pot and add ¼ of the dough on top. Start to press the dough down with a spatula (often comes w/ the lid). Stir around the spätzle a little so they don’t stick together. The spätzle are done after about 2-3 minutes when they float up to the surface. Use a skimming ladle to fish them up. Repeat above steps until the dough is finished. Adjust the heat if necessary. Add some melted butter to the spätzle so they don’t stick together.

Serve the  spätzle with a rich goulash, creamy mushrooms or baked in the oven topped with cheese.

Other methods (and there are more)
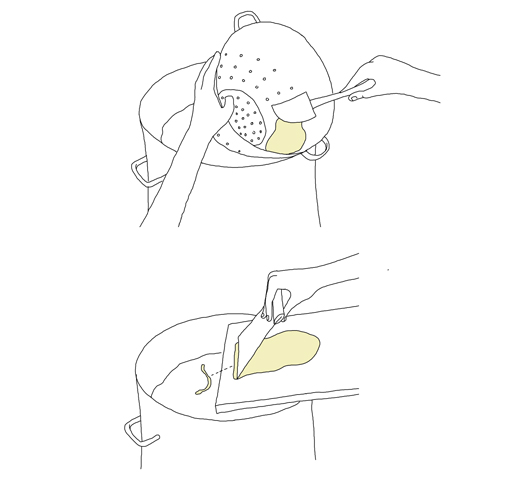
Another technique is to use a pasta strainer, preferably those with larger wholes. My stainless steel strainer worked fine, even if it was a little clumsy, the spätzle came out pretty nice, tiny and delicate! Just let the strainer rest at an angle on the edge of the pot (see image above) and use a soft spatula to press down the batter through the holes into the hot water.

If you want larger spätzle you can use a smaller chopping board and a chef knife or a bench scraper. Place one batch of dough on the chopping board and let it rest at an angle at the edge of the pot. Start to cut small pieces of the dough right into the boiling water. It worked okay and probably would be better with practice.

Recipe and drawings was originally published at EcoSalon, on 11 March 2012

Sopa de Ajo – Traditional Spanish Bread Soup (by Ibán Yarza)

Ibán Yarza is a self-taught baker (and bike mechanic) based in Barcelona where he organizes baking classes and promotes good bread for everyone. I first got to know of him through his site ¿Te quedas a cenar? (“Are you staying for dinner?”) and for the last few years we have been talking through twitter, mostly about baking, cookbooks and Sweden. Iban runs two other websites that are only dedicated to bread, La Memoria del Pan where he shares stories and interviews and El Foro del Pan which is the leading bread forum in Spain (they have one section in English).

Ibán has been to Sweden several times and he probably knows much more about traditional Swedish baked goods than many Swedes. Last year he worked as a volunteer at Ramsjö Gård, an organic farm in Björklinge (north of Stockholm) where he followed their daily work for 2 months. Lately Ibán has been seen on Spanish Television where he bakes together with David Jorge and Robin Food. In one episode he bakes my absolute favorite, a classic Swedish Cardamom bun.

Ibán has an education in journalism and translation. In 2010 he translated Dan Lepard‘s book “The Handmade Loaf ” from English to Spanish.

I’m so happy I finally asked Ibán to be my guest here on Kokblog. Welcome!

Sopa de Ajo – Traditional Spanish Bread Soup
by Ibán Yarza

There is a certain austerity to many traditional Spanish dishes that I find utterly appealing. It probably has to do with the fact that I grew up with my grandparents, my grandmother being a classic example of a Spanish cook: hardly any spice in the cupboard, simple and honest ingredients bought daily at the local market and cooked in the simplest of ways (stewed, boiled, braised, fried) always respecting the flavor of the ingredients in the pan. Simple as they can be, some recipes that date back to the Middle Ages can bring unique emotions to our table, well in the 21st century. Sopa de ajo (literally “garlic soup”) is one of those dishes, an example of the great cuisine of bread, the kingdom of leftovers and the audacity to make the best out of what’s in the larder. A simple and filling meal made out of stale bread, what many Spaniards would definitely refer to as their favorite wintertime comfort food (another soup, gazpacho, most likely being its summertime counterpart).

If one had a look at the menu of top-notch Spanish restaurants over the last years, a clear Asian influence would be easily noticeable, in the form of a zen-esque approach to elaborations and presentations. However, if you dive deep enough into traditional Spanish cookbooks, simple, minimal recipes appear with an almost-spiritual scarcity of means and ingredients that could seduce any Zen master. A famous Spanish writer and gourmet, Xavier Domingo, once described traditional Spanish cookery as “a minimal cuisine”, with only three basic foundations: olive oil, garlic and bread. Sopa de ajo remains a peerless example of this.

Then there is something about the word “sopa” (soup) and bread, the essential food. They go hand in hand in the mind and speech of Spaniards. Even to this day, the first meaning of this word in Spanish does not refer to the liquid food, but to a piece of bread soaked in liquid. In fact, “hacer sopas” (literally “to make soups”; this is, to soak bread in stock, coffee or whatever is at hand) seems to remain a favorite way of eating in my homeland, both pleasant and nutritious. You can find soups made with bread throughout Spain, from North to South, from Majorca to Andalucía, cold and hot, thick and light, meaty or full of vegetables. The recipe below is perhaps the best known version, where only four ingredients (bread, garlic, olive oil and paprika) are able to convey childhood memories and a bit of daydreaming on a dull winter evening. As any traditional meal, recipes vary from one family to another.

Seasonal hint: because of the lack of meat, this soup has traditionally been a Lent dish; in fact, the whole concoction is plain and clear frugality. Rejoice.
Sopa de Ajo
(serves 4)

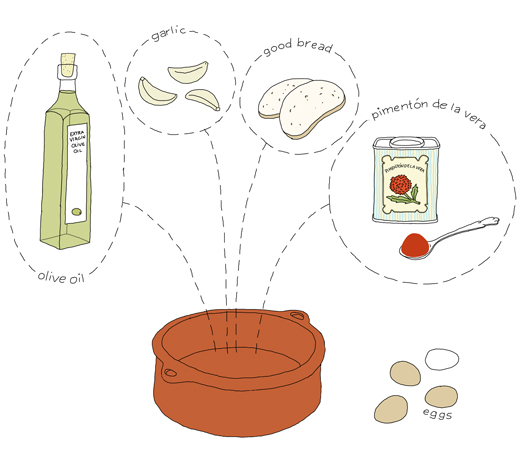
150 – 200 g of good bread, stale. Life is too short to eat bad bread, even if it’s stale. I like to keep the crust for flavor, color and texture. Traditionally we would use a white dense wheat loaf, but feel free to use wholemeal, sourdough… I’ve even cooked delicious sopas de ajo using rye bread (to my fellow countrymen’s disdain)

3-5 cloves of garlic, sliced

3 tsp paprika. The best you can find, my favorite is smoked bittersweet Pimentón de la Vera, available nowadays in gourmet shops worldwide

1 – 1,5 dl extra virgin olive oil. Again, try to find good oil: dense, deep and fragrant. We are using few ingredients, so try to find the best

1,5 liter water (or stock, if you happen to have it at hand; but water is more than OK).

4 eggs (optional)

Traditionally, in Spain you would use a clay pot for this recipe, but any deep pot would do. Slice the cloves of garlic and fry them in olive oil until they’re golden (I tend to think that the amount of olive oil we use in Spain would seem rather large abroad; just don’t be shy, pour it in). Take the pieces of garlic out of the pan and keep them aside so they don’t burn and turn bitter. Now place the bread in the pan and fry in the remaining oil (it will soak up part of the oil). Take the pot off the stove, add the paprika and stir with the bread and oil making sure it doesn’t burn, otherwise it would lose its wonderful fragrance and turn bitter and tart. Once this is done, add the water (or stock) and garlic, and let it simmer for some 10-15 minutes. At the very beginning, it will probably not look the most appetizing of meals, but just be confident, time will bind the soup and the result will be simply delicious.
Some people like to have their sopa de ajo really thick and dry (some even finish it in the oven), I prefer to keep mine just on the creamy side of the term soup, with thick blobs of creamy bread that melts in your mouth. Once the soup has thickened, and while I set the table, I like to take the pot off the stove and use the remaining heat to poach one egg per person. Once at the table, the yolk will break in each guest’s bowl, taking the sopa the ajo experience to its very limit, so to speak. Sometimes I also like to sprinkle a bit of ground cumin. Feel free to add anything you like.