About two years ago I started my two sourdough starters, wheat and rye. Both of them are still active and have been with me back and forward to Sweden, London and Brooklyn. This summer I will bring them to Sicily and Amsterdam.
The breads I bake are often simple, with or without extra flavor (for e.g. Caraway, fennel or anise seeds, rosemary etc). The flours I mostly use are regular unbleached flour, whole wheat, dinkel or rye flour (mixed with regular flour or 100%). I have also baked with the addition of sunflower seeds, linseeds, prunes and with beer or my home made kefir instead of water. I also bake sourdough knäckebröd.
(I will share more of this eventually). The variations are endless, but I am always amazed how good just flour, water and a little salt can taste.

Plain Sourdough Bread
adapted from Peter Reinhart’s recipe of San Francisco Sourdough Bread, “artisan bread every day”, Ten Speed Press, 2009.
gives 1 large, 2 medium or 3 smaller loaves
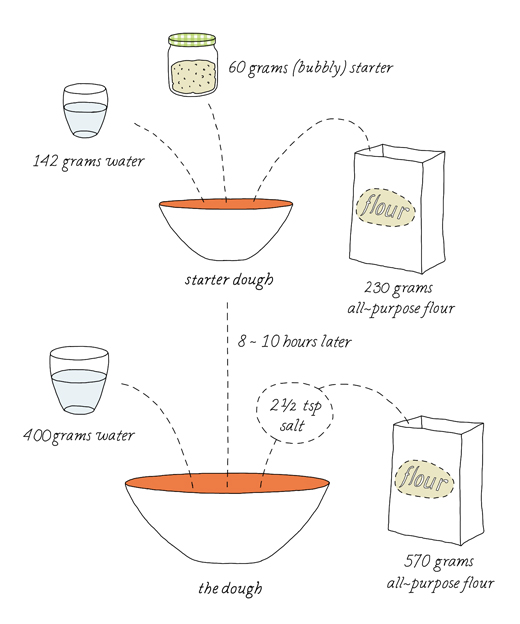
starter dough
60 grams (about ¼ cup, 60 ml) lively starter (rye or wheat), at room temperature
142 grams (2/3 cup, a little less then 150 ml) water, at room temperature
230 grams (1 2/3 cups, 400 ml) all-purpose flour (unbleached)
the dough (8-10 hours later)
all of the first starter dough
400 grams (1 ¾ cup, 400 ml) water, at room temperature
570 grams (4 cups, 945 ml) all-purpose flour (unbleached)
2½ teaspoon salt
starter dough (I suggest in the morning)
Mix together starter with water and flour until well blended and you can form a ball (this starter dough should feel like a dough and be sticky). Transfer to a slightly floured flat surface and knead for about a minute. Place the dough in a bowl and cover with plastic wrap. Let rise for 8-10 hours (or overnight).
the dough (for e.g in the evening)
Divide the dough into 10 equal pieces. Place them in a bowl and pour over the water. With your fingers or a spoon loosen the pieces up in the water.
Add the flour and salt and mix together until well blended.
Let the dough rest uncovered for about 5 minutes.
The dough should feel slightly sticky and be flexible (add more flour or water if necessary). Transfer the dough to a slightly floured flat surface and knead for about 1-2 minutes.
Let the dough rest uncovered for 10 minutes.
Stretch and fold the dough. Form the dough to a ball and place in a bowl (slightly oiled), cover with some plastic wrap. Repeat the stretch and fold 1 – 2 times with 10 – 30 min rest in between.
Let the dough rise at room temperature for 1½ hour to 2 hours and place it in the fridge overnight.
The dough should have grown a little larger and it will increase in size some more in the fridge. (if you want to skip a slow rise in the fridge just let the dough rise outside for 3 – 5 hours before shaping).
Take the dough out of the fridge at least 4 hours before you plan to bake the bread in the oven.

After about 2 hours, shape the bread into 1, 2 och 3 loaves.
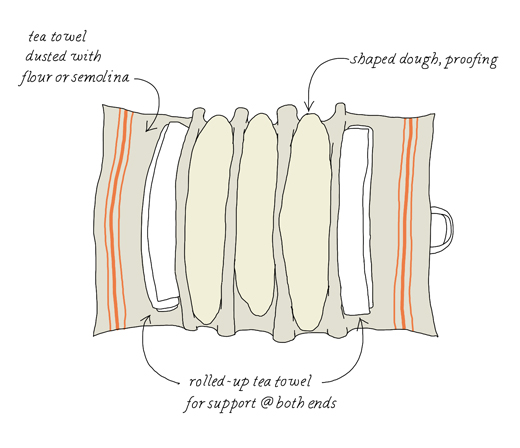
Flour all around and place on a floured (all purpose or semolina flour) tea towel (or use a bakers couche), see illustration above. Cover with a tea towel and let proof for about two hours.
About ½ hour before baking, preheat the oven to 250ºC (480ºF). Place a baking sheet in the oven plus a smaller baking tin (for water to create steam while baking) on a rack underneath. If using a baking stone (which I don’t) you will need to preheat the oven earlier.
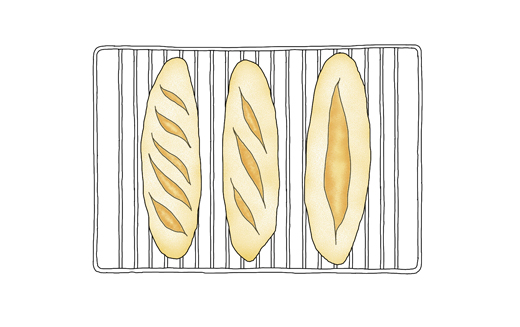
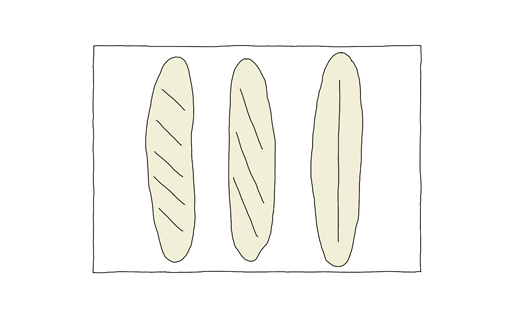
When it’s time, take out the warm baking sheet from the oven. Carefully transfer the shaped dough and drop each one onto the hot surface. Score the dough in a pattern you like with a sharp knife or a bread slashing tool (I use my sharp serrated bread knife).

Place the baking sheet in the oven. Pour some water, hot or cold into the baking tin below. Close the door.
After 15 minutes, open the oven door to let out some steam. The bread should have risen up nicely and started to get some nice golden color. Depending on size, bake for another 15 to 30 minutes.
Repeat opening the oven door every 5 to 10 minutes (I have been told that this should give the bread a nice crust). You can also turn the breads upside down to get a nice brown color all around.
The bread is done when it sounds hollow when knocking on the bottom. If you are not sure just bake it a little longer.
Let the breads cool on a cooling rack before slicing, at least 1 hour.
This bread is a quite simple bread that works by itself, dipped in olive oil or spread with butter. Its also great with cheese (goat cheese with honey and thyme is my favorite), thinly sliced dried sausage or toasted with jam for breakfast.
* You can of course shape this bread into rounds as well. Place them in bread baskets (banetons) or like me in small serving bowls lined with a floured tea towels.
some more links
Sourdough Bread with Rye
Sourdough knäckebröd by kokblog
How to make a sourdough starter – movie by Iban Yarza (this is how I learned it)
3-2-1 Contact! – notes by Andrew Janjigian on how he feed levain (starter).
Pain de Martin’s bread movies
More shaping by Mark @ the Back Home Bakery
scoring bread post by the Fresh Loaf
Dan Lephard’s sourdough starter with raisins and yogurt post by Azelia’s Kitchen

Great recipe! love your art work. I am very new with baking bread. I am a bread fun. So I decide to learn how to make bread. Thanks for your recipe it is very easy to follow. I am only to try it on the week. I have to get all my ingredients. Awesome!!1
Excellent! I’ve been working on my rye sourdough technique for a few months. I still have problems with the stickiness of the dough…
Hi Ron, when the dough is too sticky I have found that slightly oil my hands help while stretching or kneading the dough.
After the last stretch and fold the dough should have become smooth & elastic and easier to handle. And when ready to shape I just dust a little flour on the work table so the dough doesn’t tare when shaping. My latest book Smorgasbord explain this more in detail.
Thank you. I floured my hands, but rye just gets sticky (the inner part of the dough ball has quite a lot of moisture). I’ll try the oil on the hands, though I don’t want the dough to get too oily.