Sourdough Discard Knäckebröd

My friend Andrew Janjigian, who is behind the #quarantinystarter project on instagram, texted me to ask if I ever used sourdough discard when making my knäckebröd (Swedish rye crispbread). Andrew was already testing it in his home kitchen and it looked pretty good. Even if I never have any discard on hand (I cook and bake with it several times a week), I decided to give this a try.

And I’m so glad I did, because the extra amount of starter gives the crispbread a perfect and very pleasant sourness that works so well with the caraway seeds. I like them with creamy goat cheese, honey and fresh thyme. Or why not try them with pickled herring, gravlax, or hot-smoked fish and pickles.

The starter I used in this recipe was a thick batter like all-purpose starter. You will need to adjust the recipe if your starter is different. If your starter is very lively it will most likely be ready to roll within 4 hours. If you want a slower rise you can have it rise in the fridge overnight. If you don’t have any caraway on hand, I suggest using fennel seeds, sesame seeds or rosemary (fresh or dry).

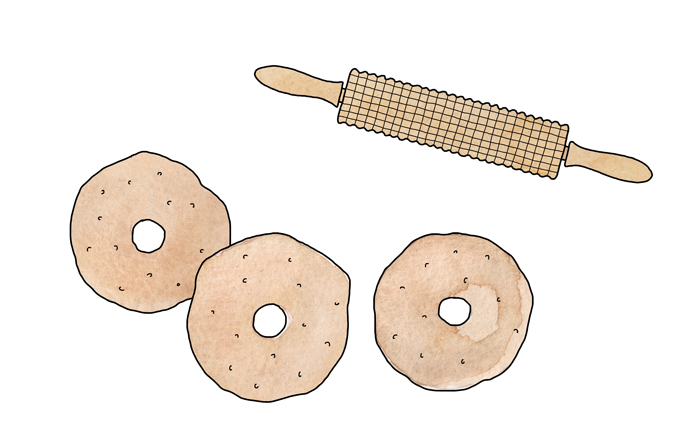
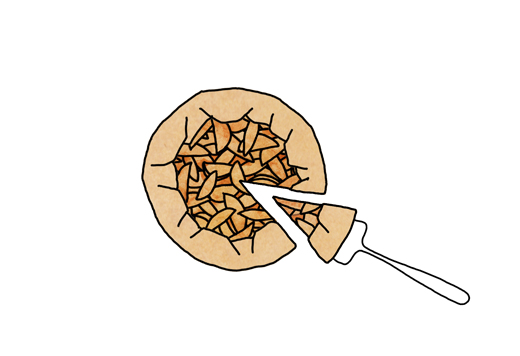
Knäckebröd is most likely one of the oldest breads in Sweden and today they are a staple in almost any Swede’s pantry. Traditionally, in order to store these crispbreads, they were baked with a hole on the middle so they could be threaded onto a horizontal wooden stick and hung from the ceiling to dry. My version here is a thinner version than a store bought knäckebröd.

This recipe and post was also featured on Andrew Janjigian’s Substack page here.

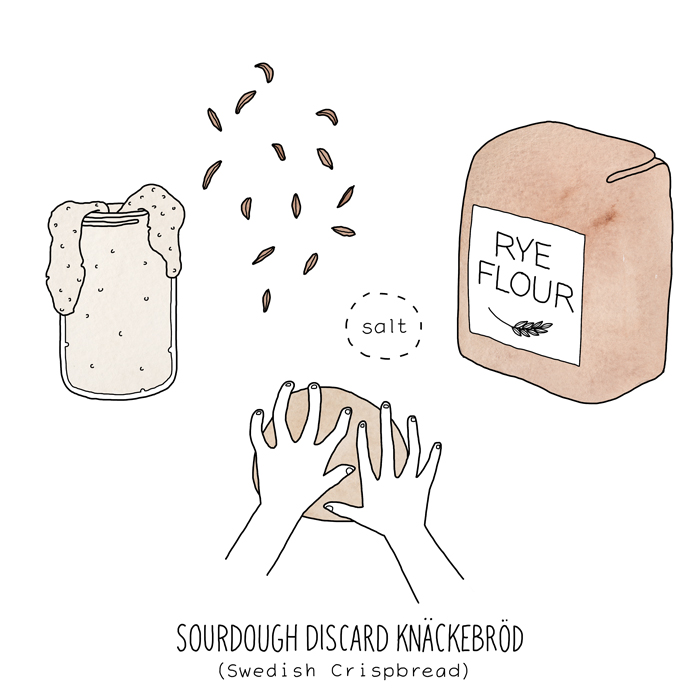
SOURDOUGH DISCARD KNÄCKEBRÖD
(adapted from Smörgåsbord – The Art of Swedish Breads and Savory Treats by Johanna Kindvall, Ten Speed Press)

(makes plenty of crispbreads)

DOUGH
150 g (1¼ c) rye flour (or whole wheat flour)
485 g (almost 2.5 c) sourdough discard
about 3 tablespoons all-purpose flour, if needed
(plus extra flour for rolling out)
1 tablespoon caraway, toasted and coarsely crushed
2 teaspoons salt

TOPPING
about 1 tablespoon flaky sea salt (optional)

MIXING THE DOUGH
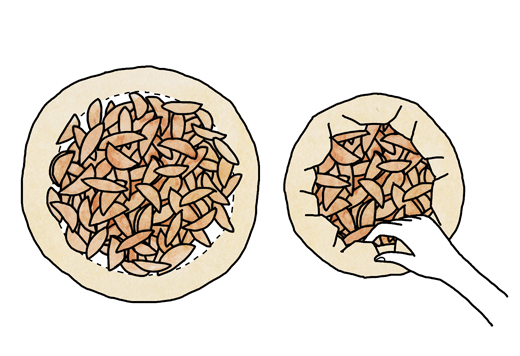
In a large bowl, mix together the rye flour, sourdough discard, caraway seeds, and salt. Work the dough together until well combined. If needed, add the all purpose flour. It’s OK if the dough feels slightly sticky but it shouldn’t be wet or too dry. Adjust with more flour or water if necessary. Transfer the dough to a lightly floured flat surface and knead for about 3 minutes. Shape the dough into a ball and let rest in a covered container. Let rise at room temperature in a draft-free place for at least 4 to 6 hours or in the refrigerator for up to 48 hours. The dough might not rise to double but it should show some growth and feel softer when you poke your finger into it.

When you are ready to bake, preheat the oven to 400°F (200°C). Grease one or two baking sheets lightly with oil.

SHAPING AND BAKING
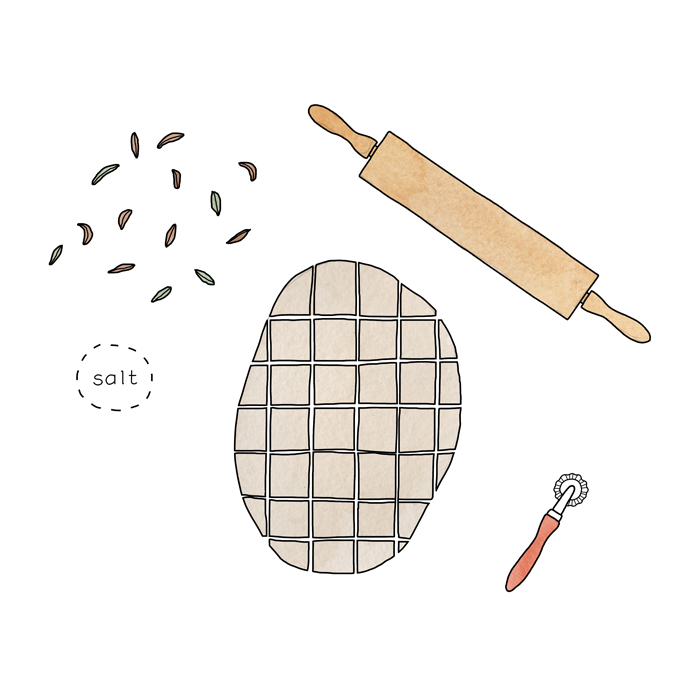
On a generous floured flat surface, roll out one piece of dough at the time until it’s as thin as the caraway seeds (see shape ideas below). If using, sprinkle some flaky sea salt on top and roll a few more times to get the salt to stick better. The crispbread will bake well as is, but if you don’t want the crispbread to puff up during baking, I suggest pricking the surface with a fork or roll it once or twice with a knobby rolling pin.

Arrange as many as you can fit on a baking sheet and bake for 4 to 8 minutes, until the crackers are golden brown and crisp. If they are still soft, bake them just a little longer, but keep an eye on them because they burn easily. Remove the baking sheet from the oven and let the crackers cool on a flat surface. To ensure that they stay crisp, do not stack the crackers until they are completely cool.

Store the crackers in an airtight container for up to 1 months.

SHAPE IDEAS
You can roll these crispbreads out with a rolling pin into small and large individual rounds or roll it out in large portions that can be cut into squares or bake whole to break up as you go. To make it simple, you can also use a pasta machine.

ABOUT ANDREW JANJIGIAN
Andrew is an associate editor at Cook’s Illustrated Magazine, a passionate baker and a mycologist. He regularly holds bread and pizza classes at King Arthur and on top of everything he is an excellent photographer. In the early days of the covid-19 pandemic, Andrew started his #quarantinystarter project on instagram to teach followers more about baking as well as cooking with sourdough. In the past, Andrew and I have collaborated on some projects for e.g., here on kokblog he is behind two popular recipes, Mushroom Confit and Chile Crisp. You can follow Andrew on instagram and twitter.

LINKS
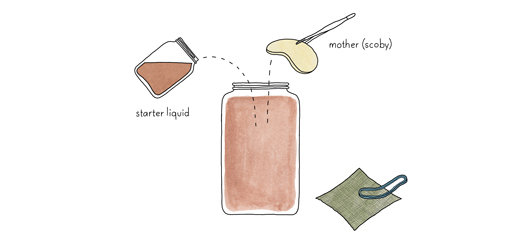
How to Build your own Sourdough Starter, illustrated diagram
Everyday Sourdough (1), Art Print
Everyday Sourdough (2), Art Print
Wild Yeast Starter, step by step illustrated recipe
Stack of knäckebröd, post on instagram
Wild Fennel Knäckebröd at Case Vecchie, Sicily
Skållat rågbröd (Scalded Rye Bread), illustrated recipe
Sourdough Bread with Rye, illustrated recipe
Plain Sourdough Bread, illustrated recipe

CELEBRATING FIKA 5 YEARS

Five years ago, Anna Brones and I released our book Fika: The Art of the Swedish Coffee Break. In honor of our 5th “book birthday,” we decided to put together a zine devoted to the basics of fika.

Maybe you have our book on your shelf, maybe you’re a fika aficionado, or maybe you’re entirely new to fika, the Swedish coffee break. Regardless of what your fika background is, we made this zine so that you can easily print it at home, color it in, and add your own drawings. There’s a recipe for chokladbollar, Swedish chocolate balls, too. We wouldn’t want you to go without a fika treat.

Why fika?

In this time when a lot of us are at home and socially distancing, fika seems like a good ritual to remind ourselves to take a little break from the onslaught of news, and find a little space to just be present.

Slow down.
Take a deep breath.
Re-calibrate.


Make a plan for a virtual fika
Fika is often a social affair, but you can fika and still practice social distancing. Why not use this as an excuse to call a friend and have a virtual fika?

Make “stay home and fika” your new mantra—click here to download and print the How to Fika zine. If you’ve never made a one-page zine before, it involves a little cutting and folding. Here’s a video that breaks down the process.

Trevlig Fika!
Anna (text) & Johanna (illustrations)


Please share your fika moment with us by tagging

#artoffika * #stayhomeandfika * #virtualfika
@johannakindvall & @annabrones (instagram)
@kokblog & @annabrones (twitter)

Selection of Fika treats on kokblog

* Cardamom Buns
* Cinnamon Buns
* Toscakaka (Swedish Caramel Almond Cake)
* Mazariner (A Swedish classic)
* Cardamom Biscuits
* Fyriskaka with Pear
* Struvor (Swedish Rosettes)
* Ginger Spice Cake
* Hazelnut & Cinnamon Cookies
* Lussebullar (Saffron Buns)
* Ginger Lime Tart
* Apple & Lemon Galette
* Joulutorttu (Finnish Christmas Tarts)
* Marängtårta (Meringue Torte)
* Semlor (Swedish Fat Tuesday buns)

March: San Francisco Book Events

Illustration of Kantine, SF 
by © Johanna Kindvall

Big news! I will be in San Francisco for some book events (and some hiking, eating, and drinking) between March 10 to March 16, 2019. I will be doing a book signing with special treats at Kantine, special Fika & Smörgåsbord classes at 18 Reasons, and an author’s talk at Omnivore Books on Food. If you are in the Bay area and would like to learn more about Nordic treats or just say hi, please sign up or come by to any of my scheduled book events and classes listed below. I’m super thrilled and would like to meet you all. A special thanks to my dear friend and awesome writer Larissa Zimberoff who invited me down to San Francisco in the first place! And thanks to all the lovely people at Ten Speed Press (my publisher) for your constant support.

Illustration of Omnivore Books, SF 
by © Johanna Kindvall

*

Sunday March 10
Special Fika & Smörgås event
at Kantine, San Francisco
btw 3pm to 5pm
The Kantine kitchen will create
Scandinavian dishes inspired by my books!
Come by for a bite and a chat.
I will be there with signed books.
Address: 1906 Market Street, SF

*

Monday March 11
Flavors of Sweden: Cinnamon Buns, Three Ways
hands-on baking & cooking class at
18 Reasons – 
San Francisco btw 6:00pm to 9:00pm
more info & tickets –> SOLD OUT

*

Tuesday March 12
Author’s Talk
at Omnivore Books, San Francisco
Talk & book signing
btw 6.30pm to 7.30pm
Its a FREE so come by and hear
me talk about Smörgåsbord,
Nordic breads & Fika.
If you are in the San Francisco area,
I hope to meet you there. Its FREE!
Address: 3885a Cesar Chavez Street
more info –> here

*

Wednesday March 13
Flavors of Sweden: Smörgås & Fika
hands-on baking & cooking class at
18 Reasons in San Francisco

btw 6:00pm to 9:30pm
more info & tickets –> HERE

Illustration 
by © Johanna Kindvall

*

If you don’t have any of my books yet, you can easily
get them in almost any online bookstore around the worlds!
Fika – The Art of Swedish Coffee Breaks
Smörgåsbord – The Art of Swedish Breads and Savory Treats

Glögg – Swedish Mulled Wine + Gift Guide

It’s winter and a perfect time to warm up with glögg (Swedish mulled wine), pepparkakor (ginger cookies), and comforting lussekatter (saffron buns). My rum glögg, which is spiced with ginger, cinnamon, cardamom, cloves, and orange, can be enjoyed within a few hours. And if you bottle up the rum essence nicely, it makes a perfect gift together with a suitable red wine. This recipe gives you enough spiced rum for one bottle of red wine. But if needed, you can easily make several batches at once.

If you need some other ideas for holiday gifts, scroll down to see some of my suggestions.

Happy Holiday everyone!

Glögg Recipe
adapted from Fika: The Art of Swedish Coffee Break by Anna Brones & Johanna Kindvall

rum glögg essence
makes one 6 oz (175 ml) bottle (enough for one bottle of wine)

5 dried figs, cut in quarters
30 raisins
1 tablespoon orange zest
2 tablespoons chopped fresh ginger
3 cinnamon sticks
2 teaspoons whole cloves
5 whole green cardamom pods
3/4 cup (175 ml) rum

for the warming glögg
1 bottle (750 ml) red wine (Cabernet Sauvignon or Syrah)
1/2 cup (3.75 oz, 105 g) brown sugar
few handfuls of raisins & blanched almonds

Soak dried fruit, orange zest, ginger, cinnamon, cloves, and cardamom in the rum for at least 6 hours or overnight.

Strain the essence through a sieve to remove the fruit and spices. Figs can be eaten as is or saved to serve with the glögg. Bottle the essence or heat it up in a saucepan together with the wine and sugar. Stir until sugar is completely dissolve. Make sure the glögg doesn’t boil.

Serve hot with blanched almonds and raisins (and figs). Unused essence can be stored for at least one month (but probably much longer).

*

gift guide ideas

1.  something by me

Fika: The Art of Swedish Coffee Break
by Anna Brones & Johanna Kindvall, Ten Speed Press 2015

Smörgåsbord: The Art of Swedish Breads and Savory Treats
by Johanna Kindvall, Ten Speed Press 2017

Art Prints and Printed Products
illustrated by Johanna Kindvall

Pattern Design on Fabric
by Johanna Kindvall

Tea Towels
by Johanna Kindvall

*

2. gift a book (new and old)

*

3. cooking related gift ideas

Cooking Class at Archestratus 
Greenpoint, Brooklyn

Cooking Class at COOK
Philadelphia

Beer Brewing Kits & Classes
at Bitter & Esters, Brooklyn

Live Sourdough Starter
by Breadtopia

Kombucha Starter Kit
by Kombucha Brooklyn

Wine Vinegar Making Kit
with a beautiful vase by Cult Vinegar (UK)

Live Vinegar
by Cult Vinegar (UK)
I especially love the Riesling, Moscatel, Sake, and Port Vinegar!

Swedish Cookies
by Unna Bakery
(with my pattern design on the package)
My favorites are the Ginger Snap and the Raspberry Cave Cookies.

Norwegian Knekkebrød
by Norwegian Baked (Brooklyn)
(I designed their label)

Animated Glögg recipe for my dear friend Alice Brax, 2017.
Music:  “Dance Of The Sugar Plum Fairies” by Tchaikovsky, played by Kevin Macleod

Flaky Pie Crust: Apple & Lemon Galette

A flaky pie crust is delicious and perfect for sweet as well as savory pies and tarts. I use it mostly when making a free form galette like here below, but you can also bake it in a pie pan as a tart decorated with lattice, or like a classic covered pie.

And it’s a piece of cake to make it yourself. You just need to follow a few simple rules. To achieve a flaky rising crust use cold ingredients and at the same time develop just enough gluten for the dough to hold together. As the gluten is formed (from the protein in flour) when you are working the dough it’s important not to overwork it, as it will just result in a tough crust (which is better suited for something else). Keeping the fat (butter or lard) as visible solid pieces will magically create rising flaky layers when baked.

If you are only making a small tart like my recipe here, you can easily do it by hand or with a simple dough scraper as shown in my illustration below. If doing it with your bare hands, just make sure to rub the butter and flour lightly and quickly to avoid melting the butter with your warm fingertips. I recommend using a food processor if you are planning to make several batches at the same time, just make sure to pulse gently so you don’t overheat or cut the butter too much.

As it’s apple season I suggest to make a galette and fill it with apple slices that are cooked in butter, brown sugar, and lemon juice. But you can fill with many other seasonal things all year around; pears, peaches, strawberries, or rhubarb. And by leaving out the sugar in the dough, it can be used for savory tarts too. My favorite is a combination of sauteed mushrooms, roasted butternut squash,  fresh tomatoes, and goat cheese.

I think this apple & lemon galette is a fantastic dessert for any Thanksgiving table. Serve it slightly warm with vanilla ice cream or heavy whipped cream. Happy Thanksgiving!

Please note that you will need to double the pie crust recipe if making a covered classic pie or a lattice decorated pie. Adjust measures and baking time accordingly.

Flaky Pie Crust for Apple & Lemon Galette
serves 6 to 8

flaky pie crust
1 ¼ cups (6.25 ounces, 180 grams) all-purpose flour
½ cup (4 oz, 113 g) cold unsalted butter, cut in chunks
1 tablespoon sugar (leave out if making a savory pie)
¼ teaspoon sea salt
1/3  cup ice cold water

filling
4 to 5 (about 1.5 oz, 700 g) crisp apples
4 tablespoons brown sugar
4 tablespoons (2 oz, 57 g) unsalted butter
juice of ½ lemon, about 3 tablespoons

a few handfuls of unsweetened coconut shreds

To prepare the pastry, place the flour, sugar, and salt directly on a flat surface. Add the butter on top. With a dough scraper (see diagram) chop the butter into roughly bean-size pieces. At the same time, toss the butter around to make sure it gets well coated with the dry ingredients. Add the ice water a little at a time and work the dough quickly until you can form a rough ball without any dry flour, beautifully marbled with visible “lumps” of butter. If needed add more ice water, one tablespoon at the time. Flatten the ball into a disc, wrap it with parchment paper and let rest in the refrigerator for at least 1 hour and up to a few days.

To prepare the filling: Peel and core the apples. Slice them thinly, approximately ¼ inch (about 6 mm) thick. In a saucepan melt the butter together with the sugar, stir occasionally. When the butter is melted add the apples followed by the lemon juice. Stir the apples to make sure they get evenly coated with the butter sauce. Cook on medium heat, until apples are slightly soft, stir occasionally. Strain the apples, but reserve the buttery liquid as it will be used as a glaze for the apples. Set aside to cool completely.

Preheat the oven to 400 F (200 C). Grease a baking sheet or line it with parchment paper or silicone mat.

To roll out the dough, place the dough on a flat surface and dust lightly will all-purpose flour. If the dough is very stiff, you can soften it first by patting the dough with the rolling pin. This will make the dough softer and easier to roll. Roll the dough from the center and out, while continually turning the dough quarterly, to roughly 12 to 13 inch (30 to 36 cm) diameter. If the dough sticks to the surface, dust the surface lightly with more flour. If your kitchen is very warm you will need to pop the dough into your freezer for about five minute. This will prevent the butter from melting.


Dust off any loose flour on the rolled-out dough and place it on the prepared baking sheet. Sprinkle over the coconut shreds, leaving about 2 inch (almost 6 cm) border all around the edge. Arrange the apples on top. Fold the edges over and pinch overlapping dough together (see diagram).

Bake on the middle rack until crust is golden brown and fruit is baked through, about 25 to 30 minutes. Last 10 minutes, brush fruit with the apple butter sauce.

Serve warm with heavy whipped cream or vanilla ice cream.

*

related links

Puff pastry
illustrated kokblog recipe

Summer Fruit Galette
by David Lebovitz

10 Galettes That Are Easier Than, Well, Pie
Bon Appétit

Ginger & Lime Tart
illustrated kokblog recipe

Caramelized Apple Tart
illustrated kokblog recipe

more Thanksgiving ideas…

Duck Liver Starter
a good use of the liver when cooking a whole bird
(kokblog recipe)

Tired of dry Turkey? Try my
Duck in Port (kokblog recipe)

An Alternative Menu for Thanksgiving
with Anna Brones