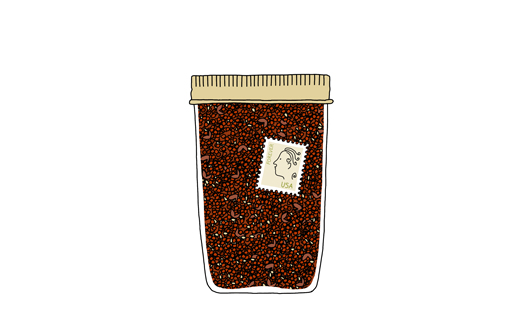
A few weeks ago I got an interesting package in the mail. I had no idea what it could be, but as it was from my friend Andrew Janjigian I suspected it was something tasty. It was a jar of his homemade chili crisp. It looked enticingly appealing with its ruby red texture. And when trying it on rice I found it incredibly delicious. My husband instantly switched out his store bought chili condiment and ended up having it on everything. Now neither of us can think of anything else. So when Andrew asked me to share it on kokblog I was over the top excited.
Andrew is an associate editor at Cook’s Illustrated Magazine, a passionate baker and a mycologist. He is regularly holding bread and pizza classes at King Arthur and on top of everything he is an excellent photographer. Andrew and I have collaborated on several things (mostly baked goods) and here on kokblog he is behind one of the most popular posts: Mushroom Confit
Chile Crisp
by Andrew Janjigian (illustrated by Johanna Kindvall)
Chile crisp is my version of Lao Gan Ma or ‘Godmother Sauce’, a spicy Chinese condiment that is a cross between a hot sauce and a crunchy salsa. But I like to think of it as chile crack, because everyone I share it with becomes just as addicted to it as I am. It tickles nearly all of my culinary erogenous zones: spice (both from chiles and the buzz of Sichuan peppercorns), sweet (from the fried shallots and garlic), umami (from fermented black beans), and heady aromatics from most of the above, along with toasted sesame oil and all the dried spices.
It’s essential on noodles, fried rice, or just steamed white rice. It makes eggs infinitely better. Combined with a little black vinegar and soy sauce, it makes a great dipping sauce for dumplings. Stir it into a little mayonnaise and it becomes a killer spread for sandwiches. Or (as I do on a daily basis) it can be simply eaten with a spoon right from the jar.
(The recipe is actually fourfer, since its byproducts are a large amount of aromatic chile oil, along with extra fried garlic and shallots. And credit where credit is due: The starting point for my recipe is the version I found in the Mission Chinese Food Cookbook.)
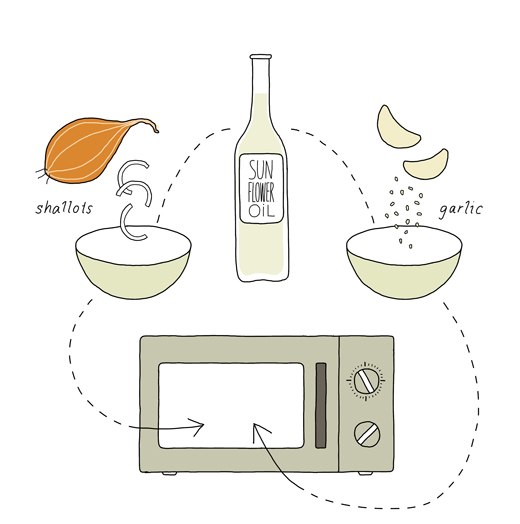
Microwave-fried garlic
makes 3/4 cup (180 ml) garlic and 1 cup (240 ml) garlic oil
Remove the garlic from the oil a few shades lighter than you want it, as it will continue to darken as it cools. Dusting with confectioner’s sugar helps prevent clumping and tempers the garlic’s bitter edge. Fried garlic will keep for several months if stored in a sealed container. (If you don’t have a microwave, the garlic can be fried on a stovetop in a nonstick skillet over medium high heat, 10 to 12 minutes.)
1 cup (150 g) garlic cloves, minced
1 cup (240 ml) vegetable oil
2 teaspoons confectioner’s sugar
1/2 teaspoon kosher salt
Combine garlic and oil in medium bowl. Microwave on high power for 5 minutes. Stir well and cook for 2 minute intervals until just beginning to brown, 2 to 12 minutes total. Stir well and cook for 30 second intervals until evenly light brown, 30 seconds to 1 minute total. Strain garlic through fine-meshed strainer set in bowl, and reserve oil. Drain garlic on paper-towel lined plate. Dust with sugar, season with salt, and allow to cool.
Microwave-fried shallots
makes 3/4 cup (180 ml) shallots and 1 cup (240 ml) shallot oil
Remove the shallots from the oil a few shades lighter than you want them, as they will continue to darken as they cool. They will still be soft at this point, but will crisp up as they cool. Fried shallots will keep for several months if stored in a sealed container. (If you don’t have a microwave, the shallots can be fried on a stovetop in a nonstick skillet over medium high heat, 10 to 12 minutes.)
2 cups (175 g) thinly-sliced shallots
1 cup (240 ml) vegetable oil
1/2 teaspoon kosher salt
Combine shallots and oil in medium bowl. Microwave on high power for 5 minutes. Stir well and cook for 2 minute intervals until just beginning to brown, 2 to 12 minutes total. Stir well and cook for 30 second intervals until evenly light brown, 30 seconds to 1 minute total. Strain shallots through fine-meshed strainer set in bowl and reserve oil. Drain shallots on paper-towel lined plate. Season with salt and allow to cool.
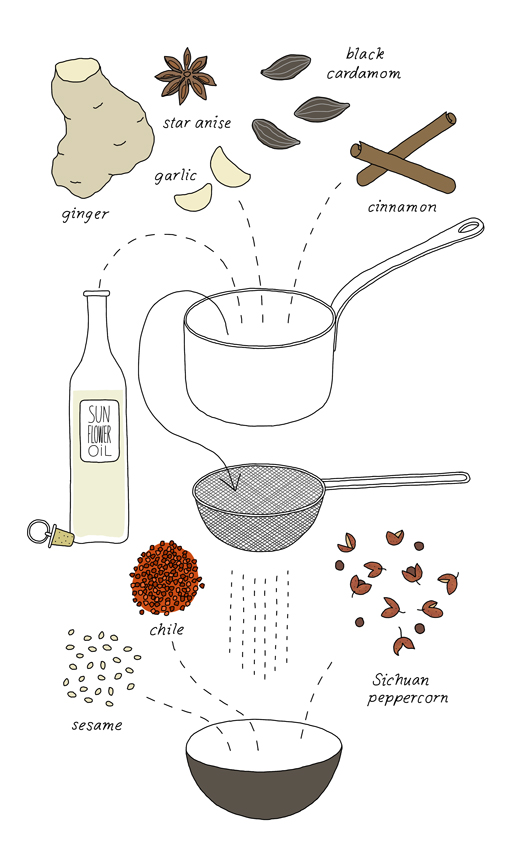
Chile Crisp / Chile Oil
makes 3 cups (700 ml) chile crisp and 3 cups (700 ml) chile oil
Using harder-to-find (but delicious) Sichuan chile flakes (“facing heaven” peppers) will make the crisp slightly hotter. Chile crisp will keep for two months or more in the refrigerator. Chile oil will keep for up to two months at room temperature.
1 cup (240 ml) Korean chile flakes (gochugaru) or Sichuan chile flakes
(or a combination of both)
4 teaspoons Sichuan peppercorns, finely ground
½ cup (120 ml) sesame seeds
4 cups (950 ml) vegetable oil (including oils from shallots and garlic above)
3 (3-inch) cinnamon sticks
6 star anise pods
6 black cardamom pods, lightly crushed
1 (3-inch) piece ginger, peeled and thinly sliced
10 cloves garlic, lightly crushed
1/2 cup (120 ml) toasted sesame oil
1/4 cup (60 ml) fried garlic (see recipe above)
1/2 cup (120 ml) fried shallots (see recipe above)
1/2 cup (120 ml) fermented black beans, chopped
2 teaspoons kosher salt
Place chile flakes, Sichuan peppercorns, and sesame seeds in large heatproof bowl. Heat oil, cinnamon, star anise, cardamom, ginger, and garlic in large saucepan over medium heat until it reaches 375ºF (190ºC). Pour oil through fine-meshed strainer slowly over chile mixture (be careful, mixture will foam initially). Discard solids in strainer. Allow mixture to cool to room temperature, 1 to 2 hours.
Add sesame oil and stir to combine. Strain through fine-meshed strainer set over bowl.
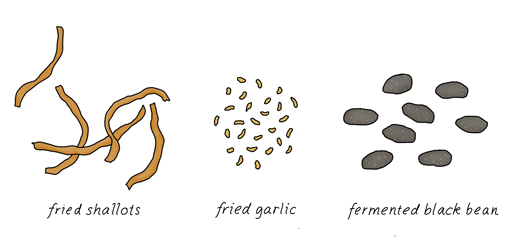
Transfer solids from strainer into second bowl. Add fried garlic, fried shallots, black beans, and salt, along with enough chile oil to produce a loose, salsa-like consistency, about 1 cup (240 ml).
Transfer chile crisp to jar and refrigerate. Transfer chile oil to jar and store at room temperature.
*
We like this condiment:
as a dipping sauce for dumplings by Rabi Abonourat at Serious Eats
on handpulled noodles by Tim Chin at Cook Science
as a garnish for congee (rice porridge) – recipe from Saveur
and Leftover fried onions are excellent topping
on a classic smørrebrød with roast biff and Danish remoulade
or Middle Eastern mejadra
*
More of Andrew
Fresh Flour Power for Cook’s Science Magazine
From Beehive to Barrel: A Tale of Two Ovens for Edible Boston
Mushroom Confit for kokblog (equally addictive as the Chili Crisp)
Follow Andrew on twitter & instagram

