Category Archives: green

Vegetable Stock

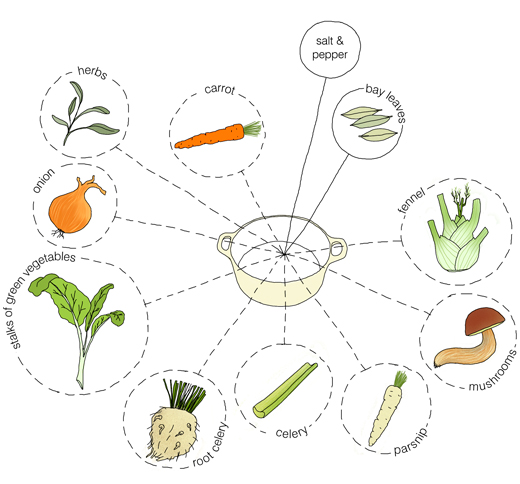
Often while I’m cooking I also have a stockpot going. I feed it with bits and pieces of whatever I have at hand. It can be the end of a carrot, a head of a fish or bones from a piece of meat etc. My vegetable stock as described in the diagram, can be made just as shown or together with any kind of meat.  The point is to use the parts of vegetables or meat that you normally don’t eat. However the ingredients must be fresh! With fish I would add some dill stalks and maybe lemon rinds.

I use my stocks to feed risotto, soups, cook beans in or to touch up stews. The use is really endless.

Bite Sized Porcini Tarts

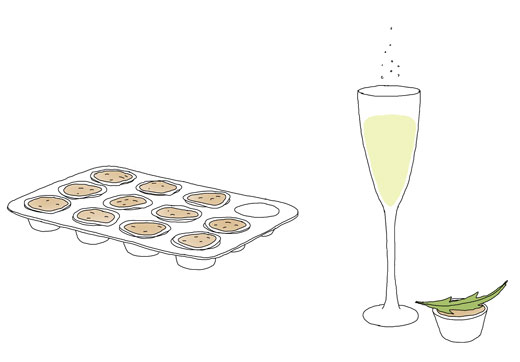
To avoid us going crazy from all the smells in the kitchen while baking duck for Thanksgiving… I made some finger foods for us to nibble on before the bird was ready to serve…

about 12 bite sized pies

for the dough
75 g (2.6 ounces) butter
250 ml (1 cup) flour  regular flour (or whole wheat)
salt
some water

mushroom filling
250 ml (1 cup) of dried porcini mushrooms (or other mushrooms)
one medium sized shallot
butter
thyme
2-3 table spoons medium dry port (or similar)
2 tablespoons sour cream
salt & pepper
parmesan

Mix the dough ingredients together and let rest for a while in the fridge. Grease a mini muffin pan or small cake tin molds with butter. You may prefer to roll the dough out but I take one portion at a time and, with my bare hands, flatten them out to fit the tiny molds. How many you get depends on the size of the molds you’re using (I had some dough left over that can be used for something else). Pre-bake the shells 10-15 min at 200°C (392 F). Let cool.

Soak the dried mushrooms in cold water for about 30 minutes to an hour. The mushrooms should be ready when they’ve softened. Chop the shallot into tiny pieces and sauté in butter at low heat until soft and golden. Put aside for later. Drain the mushrooms and keep the liquid for later use*. Chop the mushrooms in smaller pieces and sauté in a dry pan on medium heat. If they’re too dry in the beginning you may add some of the soaking water. Sprinkle some salt over and when all the water has disappeared its time to start feeding with butter, thyme, the sautéed shallots and later on the port. When the alcohol has dissolved add some spoons of sour cream. The mushroom filling should be a little thick but not too thick. Add some of the soaking liquid to make it slightly thinner. Season with salt and pepper. Let cool.

Fill the pie shells and bake in the oven for about 10 minutes. Sprinkle some parmesan on top and bake for another 10 minutes. Let the pies cool a little before popping them out of the mold. I served mine as finger food with bubbly. However, they work perfectly well as a starter with an arugola & walnut salad.

*I use the  remaining liquid for mushroom stews, stocks, noodle soups and whatever I will be cooking in the next few days. This time I used some in the duck stock .

Tomato Sauce (diagram)

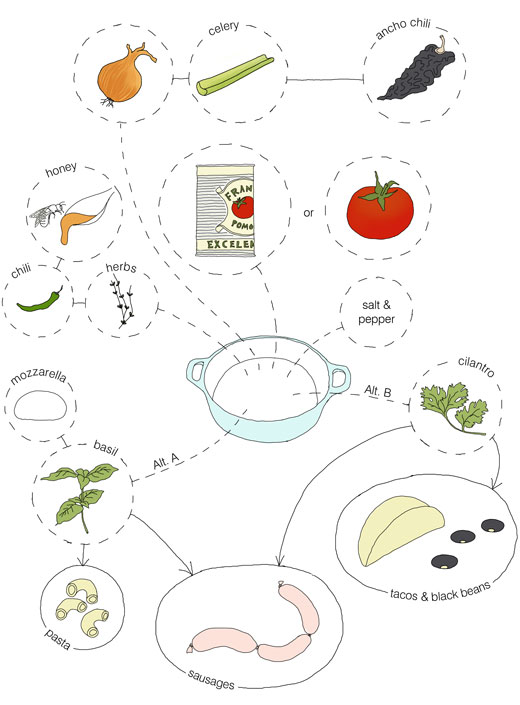
For this tomato sauce you can either use fresh or canned tomatoes. If you use canned tomatoes I recommend that you to buy a good quality brand.  There are so many bad canned tomatoes out there, they should be banned. Here are some of my favorites: Muir Glen Fire Roasted Tomatoes, Mutti Cherry Tomatoes and the Swedish brand Willy’s Cherry Tomatoes or their organic whole tomatoes (only sold in Sweden).

This ancho rich tomato sauce is fantastic with pasta, especially with mozzarella and basil. Topped with cilantro it’s perfect for tacos and black beans. I often use either version instead of ketchup for sausages. Its definitely not the same thing but I kind of prefer it.

Also check out recipe for Fresh Tomato Pasta


Mushrooms (preserves)

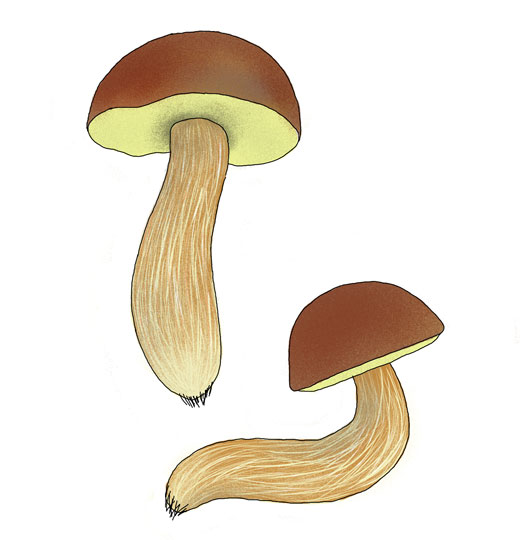
brunsop

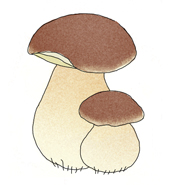
I can’t say I’m an expert in mushrooms and mushroom-picking but I am pretty good. I started learning as a child by picking together with my father, who could spot ceps (porcinos) while driving the car, and my mother who would also pick berries. Today I pick mostly mushrooms that are quite safe; they are easy to recognize and don’t have many poison look-alikes.

Here are some cooking and preserving tips:

Fresh Mushrooms
Clean the mushrooms with a brush and a knife. (I use runing water only if they are really sandy or dirty). Chop the mushrooms into smaller pieces. In a dry pan place the mushrooms and let them cook in their own liquid on medium heat (only add some water if the mushrooms are too dry). Let the liquid slowly cook into the mushrooms. Only when the mushrooms are dry can you add some butter. Keep feeding the mushrooms with more and more butter and season with salt, thyme and just a touch of pepper (optional).  I like my mushrooms well cooked and  little crispy.

You can stop cooking here and just serve the buttery mushrooms on toast. However this lovely mushroom can easily be used in risotto, as a side for meat or together with pasta (I make a really flavorful version of Carbonara with bacon and mushrooms). Together with cream spiced with, for example, dry sherry, they are lovely in stews, sauces, pies or lasagna etc.

I often use thyme as it really works well with most mushrooms. Its mild and doesn’t overpower the flavor of the mushroom. But there are plenty of other herbs and tasty ingredients that work just as well. For instance, rosemary works great with portabella, fresh fennel is lovely w/ Ceps  and juniper w/ Funnel Chanterelles.
pots

Dried Mushrooms
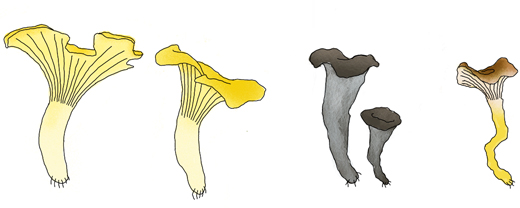
Mushrooms that are good to dry are, among others, the Boletus family (with my favorites Cep and Bay Bolete), Funnel Chanterelleblack trumpets and morels (another favorite but which I know too little about to pick).

Clean the mushrooms with a brush and a knife. Ceps and most mushrooms can be cut smaller with a knife into 1/4″ pieces. Don’t cut them too small as they shrink a bit when drying. Funnel chantarelles and trumpets you can just tear in half or thirds depending on how big they are.

The best way to dry the goodies are to let them get as much dry air as possible. However if you live small it works to dry them on baking paper and turn them around now and again. Try not to use newspaper as the mushrooms will soak up some of the printing ink.  I use a thin net curtain that I hang as a hammock so air can come from all sides. Its also works well to dry on low heat (max 50°C) in a convection oven.  It takes between 1-5 days to dry depending on which method you use and you will have an insane smell of mushrooms in your home. The mushrooms have to be totally dry before storing. I store dried mushrooms in glass jars placed in a dark cupboard. Some say they have to be in a paper bag but then they need to be stored in a very dry place. The mushrooms can be stored like this for years.

Cooking:  Soak dried mushrooms for at least 30 minutes – one hour until soft. Drain and reserve the mushroom water for later. The water can also be used in stocks and soups. Sauté the soaked mushrooms in a dry pan on medium heat with some of the soaking water. When dry start feeding with butter. Season w/ salt, thyme and just a touch of pepper (optional). They are done when they are tender and have just started to brown.

Frozen Mushrooms
I don’t think that drying Chanterelles is a great method as they lose their aroma and also tend to get a little bitter. The best way to preserve Chanterelles is to freeze them. My mother also freezes mushrooms from the Boletus family which both me and my sister prefer to dry. Other mushrooms that freeze well are the Wood Hedgehog and species of the Russula family (which I rarely pick).

Clean the mushrooms with a brush and a knife and cut them into smaller pieces. Saute in a dry pan in their own liquid until dry. Don’t add any butter as the butter will shorten their sustainability in the freezer. Freeze the mushrooms in small portions. When its time to use them, defrost before cooking and saute in a pan with plenty of butter. Season with salt and thyme.

There are of course other ways to preserve and cook mushrooms but this is how I’m used to do it. Enjoy!
Hazelnut Baked Cauliflower


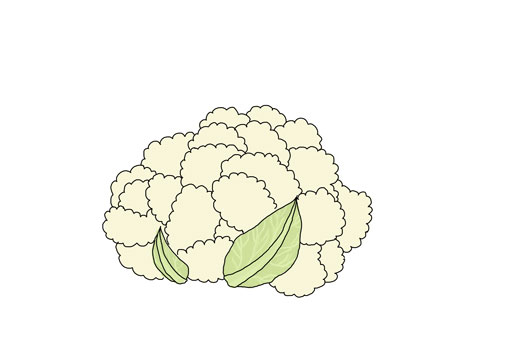
This summer, when I’ve had the house full of guests, I’ve been in need of simple things that can be done quickly and feed several people. One of our favorites has been this Hazelnut Baked Cauliflower that we’ve served together with different kinds of salads or BBQ (works both with vegetables and meat).

one head of cauliflower
olive oil
fresh basil and oregano
garlic
handful of hazelnuts
salt and pepper
juice from ½ lemon

grated parmesan

Rinse the cauliflower and break up the florets into smaller pieces. Place them steams down in one layer on an oven dish. Chop basil and oregano finely and mix with olive oil, minced garlic and chopped hazelnut. Season with salt, pepper and some lemon juice. Pour mixture over the cauliflower and blend together. Let soak for 15 minutes. Bake in the oven at 400°F (just over 200°C) until al dente. Sprinkle a rich amount of grated parmesan on top. Serve immediately.