Category Archives: green

Chile Crisp by Andrew Janjigian

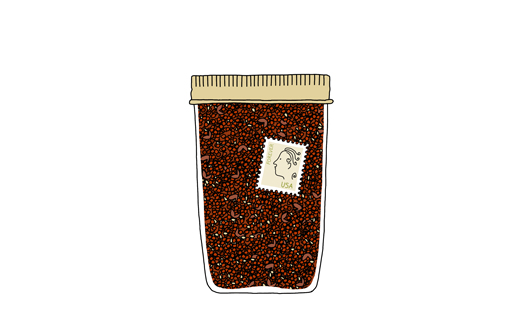
kokblog-chili-crisp-jar

A few weeks ago I got an interesting package in the mail. I had no idea what it could be, but as it was from my friend Andrew Janjigian I suspected it was something tasty. It was a jar of his homemade chili crisp. It looked enticingly appealing with its ruby red texture. And when trying it on rice I found it incredibly delicious. My husband instantly switched out his store bought chili condiment and ended up having it on everything. Now neither of us can think of anything else. So when Andrew asked me to share it on kokblog I was over the top excited.

Andrew is an associate editor at Cook’s Illustrated Magazine, a passionate baker and a mycologist. He is regularly holding bread and pizza classes at King Arthur and on top of everything he is an excellent photographer. Andrew and I have collaborated on several things (mostly baked goods) and here on kokblog he is behind one of the most popular posts: Mushroom Confit

Chile Crisp
by Andrew Janjigian (illustrated by Johanna Kindvall)

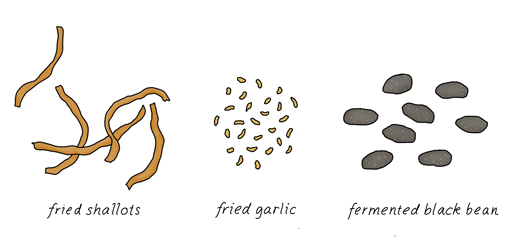
Chile crisp is my version of Lao Gan Ma or ‘Godmother Sauce’, a spicy Chinese condiment that is a cross between a hot sauce and a crunchy salsa. But I like to think of it as chile crack, because everyone I share it with becomes just as addicted to it as I am. It tickles nearly all of my culinary erogenous zones: spice (both from chiles and the buzz of Sichuan peppercorns), sweet (from the fried shallots and garlic), umami (from fermented black beans), and heady aromatics from most of the above, along with toasted sesame oil and all the dried spices.  

It’s essential on noodles, fried rice, or just steamed white rice. It makes eggs infinitely better. Combined with a little black vinegar and soy sauce, it makes a great dipping sauce for dumplings. Stir it into a little mayonnaise and it becomes a killer spread for sandwiches. Or (as I do on a daily basis) it can be simply eaten with a spoon right from the jar.

(The recipe is actually fourfer, since its byproducts are a large amount of aromatic chile oil, along with extra fried garlic and shallots. And credit where credit is due: The starting point for my recipe is the version I found in the Mission Chinese Food Cookbook.)
kokblog-crispy-onions

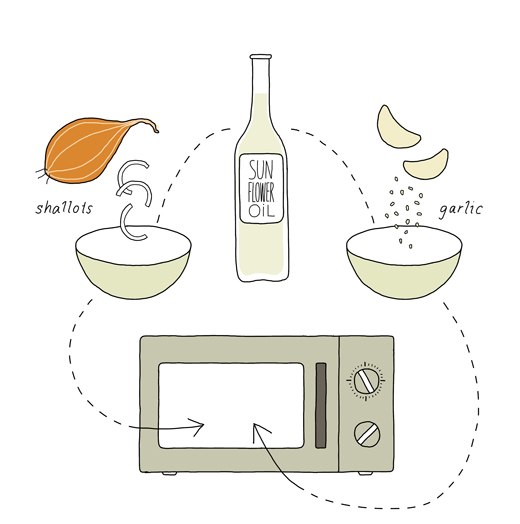
Microwave-fried garlic
makes 3/4 cup (180 ml) garlic and 1 cup (240 ml) garlic oil

Remove the garlic from the oil a few shades lighter than you want it, as it will continue to darken as it cools. Dusting with confectioner’s sugar helps prevent clumping and tempers the garlic’s bitter edge. Fried garlic will keep for several months if stored in a sealed container. (If you don’t have a microwave, the garlic can be fried on a stovetop in a nonstick skillet over medium high heat, 10 to 12 minutes.)

1 cup (150 g) garlic cloves, minced
1 cup (240 ml) vegetable oil
2 teaspoons confectioner’s sugar
1/2 teaspoon kosher salt

Combine garlic and oil in medium bowl. Microwave on high power for 5 minutes. Stir well and cook for 2 minute intervals until just beginning to brown, 2 to 12 minutes total. Stir well and cook for 30 second intervals until evenly light brown, 30 seconds to 1 minute total. Strain garlic through fine-meshed strainer set in bowl, and reserve oil. Drain garlic on paper-towel lined plate. Dust with sugar, season with salt, and allow to cool.

Microwave-fried shallots
makes 3/4 cup (180 ml) shallots and 1 cup (240 ml) shallot oil

Remove the shallots from the oil a few shades lighter than you want them, as they will continue to darken as they cool. They will still be soft at this point, but will crisp up as they cool. Fried shallots will keep for several months if stored in a sealed container. (If you don’t have a microwave, the shallots can be fried on a stovetop in a nonstick skillet over medium high heat, 10 to 12 minutes.)

2 cups (175 g) thinly-sliced shallots
1 cup (240 ml) vegetable oil
1/2 teaspoon kosher salt

Combine shallots and oil in medium bowl. Microwave on high power for 5 minutes. Stir well and cook for 2 minute intervals until just beginning to brown, 2 to 12 minutes total. Stir well and cook for 30 second intervals until evenly light brown, 30 seconds to 1 minute total. Strain shallots through fine-meshed strainer set in bowl and reserve oil. Drain shallots on paper-towel lined plate. Season with salt and allow to cool.
kokblog-chili-crisp-4

Chile Crisp / Chile Oil
makes 3 cups (700 ml) chile crisp and 3 cups (700 ml) chile oil

Using harder-to-find (but delicious) Sichuan chile flakes (“facing heaven” peppers) will make the crisp slightly hotter. Chile crisp will keep for two months or more in the refrigerator. Chile oil will keep for up to two months at room temperature.

1 cup (240 ml) Korean chile flakes (gochugaru) or Sichuan chile flakes
(or a combination of both)
4 teaspoons Sichuan peppercorns, finely ground
½ cup (120 ml) sesame seeds
4 cups (950 ml) vegetable oil (including oils from shallots and garlic above)
3 (3-inch) cinnamon sticks
6 star anise pods
6 black cardamom pods, lightly crushed
1 (3-inch) piece ginger, peeled and thinly sliced
10 cloves garlic, lightly crushed
1/2 cup (120 ml) toasted sesame oil
1/4 cup (60 ml) fried garlic (see recipe above)
1/2 cup (120 ml) fried shallots (see recipe above)
1/2 cup (120 ml) fermented black beans, chopped
2 teaspoons kosher salt

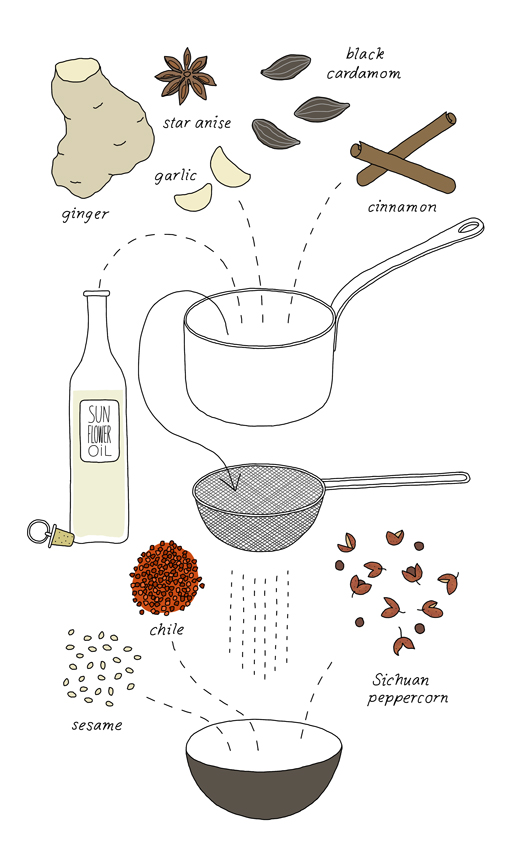
Place chile flakes, Sichuan peppercorns, and sesame seeds in large heatproof bowl. Heat oil, cinnamon, star anise, cardamom, ginger, and garlic in large saucepan over medium heat until it reaches 375ºF (190ºC). Pour oil through fine-meshed strainer slowly over chile mixture (be careful, mixture will foam initially). Discard solids in strainer. Allow mixture to cool to room temperature, 1 to 2 hours.

Add sesame oil and stir to combine. Strain through fine-meshed strainer set over bowl.
kokblog-fermented-black-beans2

Transfer solids from strainer into second bowl. Add fried garlic, fried shallots, black beans, and salt, along with enough chile oil to produce a loose, salsa-like consistency, about 1 cup (240 ml).

Transfer chile crisp to jar and refrigerate. Transfer chile oil to jar and store at room temperature.

*

We like this condiment:

as a dipping sauce for dumplings by Rabi Abonourat at Serious Eats

on handpulled noodles by Tim Chin at Cook Science

as a garnish for congee (rice porridge) – recipe from Saveur

and Leftover fried onions are excellent topping
on a classic smørrebrød with roast biff and Danish remoulade

or Middle Eastern mejadra

*

More of Andrew

Fresh Flour Power for Cook’s Science Magazine

From Beehive to Barrel: A Tale of Two Ovens for Edible Boston

Mushroom Confit for kokblog (equally addictive as the Chili Crisp)

Follow Andrew on twitter & instagram


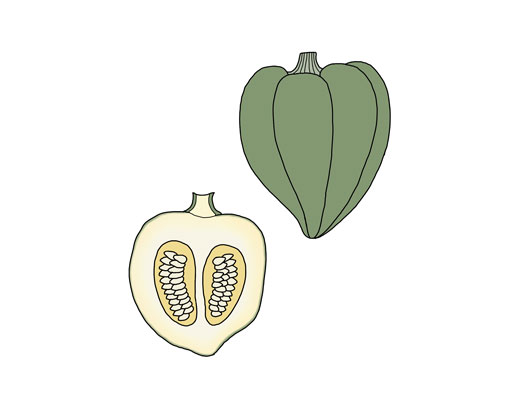
Roasted Acorn Squash Spread

kokblog-acorn-squash2

The reason for my silence here on kokblog is simple, I have been extremely busy with a number of exciting projects in the kitchen as well as in my drawing studio (about which I’m hoping to share with you soon). I’m also recovering from a long lasting and painful frozen shoulder. Luckily it hasn’t stopped me from creating stuff but it surely has slowed me down a little. One good thing is that it has encouraged me to take exercising more seriously and daily walks in the neighborhood.

Well, it’s getting freezing out there so I’m enjoying cozy nights in front of our fireplace with warming dishes like mushroom risotto or polenta with hearty ragu. If I want something simple I make Äggakaga a pancake like dish from South Sweden. Traditionally it’s served with bacon but it’s delicious with Andrew Janjigian’s mushroom confit too.

Lately I have been developing several new bread recipes. Instead of the normal spreads like cheese, charcuterie and pickles, I  enjoy having bread with slices of avocado or hummus with roasted peppers. I have also been savoring it with roasted acorn squash, as in the recipe below. Typically, this is a side dish but I think it really works well on slices of toasted sourdough bread. If you like, add some goat cheese but it’s pretty good just as it is.

Roasted Acorn Squash Spread
serves 2 to 4

1 acorn squash, approximately 1 pound
about 3 tablespoons extra virgin olive oil, plus extra if needed
1 to 2 teaspoons maple syrup (or brown sugar)
rosemary, fresh or dried, chopped or crushed
salt and freshly milled pepper, for seasoning

Preheat the oven to 400°F (200°C)

With a sharp heavy knife cut the acorn squash lengthwise. Remove the seeds (which are delicious roasted) and all the stringy pulp with a small knife and a spoon.

Arrange the halves in a baking pan, with cut side up. Pour the olive oil into the center of both halves. Add the syrup, rosemary and a dash of salt.

Roast the squash until very very soft and with a nice caramelized top. Remove from the oven and let cool slightly.

Scope out the flesh into a medium bowl including any remaining olive oil. Mash it all together with a fork. If it feels too dry, add more olive oil. Season with salt and pepper.

Serve immediately with toasted sourdough bread.

kokblog-winter-squash

Related links

Acorn Squash Crostini with Crispy Bacon and Sage Recipe – Serious Eats

Butternut Squash and Sage Latkes by Martha Rose Shulman, NYTimes

Yotam Ottolenghi’s butternut squash and tahini spread, The Guardian

*

illustrated by me

Adventures in Vegetables
Interview with Dennis Cotter by Killian Fox at The Gannet Magazine

Pumpkin artwork

Elderflower Tea in my Summer Garden

© Johanna Kindvall

Its that time of the year when I stand under the big oak tree in our summer garden listening to the bees collecting honeydew, picking mushrooms, pickling gherkins, making jam, weeding, fighting brown murder slugscooking outdoors or waiting for the rain to stop so I can hang my laundry.

Earlier this year, Rachel Safko introduced me to Elderflower tea or rather Elderflower herbal infusion. Rachel paired the infusion with Dream Cookies by Unna Bakery. The warm and refreshing tea brought me back to my summer garden where I can enjoy afternoon fika while listening to hard working bumble bees and newborn tree sparrows tweeting in their nests. In the back of the house where I hang my laundry, we have a large elderflower bush. The bush produce enough flowers to treat us with my favorite summer cordial while at the same time infusing our laundry with a refreshing smell.

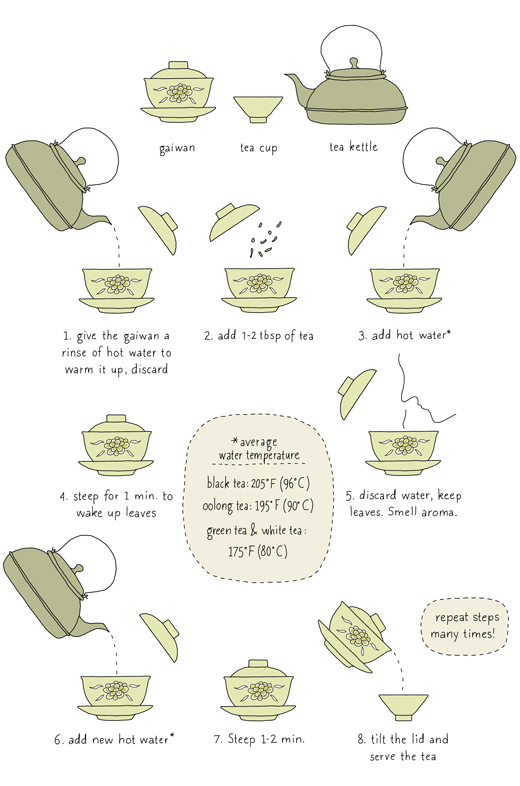
Obviously, this year I couldn’t resist to dry a bunch of them. And it couldn’t have been easier:

Pick as much elderflower clusters as you can. Cut off the thick stems, and give them a gentle rinse. Place them on parchment paper or something similar in a dry and warm place. Let them dry completely. Store the flowers in airtight containers.

If you need guidance to brew your tea or herbal infusion, check out this diagram that I developed together with Rachel.

© Johanna Kindvall

The elderflower season is over but here are a few things you can do with the berries:

Elderberry Liqueur by Hank Shaw
Elderberry Jelly by Elise Bauer
Elderberry Capers by Anna Billing (in Swedish)
Elderberry Syrup with Alexis Siemons

related links
Fika with Tea – Paring Tea with Swedish cookies
Tea and Food by Rachel Safko at Fresh Cup Magazine
A Swedish Coffee Tradition Breaks Through the Day’s Buzz by Rachel Safko at Edible Manhattan
Elderflower gravlax by kokblog

also…
Check out the pattern design I created for Unna Bakery’s new cookie packages. The pattern was inspired by Scandinavian porcelain.

Warm Pear Salad with Thyme & Feta

© Johanna Kindvall

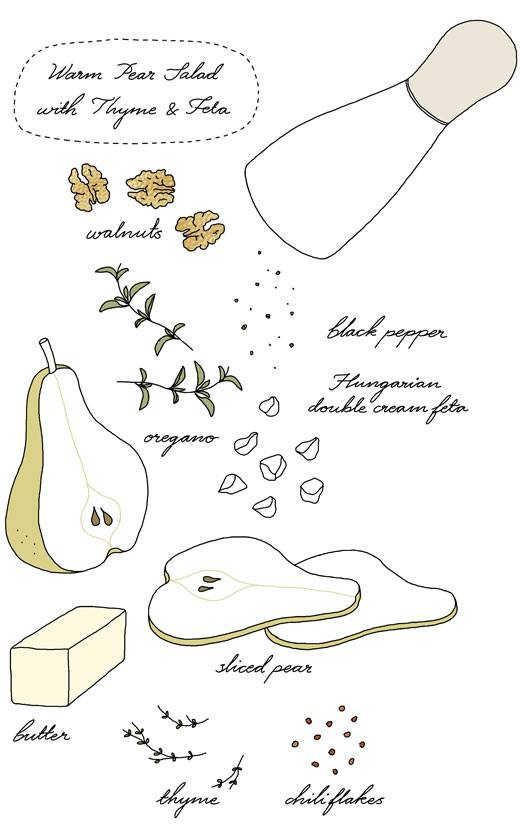
One of my current favorites is this warm pear salad that’s inspired by Ilva Beretta & Jamie Schler‘s beautiful Winter Pear Salad. This is a warm salad with the fabulous combination of pears, blue cheese and walnuts. A combination that shouldn’t really be changed in any way. But the other day, the blue cheese I thought I had, had miraculously been eaten by a mouse (or maybe it was M), so I needed to come up with a quick substitute. I must say, the Hungarian double cream feta I had on hand did a great stand-in job. Not the same, but excellent in another way.

Serve it as a starter or as I did, with hanger steak (medium rare) and a watercress salad.

Warm Pear Salad with Thyme & Feta
(for two)
Slice one pear thinly (about 1/8 inch, 3 mm) from top to the bottom. Saute on medium to low heat together with some ancho pepper flakes (or red pepper flakes) and thyme (dried or fresh) until nicely brown on both sides. Arrange pears neatly on a plate. Topp with creamy feta, toasted chopped walnuts and chopped fresh herbs (oregano or thyme). Sprinkle some freshly hand cranked black pepper over. Serve immediately.

Enjoy!

Pssst this illustrated recipe is available as an art print in my Society6 shop.

*

related links

get more of Ilva and Jamie’s mouth watering stuff at Plated Stories
Minty Zucchini Salad
 – kokblog recipe
Chickpea Salad with Rosemary & Almonds – kokblog recipe
Spinach Salad with Warm Brown Butter Dressing – Sarah Crowder @ TheKitchn


Quick Pickled Cucumber

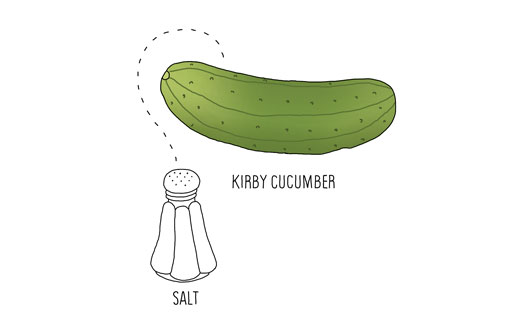
kindvall-salt-gherkin

In our garden we had an earth cellar that my mother stocked with treats during the outdoor season. The whole family went for weekend walks in the woods to forage for plants, berries and mushrooms. Some of the fruit and vegetables came from our own garden or nearby orchards and neighbor’s vegetable gardens. My mother made strawberry and raspberry jam, cooked apple compote, pickled gherkins and beets. With a steam juicer she made both elderflower cordial and black currant juice. She also made lingonberry jam that is very common as a side for typical Swedish everyday dishes such as meat balls, potato pancakes, kroppkakor and blood pudding. Some Swedes even enjoy this jam with fried herring. My father made different kinds of spirits (blackthorn and figs), that they stored and forgot until it was found (to their happy surprise) several years later.

Some of these wonderful treats I do myself today, but at a much smaller scale as I don’t have the storage or a family of five to feed.

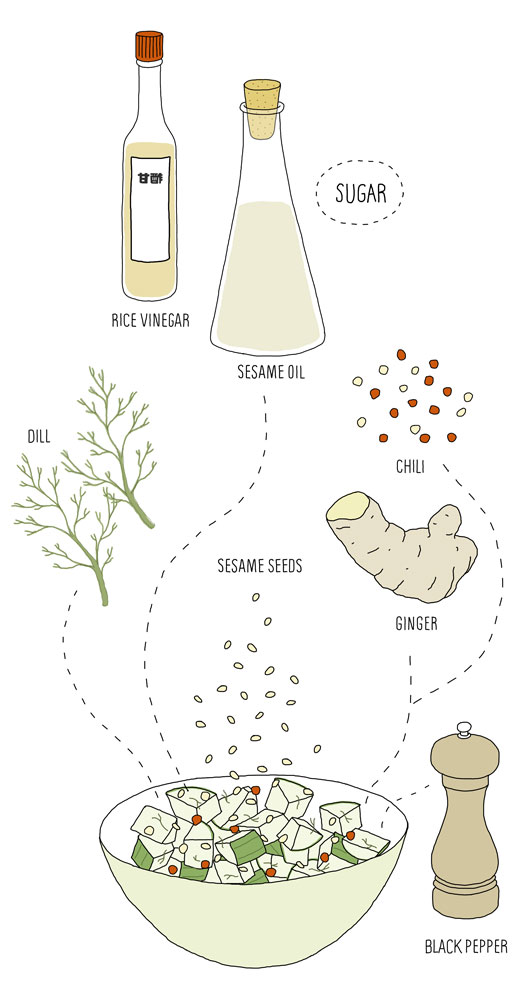
My latest favorite are these quick pickled cucumbers that I created from memory from a restaurant visit to Amsterdam last summer. The original origin is definitely not Dutch or European,  it’s more likely Korean or Japanese.  These pickles can be done just a couple of hours before serving. They are fresh and crunchy and the rice vinegar together with the  sesame oil give them a very pleasant sweet and sour flavor. I love it as a small treat before dinner, just as it is or together with cured fish. Its also excellent as a side for BBQ, stews and sandwiches.

kindvall-pickling

Quick Pickled Cucumber

2- 3 (about 10 ounces, 280 – 300 gram) kirby cucumber
2 teaspoon salt

2 tablespoon rice vinegar
2 tablespoon sugar
1 teaspoon sesame oil

½ teaspoon chili flakes
1 teaspoon finely grated ginger
black pepper, freshly milled
fresh chopped dill
toasted sesame seeds

Wash the cucumbers and cut them into small bite size pieces.

Place them in a bowl and add the salt. Toss well and let sit for 15-30 minutes.

In the meantime, whisk together rice vinegar, sugar and sesame oil. Whisk or stir until sugar is dissolved. Add the chili flakes, ginger and season with pepper and fresh dill.

Rinse the salted cucumber lightly with fresh water. Squeeze them slightly to remove water and pat them dry with a paper towel. When dry add them to the vinegar mixture. Toss well until all pieces are well coated. Season with more salt if necessary. Let sit for about an hour.

Sprinkle some roasted sesame seeds over before serving.

Please note that these pickles are not meant to be stored for a long time. The pickles should be stored in the refrigerator and I recommend you eat them within a few days.

You can tweak this in many ways. For example you can take out the sesame oil and switch the rice vinegar to distilled white vinegar and use horseradish instead of ginger.

*

related recipes

Raw Stirred Cranberries (kokblog recipe)
Orange Cured Carrots by Sofi Meijling
Lemon & Olive Oil Preserved Asparagus by Amy Pennington
Superfast Salt-and-Sugar Pickles by Dave Chang