Tag Archives: guest post

Four-Cheese Ravioli with Tomato Sauce (by Stephane Lemagnen)

One small reason I draw my food is that my cooking results will probably never look as good as Stephane Lemagnen’s creations. It’s silly of me to compare (and I’m not really trying), as Stephane happens to be a well trained chef. On his site Zen Can Cook he shows mouth watering examples of his ability. If you visit the site you’ll also notice that his photography skills aren’t bad either. His cooking and recipes are creative and a great inspiration for many other cooks all over the world. Even if his creations look complicated most of the recipes are easy to follow and can be cooked in a regularly equipped kitchen like mine. My aquavit pork buns were created based on Stephane’s way to cure pork belly.

Stephane grew up in Gascony, France and trained as a cook in the Pays Basque and Paris. In 2006 he opened the avant-garde dessert bar, Room 4 Dessert here in New York City where he offered modern cuisine in the form of a dessert tasting menu. Today, Stephane works as a full time private chef for a well known (secret) client. Lucky them! Recently Stephane started Zenspotting, a space for chefs and serious amateur cooks to publish their photos with links to interesting recipes. I’m flattered to be part of it.

Stephane and I met through twitter two years ago. Ever since then we have had great and inspiring exchanges by email or tweets. I’m happy to host Stephane and I’m really happy how this simple cheese ravioli turned out. Enjoy.

Four-Cheese Ravioli with Tomato Sauce
by Stephane Lemagnen

I’m thrilled to see one of my recipes come to life through Johanna’s illustrations. I have admired her work for a numbers of years now and always loved her recipes and her artistic way of explaining how things are done. And it’s even better with a glass of aquavit! Kokblog is clever, delicious and visually pleasing and it made me wish I stuck with those art classes in 5th grade.

Ravioli are also clever and delicious little morsels of happiness, and for me they are at their best when left simple. An oozy, cheesy filling in a soft envelop of pasta with a tomato sauce flavored with hints of fresh basil is often all you need to put a smile on people’s face. And it’s as easy as… the illustrations. Drawing, in fact, is much harder than ravioli-making and eating them is definitely easier than both. They can be enjoyed right away, or made in batches and frozen for future use which makes them great little discoveries to be made in your freezer.

for the pasta dough

3 cups all-purpose or “00″ flour, plus more for dusting work surface
1/2 teaspoon salt
4 whole eggs
4 yolks
2 tablespoons olive oil

for the cheese filling

8 ounces ricotta (drained)
4 ounces Montasio cheese (grated)
4 ounces Gorgonzola (crumbled)
4 ounces Italian Fontina cheese (grated)
1 egg
½ cup basil leaves, chopped
salt and pepper
nutmeg

to finish

Tomato sauce
Basil

for the pasta dough

Combine the flour, the salt, the eggs, yolks and olive oil in a Kitchenaid bowl and combine on low speed using the dough hook (this also could be done by hand in a large bowl). Increase the speed until you get a rough dough. This should take 1 or 2 minutes.
When the mixture comes together transfer to a floured clean surface and knead the dough, turning the inside-out, until you obtain a dough that’s smooth on the outside, adding flour every time the dough starts to feel sticky. The whole process should take less than 5 minutes. Wrap the dough in plastic wrap and let it rest in the refrigerator for at least 2 hours, or overnight.

Take the dough out from the fridge and place it on a floured surface. Cut it in 4 equal pieces. With a rolling pin make rectangle with the pieces of dough, so that they fit inside the pasta machine. Start rolling pasta sheets on the thickest setting and cut in half (so it doesn’t get too long). Keep rolling reducing the setting every time.
You should be able to see your hand through the pasta sheets when you have reached the right thickness. You want it thin but not so thin that it becomes fragile.

Make an egg wash by beating an egg with a tablespoon of water. Cut sheets of pasta so they have about the same length and lay them on a floured surface.
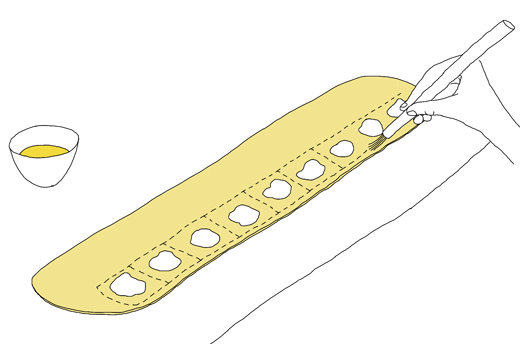
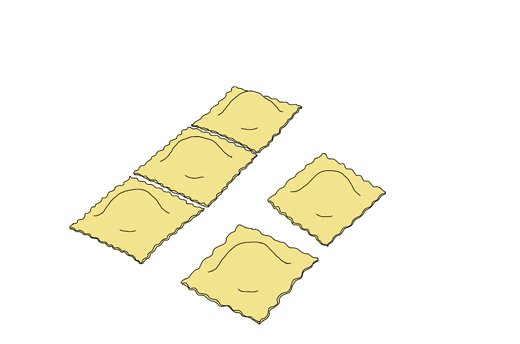
Pipe little mounds of stuffing on the pasta sheets. Brush the edges and the middle sections with egg wash. Cover with another sheet of pasta. Seal with your fingers and push out any air pockets. Use the back of a pastry cutter the size of the mounds to seal each ravioli. Now use a pasta cutter or pastry cutter to portion the raviolis. Reserve on a single layer on a tray dusted with semolina flour.

for the filling

Combine all the ingredients by hand, or in a food processor. Season to taste. Place in a pastry bag with a round 1/2 inch tip.

to finish

Bring a pot of salted water to a boil. Drop the ravioli in the water and cook until they come back to the surface. About 5 minutes. Drain them and toss with tomato sauce. Garnish with basil.
for the tomato sauce

3 tablespoons olive oil
1 small onion, finely chopped
1 clove garlic, finely chopped
1 28 oz. can San Marzano whole peeled tomatoes, including the juice, (or in season 1 3/4 pound of fresh tomatoes, peeled, seeded, and chopped)
2 tablespoons tomato paste
1 large pinch of sugar
1 pinch hot pepper flakes
fresh basil leaves

Heat the olive oil in a saucepan. Add the chopped onion and stir to coat. Reduce the heat to low and let it cook for 15 to 20 minutes, stirring occasionally until soft and translucent. Meanwhile, place the tomatoes in a bowl and crush them with your hands or using a potato masher. Add the garlic to the cooked onions and cook for a minute more. Add the tomatoes, including the juice, a few leaves of basil, the tomato paste and pinch of sugar. Season with salt and pepper and bring to a very low simmer. Cook for 15 to 20 minutes more, stirring occasionally, until it gets thicker. Remove from the heat, if you want you can blend the sauce for a few seconds for a smooth consistency.

Here are some other Ravioli recipes by Stephane:

Veal Ravioli with Culatello, Radiccio, Chanterelles & Sage
Langoustine Ravioli with Citrus-Coconut Sauce, Thai “Bird’s Eye” Chili & Fava Beans
Five-Herb Ravioli with Chanterelles, Roasted Tomato Coulis and Basil Oil

More ravioli reads on Kokblog, Duck Egg Raviolo
Pasta Shaping Work Shop on kokblog

Pump up the Carrots! (by Sofi Meijling)

One of the first times I met Sofi Meijling she treated me to a fantastic eel salad. It was Christmas eve and the salad was blended together with apples and dill. Since then we have become really good friends and she is somebody who I really enjoy having around in the kitchen. Sofi is that kind of person who could turn a catastrophic moment in the kitchen into a culinary adventure. She always has a great idea of how to turn a bland stew into something sensational.

Sofi, who used to be a graphic designer, works as a dramaturge (litterary adviser for theater plays) in both Malmö and Copenhagen. She is an excellent translator and is fluent in both Danish and English. She can also get around with some Russian. Impressive!

For some time Sofi lived without a normal kitchen and instead of getting a microwave she cooked her meals with an electric kettle and a soup thermos. She developed methods to steam different kinds of vegetables, boiled soft eggs and, according to Sofi, made the best couscous ever. She mastered the kettle and thermos so well that she once cooked an entire dinner for 4 adults and two kids.

I hope Sofi one day will start her own blog as I really enjoy her cooking and stories. Until then I’m happy to host her here.

Pump up the carrots!
by Sofi Meijling

This time of year I am getting a bit bored with the old swedes, parsnips and carrots. Roasting them in the oven, blending them in a hot lentil soup, mashing them into a golden puree is all nice and comforting, but now’s the time to wake them from the dead of winter and let the sunshine in! This delicious way of enjoying them raw suits any blend of roots, or carrots on their own. They will keep for several days, so you can make a large batch at a time. (Just make sure to use clean tools when you fish out the portion needed.)

Orange Cured Carrots
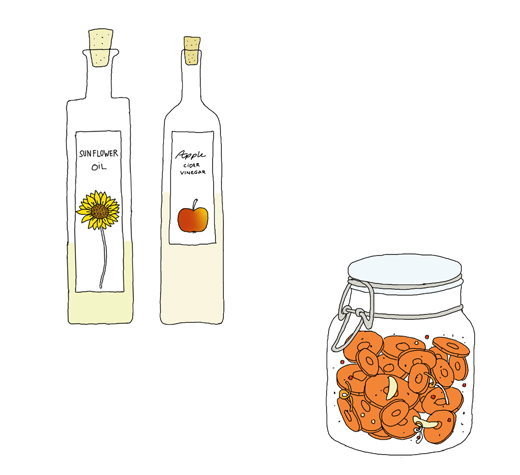
Fill a glass storage container with thinly sliced carrots. I recommend the use of a mandolin, if you are not particularly fond of slicing.
Use one orange per pound of roots to make the marinade. Choose organic oranges, since you want to use the zest, but tart or sweet variety doesn’t matter, the acidity will have to be balanced to taste anyway. Grate the zest off first, then press the juice from the halved fruits. Add double the amount of sunflower oil, a pinch of salt, a pinch of sucanat, a pinch of Korean chili flakes, a little ground black pepper, and a clove of garlic, cut in half but not crushed. Now add your apple cider vinegar, generously if your brand is full-bodied, a little less if the oranges were tart to begin with; the mix should be fresh and pleasantly sour.
Pour the marinade over the carrots and leave in the fridge overnight. Try it as a side dish with pork, with roman lettuce and rocket in a green salad, gently heated with lots of blue poppy seeds for your vegetarian buffet – or as I did last week: add their glory to a fish soup.

Waiting for spring Fish Soup
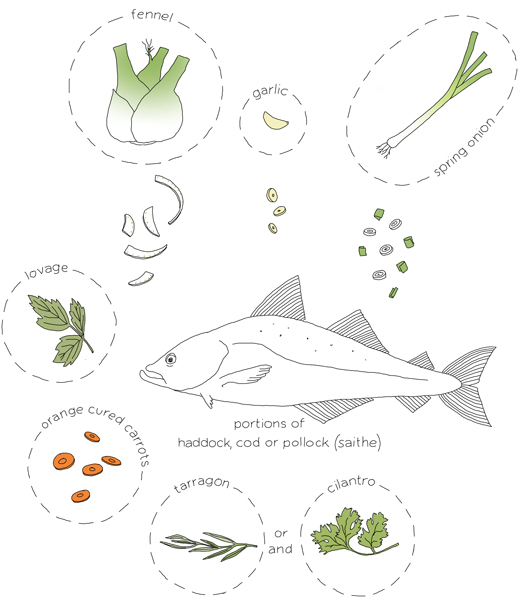
Sweat thinly sliced fennel, coarsely cut spring onion (or the green part of a leek) and a little thinly sliced garlic with olive oil. Season generously with salt, black pepper and some lovage. Set portion-cuts of haddock, pollock (saithe) or cod on top of the vegetables and add boiling water until just covered. Simmer gently for a few minutes. Add the oranged carrots when the fish is almost done, let them get warmed through but not softened. Sprinkle each serving with freshly chopped tarragon and/or cilantro.

(kokblog recommend to always check what fish to buy…
Seafood Watch (US) and WWFs fisk guide (Sweden)

*

related links

Quick Pickled Cucumber

Sopa de Ajo – Traditional Spanish Bread Soup (by Ibán Yarza)

Ibán Yarza is a self-taught baker (and bike mechanic) based in Barcelona where he organizes baking classes and promotes good bread for everyone. I first got to know of him through his site ¿Te quedas a cenar? (“Are you staying for dinner?”) and for the last few years we have been talking through twitter, mostly about baking, cookbooks and Sweden. Iban runs two other websites that are only dedicated to bread, La Memoria del Pan where he shares stories and interviews and El Foro del Pan which is the leading bread forum in Spain (they have one section in English).

Ibán has been to Sweden several times and he probably knows much more about traditional Swedish baked goods than many Swedes. Last year he worked as a volunteer at Ramsjö Gård, an organic farm in Björklinge (north of Stockholm) where he followed their daily work for 2 months. Lately Ibán has been seen on Spanish Television where he bakes together with David Jorge and Robin Food. In one episode he bakes my absolute favorite, a classic Swedish Cardamom bun.

Ibán has an education in journalism and translation. In 2010 he translated Dan Lepard‘s book “The Handmade Loaf ” from English to Spanish.

I’m so happy I finally asked Ibán to be my guest here on Kokblog. Welcome!

Sopa de Ajo – Traditional Spanish Bread Soup
by Ibán Yarza

There is a certain austerity to many traditional Spanish dishes that I find utterly appealing. It probably has to do with the fact that I grew up with my grandparents, my grandmother being a classic example of a Spanish cook: hardly any spice in the cupboard, simple and honest ingredients bought daily at the local market and cooked in the simplest of ways (stewed, boiled, braised, fried) always respecting the flavor of the ingredients in the pan. Simple as they can be, some recipes that date back to the Middle Ages can bring unique emotions to our table, well in the 21st century. Sopa de ajo (literally “garlic soup”) is one of those dishes, an example of the great cuisine of bread, the kingdom of leftovers and the audacity to make the best out of what’s in the larder. A simple and filling meal made out of stale bread, what many Spaniards would definitely refer to as their favorite wintertime comfort food (another soup, gazpacho, most likely being its summertime counterpart).

If one had a look at the menu of top-notch Spanish restaurants over the last years, a clear Asian influence would be easily noticeable, in the form of a zen-esque approach to elaborations and presentations. However, if you dive deep enough into traditional Spanish cookbooks, simple, minimal recipes appear with an almost-spiritual scarcity of means and ingredients that could seduce any Zen master. A famous Spanish writer and gourmet, Xavier Domingo, once described traditional Spanish cookery as “a minimal cuisine”, with only three basic foundations: olive oil, garlic and bread. Sopa de ajo remains a peerless example of this.

Then there is something about the word “sopa” (soup) and bread, the essential food. They go hand in hand in the mind and speech of Spaniards. Even to this day, the first meaning of this word in Spanish does not refer to the liquid food, but to a piece of bread soaked in liquid. In fact, “hacer sopas” (literally “to make soups”; this is, to soak bread in stock, coffee or whatever is at hand) seems to remain a favorite way of eating in my homeland, both pleasant and nutritious. You can find soups made with bread throughout Spain, from North to South, from Majorca to Andalucía, cold and hot, thick and light, meaty or full of vegetables. The recipe below is perhaps the best known version, where only four ingredients (bread, garlic, olive oil and paprika) are able to convey childhood memories and a bit of daydreaming on a dull winter evening. As any traditional meal, recipes vary from one family to another.

Seasonal hint: because of the lack of meat, this soup has traditionally been a Lent dish; in fact, the whole concoction is plain and clear frugality. Rejoice.

Sopa de Ajo
(serves 4)

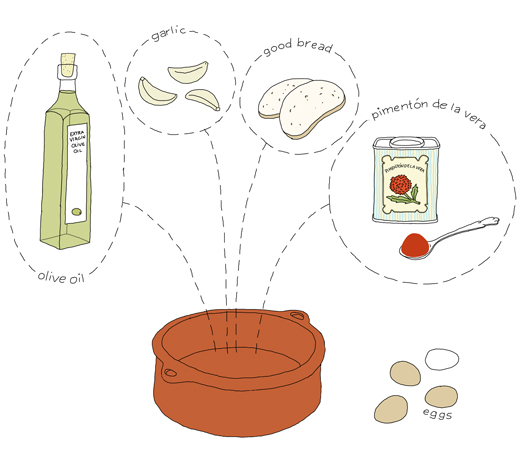
150 – 200 g of good bread, stale. Life is too short to eat bad bread, even if it’s stale. I like to keep the crust for flavor, color and texture. Traditionally we would use a white dense wheat loaf, but feel free to use wholemeal, sourdough… I’ve even cooked delicious sopas de ajo using rye bread (to my fellow countrymen’s disdain)

3-5 cloves of garlic, sliced

3 tsp paprika. The best you can find, my favorite is smoked bittersweet Pimentón de la Vera, available nowadays in gourmet shops worldwide

1 – 1,5 dl extra virgin olive oil. Again, try to find good oil: dense, deep and fragrant. We are using few ingredients, so try to find the best

1,5 liter water (or stock, if you happen to have it at hand; but water is more than OK).

4 eggs (optional)

Traditionally, in Spain you would use a clay pot for this recipe, but any deep pot would do. Slice the cloves of garlic and fry them in olive oil until they’re golden (I tend to think that the amount of olive oil we use in Spain would seem rather large abroad; just don’t be shy, pour it in). Take the pieces of garlic out of the pan and keep them aside so they don’t burn and turn bitter. Now place the bread in the pan and fry in the remaining oil (it will soak up part of the oil). Take the pot off the stove, add the paprika and stir with the bread and oil making sure it doesn’t burn, otherwise it would lose its wonderful fragrance and turn bitter and tart. Once this is done, add the water (or stock) and garlic, and let it simmer for some 10-15 minutes. At the very beginning, it will probably not look the most appetizing of meals, but just be confident, time will bind the soup and the result will be simply delicious.
Some people like to have their sopa de ajo really thick and dry (some even finish it in the oven), I prefer to keep mine just on the creamy side of the term soup, with thick blobs of creamy bread that melts in your mouth. Once the soup has thickened, and while I set the table, I like to take the pot off the stove and use the remaining heat to poach one egg per person. Once at the table, the yolk will break in each guest’s bowl, taking the sopa the ajo experience to its very limit, so to speak. Sometimes I also like to sprinkle a bit of ground cumin. Feel free to add anything you like.

Vanilla Ice Cream (guest post)

This summer a friend asked me what was the maximum temperature that egg yolks should reach while making ice cream. He was a little upset as many ice cream recipes aren’t clear about that. He’d just experienced what happens when you heat up the eggs too high! It separates! As it was a shamelessly long time ago that I made my own ice cream I couldn’t answer him. A few days later when I was reading Johan Kohnke’s Vanilla Ice Cream recipe (below) I was happy to see that he very carefully described every step.
With this guest post I think its time for me to start making ice cream again. I especially love vanilla ice cream, but this recipe can be a fantastic base to add other flavors to. I will definitely make my other favorites: fig, pistachio or salt-licorice. Thanks Johan!

(damn good) Vanilla Ice Cream
by Johan Kohnke

100 years ago,  ice cream (and chocolate) became more common in Sweden.  Ever since then, the Industry has made efforts to cultivate the taste of ice cream and make it more economically. Still, there are few things in life that beats ice cream made at home. Home-made vanilla ice cream contains cream, sugar, egg yolks and vanilla bean.
At Savoy Hotel, Malmö (Sweden) they always have a bucket of their own vanilla ice cream. It’s served in simple silver bowls. To sneak a scoop from the cold-buffet manageress was the absolute prime joy of the day. You can play with flavors endlessly but I stick to just plain vanilla ice cream. If there are no fresh or frozen berries to serve warm with the ice cream, then a simple chocolate sauce is super. It’s the simplest thing in the world: Mix together one dl sugar, one dl cacao, one dl water. Bring to a boil and let cook to a just thick enough consistency. You can make the sauce any time but the ice cream needs at least two days to be really good.

Vanilla Ice Cream
(about half a liter)

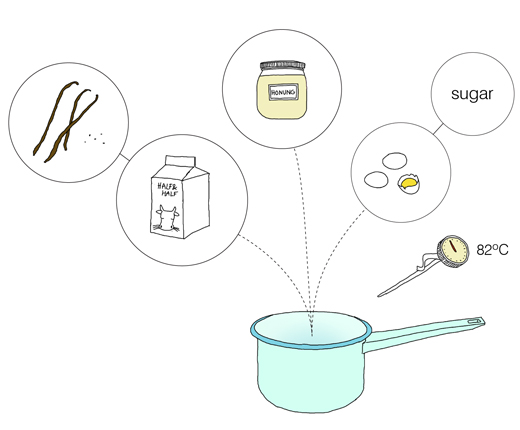
5 dl half & half (or 50 milk and 50 heavy cream)
115 gram egg yolk (grrr so complicated: use about 5-6 egg yolks if you don’t have a scale)
125 gram sugar, (1.75 dl)
17.5 gram honey, (one large table spoon)
one half or a whole vanilla pod (depending on the size and the taste)

Whip sugar and egg yolks until the sugar has dissolved and the batter feels airy.
Scrape out the beans from the vanilla pod and place pod and beans together with the half & half in a saucepan. Heat the cream mixture to just about 100ºC. The liquid should just simmer and not boil. Add the honey.
I have a digital thermometer to specifically control the next step. Pour in the sugar and egg yolk batter. Whip like crazy and let the temperature just reach 82ºC. (Any higher temperature and the ice cream mixture will be wasted!!!) Cool the whole thing immediately in a water bath in your kitchen sink. The temperature should reach 8ºC before placing in the fridge for 8 hours. Its no good skipping this part, I have tried! If you do, you just better buy ice cream instead! The fat in egg yolk needs time to swell, end of story!
Before you run the batter in an ice cream maker, fish out the vanilla pod. Store in the freezer and you have simple vanilla ice cream at hand for your special treats.
The recipe is adapted from the Swedish confectioner Mikael Palm’s ”gräddglass” recipe.

See other posts by Johan Kohnke here on Kokblog.


Mom Skanes’s Toutons (guest post)

A couple of weeks ago I was contacted by Sharon Hunt who wanted to contribute a guest post here on Kokblog. I was flattered and happy she chose to post about the Newfoundland specialty, Toutons, which I had never heard of. Sharon Hunt is a freelance writer in Canada. Her food writing has appeared in Edible Toronto, Shambhala Sun, and in Gastronomica.  Sharon also works for the Stratford Chefs School in Stratford, Ontario, which is one of Canada’s premier culinary training institutes.

Eating Toutons by Sharon Hunt

Mom Skanes – my maternal grandmother – was proud of two things, her long, dark hair that she braided and wound around her head like a bee hive, and her skill as a baker.

She could bake anything, but what she made best was bread. It had a perfect crust, a perfect crumb, and it never lasted long so she made it almost every day, until my grandfather died.

Mom Skanes had plenty of practice perfecting her bread making skills since she started at four, when she climbed onto a stool by the kitchen counter, and punched and kneaded dough with her tiny fists. Coming from a family of twelve children, there was no time for a carefree childhood. Everyone contributed to the family’s survival and being a girl in the early years of the twentieth century meant her contribution was in the kitchen.

In her own kitchen she had a huge oil stove with two ovens, six burners and a warming compartment; the stove was always humming with activity. When I slept over on a Friday night I couldn’t wait to run downstairs Saturday morning and sit with my feet wrapped in a towel and propped on an oven door, while she made cocoa and sometimes … oh please, yes, yes, toutons.

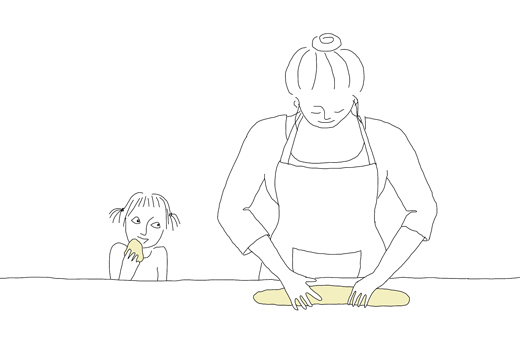
Toutons are white bread dough that is fried and served like pancakes.  Mom Skanes would slice off pieces of dough, let me shape them, and then she fried the toutons until each side had a gentle, golden hue.

Having risen as they fried, they were hot and light, crispy outside, and soft but not doughy inside.  The aroma of hot bread and melted butter was intoxicating, and with my first bite the crust cracked and heat filled my mouth. I started to laugh; so did my grandmother. When I was finished, I licked my fingers, the only time she let me do that. Sharing toutons with her on those quiet, early mornings are among my best memories of time spent with my grandmother.

Toutons were originally made using left-over scraps of bread dough, but they became so popular that bread dough was made just for toutons. Here is a half recipe of Mom Skanes’ white bread dough so you can try toutons for yourself.

white bread (for toutons)

1 package of dry yeast
½ cup (120 ml) lukewarm water
1 teaspoon white sugar
½ cup (120 ml) whole milk
½ cup (120 ml) cold water
1 tablespoon white sugar
2 teaspoons salt
2 tablespoons butter
4 ½ cups (1.5 liter) sifted all purpose white flour

Dissolve 1 teaspoon of sugar in ½ cup of lukewarm water; sprinkle yeast over the water and let stand for 10 minutes. Combine milk, cold water, 1 tablespoon of sugar, salt and butter in a saucepan; heat to scalding point, then remove from the heat and cool until the liquid is lukewarm. Stir the yeast mixture and add it to the lukewarm liquid. Place sifted flour in a large bowl and make a well in the center. Add the liquid and mix into a stiff dough. (Another ½ cup of flour can be added if necessary.) Turn the dough onto a floured surface and knead for 10 minutes. Form into a ball. Place the dough in a greased bowl; grease the top, cover the dough and let it rise in a warm place until doubled in bulk (1 ½ hours). Punch down, and divide the dough in half. (Because each half will make 6 to 8 medium sized toutons you can freeze one half of the dough for another time.)

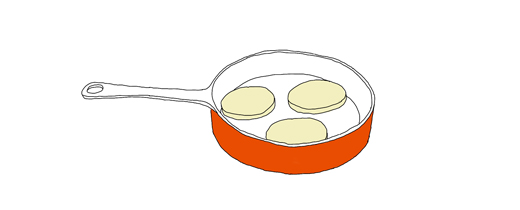
Cut the dough into equal-sized pieces, form into balls and then flatten into pancakes. Heat butter in a heavy frying pan, add toutons and cook on medium heat until each side is golden and a knife piercing the center shows the dough cooked inside (about 10-12 minutes). Sprinkle with salt and enjoy (caution, they are hot).