Tag Archives: illustration

Knäckebröd Crackers

After being tired of not finding great Knäckebröd, Scandinavian Crisp Bread in the stores around my neighborhood in East Village, I started to make my own. Traditionally they are made as round wafers with a hole in the middle so you could store them hanging on a stick in the roof. They are often made with rye flour and rolled out with a special rolling pin with knobs. However I usually don’t use this tool and I like my home made knäckebröd as small crackers flavored with either or a combination of some: caraway seeds, fennel seeds, sesame and rosemary. My recipe is based on Alice Brax knäckebröd recipe.

first
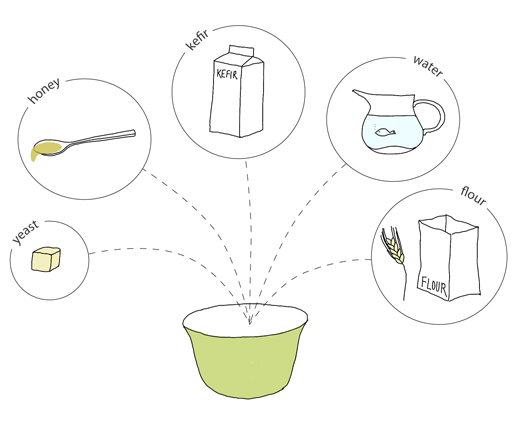
25 grams fresh yeast
1 tablespoon honey
200 ml (almost 1 cup) kefir or yogurt
400 ml (1 2/3 cup) water
600 ml (2 ½ cup) rye flour
about 600 ml (2 ½ cup) regular flour

and later
100-200 ml ( ½ – 1 cup) regular flour
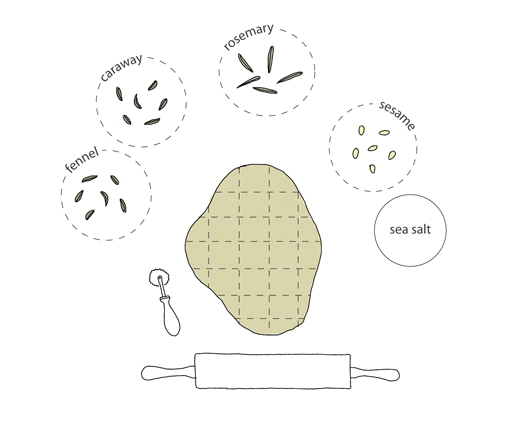
caraway seeds, toasted and crushed
fennel seeds, toasted and crushed
sesame seeds, toasted
dried Rosemary, crushed
flaky sea salt

Warm the yogurt with the water to 37°C (100°F). Dissolve the yeast in some of the warm yogurt mixture. Add the rest of the liquid and blend in honey and rye and regular flour. The dough will be quite sticky. Cover the bowl and keep at room temperature in a non-drafty area overnight or for at least 6 hours.

When the dough is ready, work in just enough of regular flour. Knead the dough on a floured counter top until the dough is smooth. Preheat the oven to 225°C (435°F).

Divide the dough into 15-20 equal parts. With your fingers sprinkle either caraway, fennel, sesame or rosemary together with flaky sea salt over each part and roll them into balls. Use a rolling pin and some regular flour to roll out every ball of dough very thinly. Using a cookie cutter or a sharp knife, cut into approximately 5 cm (2 inch) shapes. Place as many as you can fit on a greased baking tin. Bake the crackers immediately for about 8-10 minutes in the middle of the oven. depending on your oven you may have to turn them around to get nice all around color. When finished let the breads cool on an oven rack or a clean table. Keep the crackers in sealed containers.

This recipe was first published at Honest Cooking, 21 September 2011

Also check out my Wild Fennel Knäckebröd I baked in Sicily, with sourdough and Perciasacchi semola.

Mom Skanes’s Toutons (guest post)

A couple of weeks ago I was contacted by Sharon Hunt who wanted to contribute a guest post here on Kokblog. I was flattered and happy she chose to post about the Newfoundland specialty, Toutons, which I had never heard of. Sharon Hunt is a freelance writer in Canada. Her food writing has appeared in Edible Toronto, Shambhala Sun, and in Gastronomica.  Sharon also works for the Stratford Chefs School in Stratford, Ontario, which is one of Canada’s premier culinary training institutes.

Eating Toutons by Sharon Hunt

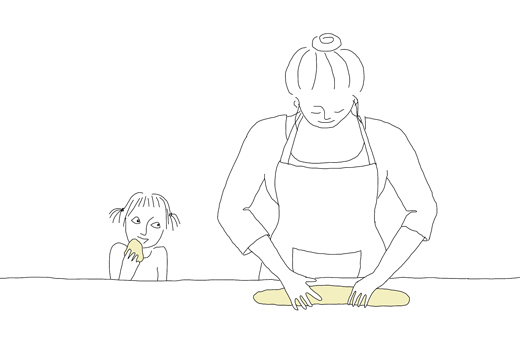
Mom Skanes – my maternal grandmother – was proud of two things, her long, dark hair that she braided and wound around her head like a bee hive, and her skill as a baker.

She could bake anything, but what she made best was bread. It had a perfect crust, a perfect crumb, and it never lasted long so she made it almost every day, until my grandfather died.

Mom Skanes had plenty of practice perfecting her bread making skills since she started at four, when she climbed onto a stool by the kitchen counter, and punched and kneaded dough with her tiny fists. Coming from a family of twelve children, there was no time for a carefree childhood. Everyone contributed to the family’s survival and being a girl in the early years of the twentieth century meant her contribution was in the kitchen.

In her own kitchen she had a huge oil stove with two ovens, six burners and a warming compartment; the stove was always humming with activity. When I slept over on a Friday night I couldn’t wait to run downstairs Saturday morning and sit with my feet wrapped in a towel and propped on an oven door, while she made cocoa and sometimes … oh please, yes, yes, toutons.

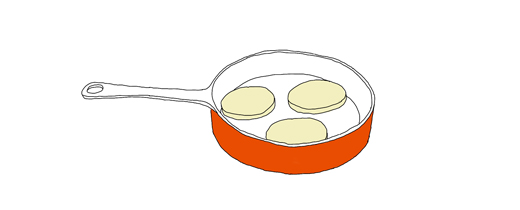
Toutons are white bread dough that is fried and served like pancakes.  Mom Skanes would slice off pieces of dough, let me shape them, and then she fried the toutons until each side had a gentle, golden hue.

Having risen as they fried, they were hot and light, crispy outside, and soft but not doughy inside.  The aroma of hot bread and melted butter was intoxicating, and with my first bite the crust cracked and heat filled my mouth. I started to laugh; so did my grandmother. When I was finished, I licked my fingers, the only time she let me do that. Sharing toutons with her on those quiet, early mornings are among my best memories of time spent with my grandmother.

Toutons were originally made using left-over scraps of bread dough, but they became so popular that bread dough was made just for toutons. Here is a half recipe of Mom Skanes’ white bread dough so you can try toutons for yourself.

white bread (for toutons)

1 package of dry yeast
½ cup (120 ml) lukewarm water
1 teaspoon white sugar
½ cup (120 ml) whole milk
½ cup (120 ml) cold water
1 tablespoon white sugar
2 teaspoons salt
2 tablespoons butter
4 ½ cups (1.5 liter) sifted all purpose white flour

Dissolve 1 teaspoon of sugar in ½ cup of lukewarm water; sprinkle yeast over the water and let stand for 10 minutes. Combine milk, cold water, 1 tablespoon of sugar, salt and butter in a saucepan; heat to scalding point, then remove from the heat and cool until the liquid is lukewarm. Stir the yeast mixture and add it to the lukewarm liquid. Place sifted flour in a large bowl and make a well in the center. Add the liquid and mix into a stiff dough. (Another ½ cup of flour can be added if necessary.) Turn the dough onto a floured surface and knead for 10 minutes. Form into a ball. Place the dough in a greased bowl; grease the top, cover the dough and let it rise in a warm place until doubled in bulk (1 ½ hours). Punch down, and divide the dough in half. (Because each half will make 6 to 8 medium sized toutons you can freeze one half of the dough for another time.)

Cut the dough into equal-sized pieces, form into balls and then flatten into pancakes. Heat butter in a heavy frying pan, add toutons and cook on medium heat until each side is golden and a knife piercing the center shows the dough cooked inside (about 10-12 minutes). Sprinkle with salt and enjoy (caution, they are hot).


Wild Cherry Pie

There is an old railroad path where the tracks have been gone for many years. Nasty weeds such as stinging nettles are about to take over as almost no one walks there anymore. Along the path a little further on grows some black cherry trees.  The cherries are tiny, sweet with a slight almond taste. They are absolutely fantastic and something I long for every summer.  Its a great treat (despite the burning weeds) to eat directly or to freeze for pies and hot sauces in the Autumn. As they are just too good to be left on the tree for the birds to eat, I will continue coming back each year.

Wild Cherry Pie
serves 4

almond dough
300 ml (1 ¼ cup) milled almonds
100 g (3 ½ ounces) butter
5 tablespoons sucanat

about 750 ml pitted black wild cherries (or similar)

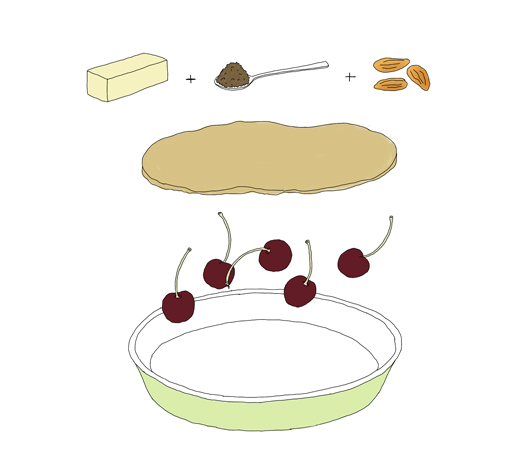
With your hands mix together butter, milled almonds and sugar. Work the dough together. As this is not a crumble, the dough should feel a little sticky. Let it rest in the fridge for about an hour. Grease a 9 ½ inch pie form and arrange the cherries in the form. Flatten some of the dough out in your hand and place over the cherries. The crust should be about 1/4” thick. Repeat until all the cherries are covered. Bake the pie in the oven at 200°C (400F) until the crust has started to get color, about 15 minutes. The crust should be a little crisp and still buttery. Serve warm with some whipped cream.

This recipe was first published at Honest Cooking1 September 2011.


The Count and the Vegetable Garden (guest post)

My first male guest here on kokblog is Johan Kohnke. Johan is a trained cook and worked for Restaurant Savoy in Malmö for some time. Today Johan has left professional cooking behind him and works with refugees. As Johan still likes to cook he often involves cooking in his job as a way for people from all over the world to get to know each other. Johan and I met years ago through my brother but never really got to know each other until Johan got me some rooks* this summer. The summer had just begun when he showed me his impressive summer project; a 225 square meter vegetable lot.

The Count and the Vegetable Garden
by Johan Kohnke

Divorced, rebooted in life, everything was piss! Desperate! But I found a home through blocket.se (like a Swedish Craigslist), a laborer’s cottage attached to a manor house, a place with history, people and lots of farming. The requirement to move in was that you had to be interested in gardening.

–  ”I’m more than interested, my thought was to grow vegetables in the park”.
–  ”No, dammit”, my new landlord, the count answered.
The lawn is treated meticulously by the count himself. He cuts the grass several times a week using three different grass-cutters.
– “Come here I’ll show you!”
The count thought it was more appropriate – a 100 meter patch behind the pigsty.
– ”Am I in heaven?”
Against the stable wall hung wires that used to hold up blackberries, pears, peaches, that previously were growing along the entire wall. The former gardener used to grow artichokes and had vegetable beds for melons.

I went there with my shovel intending to hand-dig the assigned plot!
– “Come with me, there is a plough in the barn! “
In the barn stood a Massey Ferguson 135 with a plough attached.
– “But I can’t drive!”
Okay, then I got a short lesson that was faster than you can read this sentence. The soil had been neglected for years, but probably because it was fun to drive a tractor, it took two hours to work the soil!
– “Would you like manure?” asked the count.
– “Well, damn yes!”
Old pig manure that had been left in the stable and newly “burnt” pig manure was driven out to the plot. Up in the tractor again and now it took just an hour for me to plough down the whole thing. The count looked damn pleased with the earth, when he squeezed a handful of soil in his hand.
-“This smells really good, it will be great, here it will grow”.
And it has been growing! Before my vacation I almost lost control over the plot, but I didn’t. The reward for all the hard work are my own potatoes, carrots, corn, radishes, dill, onions, spinach, beans and beets in decent quantities. Next year I will double the plot. Then there will be more of everything.

Baked Vegetables
Potatoes are served best cut into quarters, rinsed in a bowl with plenty of water, let it run or change the water a few times so the starch will drain away. Then place the potatoes in a colander to dry. Bake for 30-45 minutes. Peeled carrots and parsnips can be baked in the oven for 20 minutes. Split in half and place on a baking sheet. Dab with olive oil and rosemary before baking.
Splitting a whole garlic in half, brushed with olive oil, is a luxurious treat. Make sure that everyone gets at least half a garlic head each. Beets takes the longest time. According to the rulebook, they should be baked on a bed of salt for almost an hour. It’s tasty!

You can also bake all the vegetables in one go. Trying to cut all the vegetables to the correct size so that they are ready at the same time is almost impossible. But worth a try.
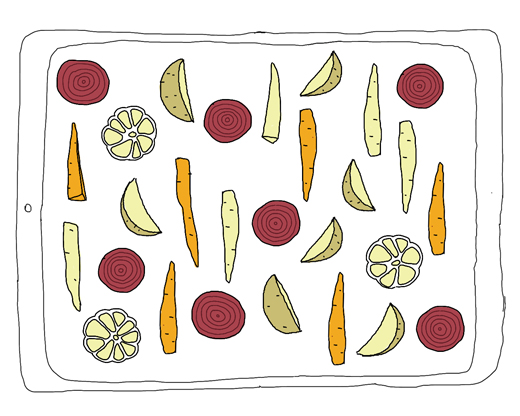
Cut the potatoes into small wedges, slice peeled beets into pennies and halve the parsnips and carrots. Get all the root vegetables mixed together with plenty of olive oil, thyme and rosemary. Bake at 225ºC (440ºF) until the vegetables are baked through and have a great golden brown color (about 30-45 minutes). Fresh summer produce need much less time in the oven than vegetables you buy in the winter. Instead of burnt BBQ-ed meat, when the baking sheet is out of the oven it will be the centerpiece of the table!
Serve with a simple tsatsiki or a ”lazy” mixture of creme fraiche, freshly pressed garlic and salt. Or a piece of plain butter that will melt nicely with the cooked vegetables on the plate.


* The bird rook is an almost forgotten culinary specialty of South Sweden! If cooked together with shallots, celery and wine – it becomes an unforgettable treat.

Anna’s Rosehip Sherry


Every Autumn about this time my twin sister Anna goes out to pick rose hips for her yearly Rose Hip Sherry. This is an exceptionally delightful treat for being a homemade spirit. My sister has done this for a while, so her wine cabinet has become full of different vintages of Rose Hip Sherry. Sometimes I have had the honor to be part of her sherry tastings, which she has after an excellent dinner. It really is a fantastic finish to a good meal and I must say the sherry just gets better as it ages.

The sherry also works in cooking and Anna says that a dash of Rose Hip Sherry in a Chanterelle sauce is absolutely heavenly! Sound fantastic to me!

2 liter (8 ½ cups) rose hips (the long narrow fruits, avoid the rounder ones)
1 ½ kg (3 1/3 lb) sugar
3 liter (12 2/3 cups) water
25 gr (7/8 oz) wine maker’s yeast (or fresh yeast and it might even work w/ instant yeast)

Roughly trim the rose hips but don’t rinse them with water as the surface contains natural yeast that are useful in the process. Make a sugar syrup by heating up the sugar and the water. When the sugar has dissolved let it cool. Use some of the liquid to dissolve the yeast. Let the yeast start (there will be bubbles on the surface) before mixing with the rest of the sugar liquid and the rose hips in a bucket or a glass carboy. Cover the jar and let the wine sit still for three months. At this time the liquid should look clear and the rose hips have fallen to the bottom of the jar. Tap the sherry into dark bottles (for example on 33 cl (12 fl oz) beer bottles). To avoid the sediment at the bottom Anna recommends to spoon up the sherry instead of pouring (can be hard with a carboy). Seal with a suitable cork or cap. Let the sherry stand for at least one more month before drinking. If your are patient enough to store it, or at least with some of it, my sister thinks it’s best to drink after 5 years.