The best tagine I have ever had is the one I cooked myself while attending a cooking class in Marrakesh, Morocco. Its probably also the only proper tagine I have ever had. Raja (the cook) who really did most of the work that day, also led me carefully through and demonstrated every step in how to make other traditional Moroccan dishes such as salad, Berber bread and chocolate layered semolina pancakes. I watched and learned. Smelled and ate. It was absolutely my best day in Marrakesh.
The day started at an indoor market in Mellah (one of the neighborhoods inside Medina) where I could pick meat and vegetables for the cooking lesson. The market had everything from meat (even live chickens), vegetables, bread and milk. We got some beef, carrots, zucchini, tomatoes, potatoes, chili and olives for the tagine and some apricots, eggs and dark chocolate for desert.
The salad we made was really simple and fresh. Just finely chopped onion, cucumber, yellow pepper and tomato. Seasoned with a splash of olive oil, salt and freshly chopped mint.
The beef tagine was cooked in a traditional ceramic tagine cookware on low heat for about 3 hours. At the bottom we arranged onions, garlic and chopped fresh cilantro. The cookware was placed on the stove and the heat was set to low. The meat was placed on top and spices (ginger powder, cumin, paprika, salt and black pepper) were added at the edges around the meat. When the meat had been turned once we arranged carrots, potatoes, zucchini, one whole chili, ½ lemon, olives and parsley on top. Lastly we poured in a mixture of both olive and sunflower oil. Before the tagine “hat” was placed on top, a little water was added. Now and again we scooped up the cooking liquid and poured it over the vegetables and meat. In this way all ingredients got a nice taste of the spices without moving them around.
The semolina Berber bread we made was baked on top of the stove in a skillet. In Morocco, bread is served to almost any meal during the day and a must when having tagine. Raja’s recipe used only semolina flour but I stumbled upon some breads in the city that seem to have a mixture of semolina and wheat flour. Unfortunately they were not as nice. Our local deli (a hole in the wall) in Kasbah sold something that looked like a rye version of the bread. That was amusing!
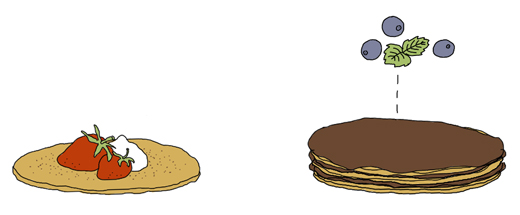
The sweet dessert semolina pancakes were really the thing that won my heart and also something that was new to me. These pancakes should not be mistaken for the more well known pancake, begrhir. Begrhir is a yeast based semolina pancake that is often served for breakfast with honey. These pancakes are baked on only one side and the yeast create decorative holes on the surface. Raja’s dessert pancakes were sweeter and made with baking powder. They create similar decorative holes but are baked on both sides.
Below I have tried to translate Raja’s semolina pancake recipe as best I could. Raja used a typical Moroccan teacup when measuring the ingredients, so her cup measure was slightly less than a standard measuring cup. My recipe is as close as I could come!
Sweet Semolina Pancakes
serves 2-4 people
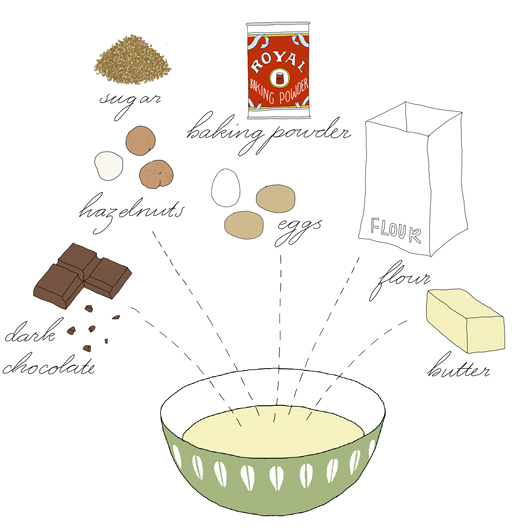
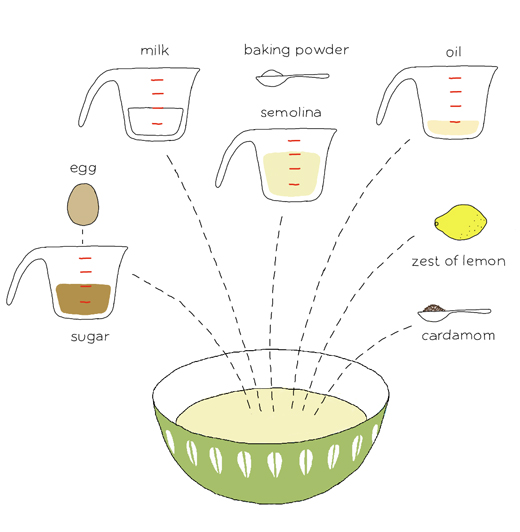
one egg
½ cup sugar ( I used sucanut)
½ cup milk (+ more if batter is too thick)
¾ cup semolina
one teaspoon baking powder
¼ sunflower oil (optional)*
zest from one lemon**
one teaspoon ground cardamom**
I don’t really remember the order Raja mixed the ingredients together but I did it this way: Whisk egg and sugar until well blended before adding the milk. Mix together semolina flour and baking powder. Add the semolina mixture to the batter and whisk well together (make sure there are no lumps). Add the oil, lemon zest and cardamom. Let the batter rest for 15-30 minutes before baking the pancakes.
Heat up a frying pan with some neutral oil (if using nonstick you don’t need any oil in the pan). When the pan is hot lower the heat to medium. Spoon up some batter in the pan with a sauce ladle (You may need to add more milk to the batter if it’s too heavy. It should be fairly easy to pour into a pan). When the pancake has nice decorative holes and starts to get firm on top flip the pancake over. The other side should now have a nice brown color. Press down the pancake with your spatula so the pancake doesn’t rise. Continue until done. Repeat until batter is finished.
It may take some time to get used to how much batter you need for every pancake. A finished pancake should be about 1/8” thick.
Serve the pancakes with sour cream and seasonal fruit and berries for breakfast or brunch. I loved it with a simple apple & orange fruit salad spiced with mint and chopped pistachio. The pancakes can also be done as Raja’s desert, layered with melted dark chocolate (she added some neutral oil to the chocolate) and topped with fresh mint and fruit of your choice. Serve it cool when the chocolate is firm.
*Raja used some neutral oil in the batter and fried the pancakes in a non-stick frying pan. As I didn’t use a non-stick pan I learned that the pancakes got a little greasy with oil both in the batter and in the pan. They still tasted great but got firmer and easier to handle with oil only in the pan.
**Raja didn’t flavor her pancakes with cardamom and lemon, instead she used 1-2 teaspoons vanilla sugar. I just didn’t have any at home when re-creating the recipe. Both versions are equally delicious.
If you planing to go to Marrakesh and want to participate in a cooking class, I can warmly recommend Raja’s class. Contact Jean Peres at Riad Dar One for details and booking.
Story and recipe was originally posted at EcoSalon on 19th January 2012.
