Tag Archives: recipe diagram

Ana’s Hazelnut Cake with Dark Chocolate

At the beginning of the summer I spotted a cake on twitter that I just couldn’t resist. It was a Chocolate & Hazelnut Cake by Ana Vega. The cake is not a dessert cake, its more like a breakfast cake or something perfect for an afternoon cup of tea. From Ana I later learned that the cake was a remake of her Plum cake corriente y moliente (plum cake with dried fruits). Sounds amazing, doesn’t it? Ana runs the cake & dessert blog Biscayenne (all in Spanish) where she share recipes and stories from her tiny kitchen in Bilbao. She also has an online vintage shop with pretty cutlery, porcelain and other kitchenware.

I have now baked this cake several times and just a few weeks ago I added some black cherries to the cake. It made it very moist and delicious. The cherries worked really well with the dark chocolate. I can also imagine adding some banana but in the end its absolutely fine just as it is.
I have only made a few changes to the recipe: Instead of regular sugar I used brown sugar. I also reduced the sugar as I wanted a less sweet cake, which Ana also suggest when using fruit in the cake.

Ana’s Hazelnut Cake with Chocolate

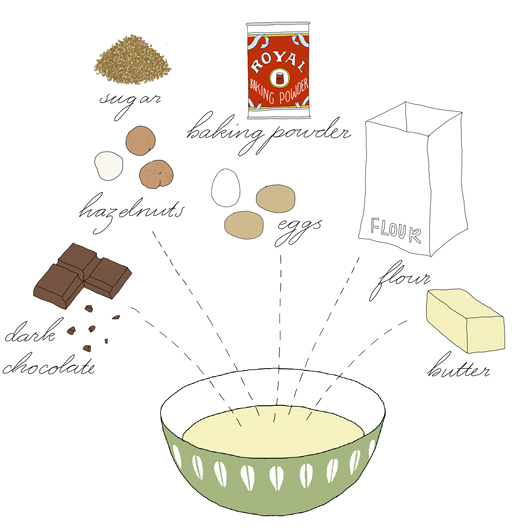
180g (7/8 Cup) brown sugar
3 eggs
250g (1 2/3 cup) flour
1 teaspoon baking powder
125g (a little more than 4 oz) butter
150g (1 cup) hazelnuts
60g (70%) (about 2 oz) dark chocolate

Melt the butter in a saucepan. Mill the hazelnuts finely in a food processor or nut grinder. (If you don’t have either just chop it finely). Chop the chocolate into small pieces. Beat eggs and sugar together before adding flour and baking powder. Blend well together to avoid any floury lumps in the batter. Pour in the melted butter and stir together before adding the milled hazelnuts and the chocolate.
Grease a loaf tin or similar mold and pour the batter into it. Bake the cake for 15 minutes 355°F (180°C). Lower the heat to 320°F (160°C) and continue baking until the top has a brown crisp crust and a toothpick comes out dry (about 40-45 minutes).

Enjoy at breakfast, brunch or with an afternoon tea!

This article was originally published at Honest Cooking on 12 September 2012


Duck in Port

I will as I always do, cook duck for Thanksgiving. The reason is the fat. A duck may look slimmer but when cooked it rarely dries out, while a turkey that’s leaner often does. To choose a leaner meat may be a good idea in general, but I definitively prefer something tastier for a holiday like this.

If you think the duck renders too much fat while baking, I suggest you spoon off the overflow for use in other treats. Potatoes fried in duck fat are heavenly and a duck fat omelet is marvelous. When done right duck fat stores really well.

I also recommend using all the parts that come with. The liver can be chopped up and sautéd with shallots, coriander and cumin. Seasoned with lime and cilantro and you have a perfect appetizer. The neck (head and feet) and rest of the giblets make a great base for a stock (see below). This week’s recipe is my own creation, but I learnt the baking method from both my mother and Elizabeth David (French Provincial Cooking, 1960). Happy Thanksgiving.

Duck in Port
4 people

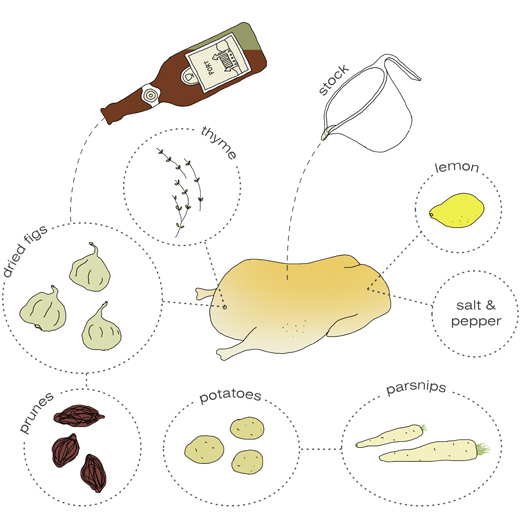
one duck (about 5lb/ 2.5 kg) free range/ wild/ organic
one lemon
2-3 teaspoons salt
pepper

fig and prune stuffing
10 prunes
10 dried figs
one cup (240 ml) port
thyme

under the duck
about 2 lb (almost a kilo) small potatoes, cut in wedges
4 parsnips, cut in wedges
some sprigs of thyme
salt & pepper

for the stock (will be used to baste the duck)
duck neck and giblets (head and feet if available)
one small onion, sliced
one small carrot, sliced
small piece of celery (or any other vegetable that you may have)
one cup (240 ml) white wine
5- 6 leaves of sage (or any other herb you have at hand)
6 black pepper corns
2 teaspoons salt
water

The day before: Cut the figs and prunes into small pieces and soak them with port overnight or at least for 6 hours.

About an hour before you roast the duck you need to prepare the stock. Take out the giblets and the neck from the duck. Sauté the different parts in a saucepan. When brown add the sliced onion, carrots and pour in the white wine. Let it bubble and reduce for a couple minutes. Add thyme, sage, pepper corns and salt. Cover with water and let simmer for about an hour. Taste and season with more salt if necessary.

Rinse the bird under running cold water. Rub the duck inside and out with lemon. Rub on some salt and pepper. Fill the duck with the fig and prune stuffing (reserve the remaining juice for the sauce below or add it to the stock)

Put the duck on its side on a rack in a roasting pan. After 30 minutes in the oven @345°F (175°C), turn the bird on the other side and pour ½ – one cup of warm stock over the bird (keep some for later if making a sauce). Let it cook for another 30 minutes.

In the mean time prepare the potatoes and parsnips. Place them in a bowl and sprinkle on some thyme,  salt & pepper. Toss well together with your hands.

Take the duck out and turn the bird facing up. Place the potatoes and parsnips at the bottom of the pan. Stir around a little so the potatoes and parsnips get well coated with the duck fat and stock. If there is too much liquid or fat jut take it aside for later use. Put the bird back into the oven and cook for about 45-60 minutes. The breast should be gorgeously brown and the legs loose. Take out the bird and let it rest for about 15-20 minutes before carving. The potatoes and parsnips should be ready about the same time but depending on the duck they may need less or longer to get ready. They should be soft inside and slightly crisp on top.

While the duck is resting you can make a simple sauce (optional) to go with the bird. Heat up some butter or some of the duck fat that you have set aside. Let a couple of the stuffed figs and prunes cook with it. Add some of the remaining stock and port juice. Let simmer for a bit before adding a little cream. Season with salt & pepper.

Other nice sides are: lingonberry or cranberry sauce, gherkins, string beans, Brussels sprouts and baked cabbage (check out my own recipe at the bottom of this post).

For more Thanksgiving articles see An Alternative Menu for Thanksgiving. 

This recipe works also with most poultry. Depending on the size of the bird, you will have to adjust the ingredients and the cooking time. I think this recipe works really well with chicken. 

Story and recipe was originally posted at EcoSalon on 10th November 2011.

Caramelized Apple Tart (EcoSalon)

A couple of weeks ago I was asked to do some recipe articles for EcoSalon. As the site belongs to one of my favorite sites I was beyond thrilled. EcoSalon has several interesting food columns, such as Foodie Underground by Anna Brones and The Green Plate by Vanessa Barrington. (BTW Anna Brones is also the woman behind the guest post Semlor for Fat Tuesday Tuesday that was posted earlier this year here on Kokblog). The site also has articles on fashion, culture, design and sex. EcoSalon, as the name shows, is about ecology and green.

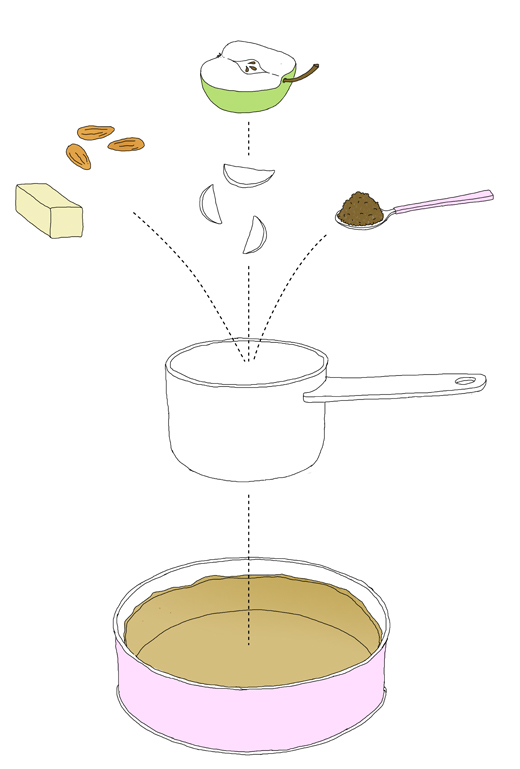
My first article is about Apples in New York City followed by the recipe: Caramelized Apple Tart (see below). Read the whole story here.


Caramelized Apple Tart
4-6 people

dough
1 ¼ cup (about 300 ml) regular flour
3.5 ounces (about 100 grams) butter
3 tablespoons sucanat*
1½ teaspoons finely crushed cardamom
splash of water

filling
4 apples (preferably apples that are sour + firm inside, ex. Granny Smith)
4-5 tablespoons sucanat* (depending on how sour the apples are)
juice from one lemon
2½ ounces (70 grams) butter
½ cup (100 ml ) almonds, toasted and chopped

heavy cream, whipped with a little sugar

Start by mixing together butter, flour, cardamom and sucanat. When the butter is well divided add a splash of water. Work the dough together and let it rest in the fridge for at least one hour. Line a greased 9 inch (about 23 cm) spring form. Pre-bake at 400°F (200°C) the pie shell for about 10-15 minutes until it has got some color. Let cool.

Wash and peel the apples. Cut in half, take out the seeds and slice the rest of the apple in thin slices. Sprinkle the slices with sucanat and lemon juice. Cook over medium heat in a frying pan until they start to get juicy. Add ½ of the butter. Keep cooking the apples until they starts to caramelize. If you think the apples need more sugar you may add some now and let cook for a little bit more. The color should be golden and have some brown spots. Remove from heat and add the rest of the butter and toasted almonds. Let cool a little before arranging the apples inside the baked pie shell. Bake at 450°F (230C) for about 15 minutes until the apples have gotten some nice color. Serve with whipped cream.

*Sucanat is a brown sugar extracted from sugar cane. It’s perfect to bake with and gives cakes and cookies a richer taste. In the U.S. you can often find Sucanat in organic shops. If you can’t find sucanat you may use muscovado sugar or even regular brown sugar instead. When I’m in Sweden I use Farin sugar which works really well too.

Vanilla Ice Cream (guest post)

This summer a friend asked me what was the maximum temperature that egg yolks should reach while making ice cream. He was a little upset as many ice cream recipes aren’t clear about that. He’d just experienced what happens when you heat up the eggs too high! It separates! As it was a shamelessly long time ago that I made my own ice cream I couldn’t answer him. A few days later when I was reading Johan Kohnke’s Vanilla Ice Cream recipe (below) I was happy to see that he very carefully described every step.
With this guest post I think its time for me to start making ice cream again. I especially love vanilla ice cream, but this recipe can be a fantastic base to add other flavors to. I will definitely make my other favorites: fig, pistachio or salt-licorice. Thanks Johan!

(damn good) Vanilla Ice Cream
by Johan Kohnke

100 years ago,  ice cream (and chocolate) became more common in Sweden.  Ever since then, the Industry has made efforts to cultivate the taste of ice cream and make it more economically. Still, there are few things in life that beats ice cream made at home. Home-made vanilla ice cream contains cream, sugar, egg yolks and vanilla bean.
At Savoy Hotel, Malmö (Sweden) they always have a bucket of their own vanilla ice cream. It’s served in simple silver bowls. To sneak a scoop from the cold-buffet manageress was the absolute prime joy of the day. You can play with flavors endlessly but I stick to just plain vanilla ice cream. If there are no fresh or frozen berries to serve warm with the ice cream, then a simple chocolate sauce is super. It’s the simplest thing in the world: Mix together one dl sugar, one dl cacao, one dl water. Bring to a boil and let cook to a just thick enough consistency. You can make the sauce any time but the ice cream needs at least two days to be really good.

Vanilla Ice Cream
(about half a liter)

5 dl half & half (or 50 milk and 50 heavy cream)
115 gram egg yolk (grrr so complicated: use about 5-6 egg yolks if you don’t have a scale)
125 gram sugar, (1.75 dl)
17.5 gram honey, (one large table spoon)
one half or a whole vanilla pod (depending on the size and the taste)

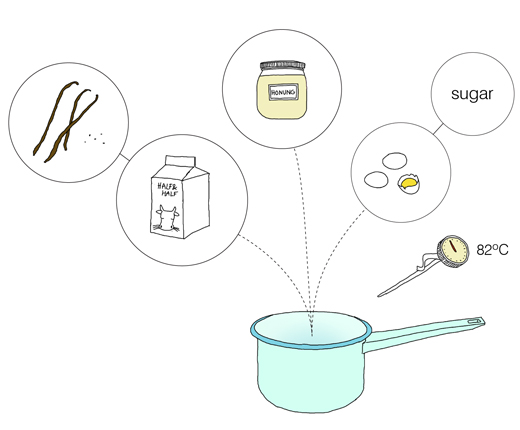
Whip sugar and egg yolks until the sugar has dissolved and the batter feels airy.
Scrape out the beans from the vanilla pod and place pod and beans together with the half & half in a saucepan. Heat the cream mixture to just about 100ºC. The liquid should just simmer and not boil. Add the honey.
I have a digital thermometer to specifically control the next step. Pour in the sugar and egg yolk batter. Whip like crazy and let the temperature just reach 82ºC. (Any higher temperature and the ice cream mixture will be wasted!!!) Cool the whole thing immediately in a water bath in your kitchen sink. The temperature should reach 8ºC before placing in the fridge for 8 hours. Its no good skipping this part, I have tried! If you do, you just better buy ice cream instead! The fat in egg yolk needs time to swell, end of story!
Before you run the batter in an ice cream maker, fish out the vanilla pod. Store in the freezer and you have simple vanilla ice cream at hand for your special treats.
The recipe is adapted from the Swedish confectioner Mikael Palm’s ”gräddglass” recipe.

See other posts by Johan Kohnke here on Kokblog.


Knäckebröd Crackers

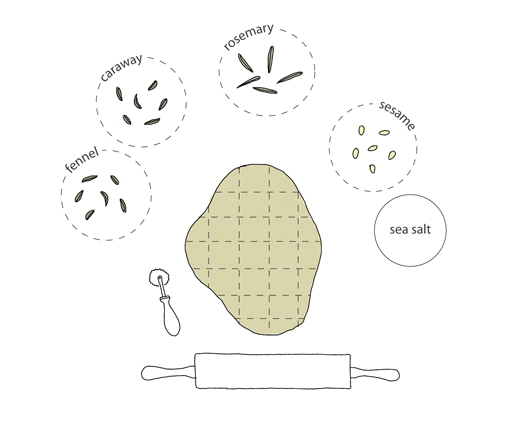
After being tired of not finding great Knäckebröd, Scandinavian Crisp Bread in the stores around my neighborhood in East Village, I started to make my own. Traditionally they are made as round wafers with a hole in the middle so you could store them hanging on a stick in the roof. They are often made with rye flour and rolled out with a special rolling pin with knobs. However I usually don’t use this tool and I like my home made knäckebröd as small crackers flavored with either or a combination of some: caraway seeds, fennel seeds, sesame and rosemary. My recipe is based on Alice Brax knäckebröd recipe.

first
25 grams fresh yeast
1 tablespoon honey
200 ml (almost 1 cup) kefir or yogurt
400 ml (1 2/3 cup) water
600 ml (2 ½ cup) rye flour
about 600 ml (2 ½ cup) regular flour

and later
100-200 ml ( ½ – 1 cup) regular flour
caraway seeds, toasted and crushed
fennel seeds, toasted and crushed
sesame seeds, toasted
dried Rosemary, crushed
flaky sea salt

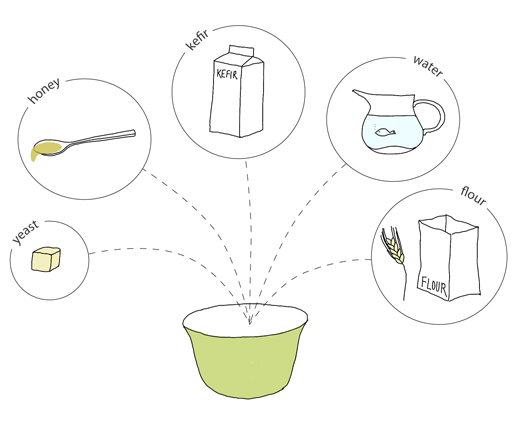
Warm the yogurt with the water to 37°C (100°F). Dissolve the yeast in some of the warm yogurt mixture. Add the rest of the liquid and blend in honey and rye and regular flour. The dough will be quite sticky. Cover the bowl and keep at room temperature in a non-drafty area overnight or for at least 6 hours.

When the dough is ready, work in just enough of regular flour. Knead the dough on a floured counter top until the dough is smooth. Preheat the oven to 225°C (435°F).

Divide the dough into 15-20 equal parts. With your fingers sprinkle either caraway, fennel, sesame or rosemary together with flaky sea salt over each part and roll them into balls. Use a rolling pin and some regular flour to roll out every ball of dough very thinly. Using a cookie cutter or a sharp knife, cut into approximately 5 cm (2 inch) shapes. Place as many as you can fit on a greased baking tin. Bake the crackers immediately for about 8-10 minutes in the middle of the oven. depending on your oven you may have to turn them around to get nice all around color. When finished let the breads cool on an oven rack or a clean table. Keep the crackers in sealed containers.

This recipe was first published at Honest Cooking, 21 September 2011

Also check out my Wild Fennel Knäckebröd I baked in Sicily, with sourdough and Perciasacchi semola.