Tag Archives: ecosalon

Kanelbullar

Yesterday was the day of Kanelbullen (the cinnamon bun) which Swedes celebrate by having ‘fika’ (a traditional coffee break in Sweden).  If you are as serious a bun eater as Anna Brones and myself, you will bake them yourself and have “fika” all day. Below is our last  article together on EcoSalon. It may be the end of EcoSalon, but it will not be the last time you see something from Anna and me, our collaboration will continue one way or another. This article was 1st published at EcoSalon, 4 October 2012.

Baking and Celebrating Swedish Cinnamon Rolls (on Cinnamon Bun Day!)
by Anna Brones (text & recipe) and Johanna Kindvall (recipe & illustrations)

Sweden is equated with many things, but there is nothing as iconic as the cinnamon roll. In Swedish culinary culture, every cup of coffee deserves to be served with a baked good. This tradition is called fika and at its core is the cinnamon roll.

I don’t mean the cream cheese frosting topped, so-sweet-it-makes-you-cringe version that is served in the U.S., I mean the classic Swedish pastry, with a hint of cardamom and just sugary enough. In a country where cinnamon rolls are a staple in every cafe and bakery, and every respectable Swede has made their own batch at least once in their lives, it should come as no surprise that Sweden is in fact the cinnamon roll’s presumed country of origin.

The beauty of the Swedish cinnamon roll is in its versatility. Depending on your mood, you can switch out a few key ingredients for a completely different taste. Cardamom infused filling instead of the standard cinnamon and sugar mix for example (kardemummabullar).

October 4 marks Kanelbullens Dag (Cinnamon Roll Day) – an entire day devoted the the baked good. Since you probably don’t have the chance to sit in a warm Stockholm cafe on a crisp autumn day and order a kanelbulle from the counter, here are a few versions you can make yourself. Just be sure to serve with coffee.

Kanelbullar – Swedish Cinnamon Rolls
Makes about 30-40 buns

dough

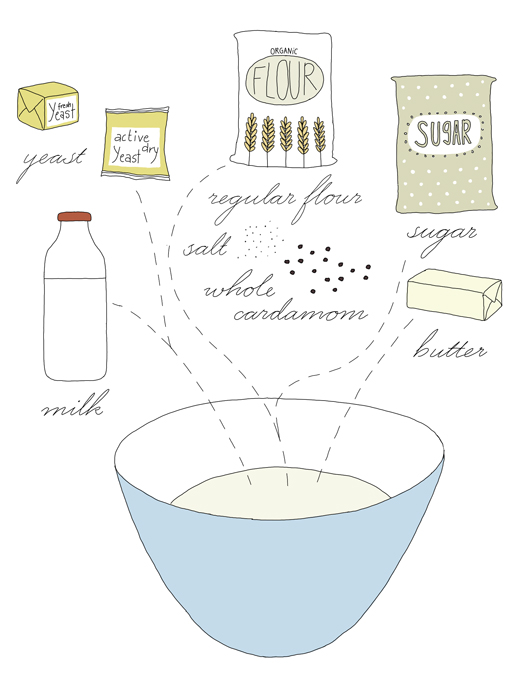
2 1/8 cup (500 ml) milk
25g fresh yeast (or 2 envelopes dry active yeast)
2/3 cup (130 g) brown sugar
5 7/8 cups (840 g) flour
2 teaspoons whole cardamom seeds
½ teaspoon salt
5 ¼ oz (150 g) butter (at room temperature)

alternative 1: cinnamon filling
4 ½ oz (about 125 g) butter (at room temperature)
1/3 cup (65 gr) regular sugar
2 ½ teaspoon cinnamon

alternative 2: cardamom filling
4 ½ oz (about 125 g) butter (at room temperature)
1/3 cup (65 gr) brown sugar
4 teaspoons whole cardamoms
(optional: 1 teaspoon cinnamon)

topping

one small egg (whipped together)
pearl sugar or sliced almonds

Prepare the dough: Crumble the yeast (if using dry yeast prepare it as required) in a big bowl. Heat milk until it is warm to the touch, about 100ºF (about 110ºF for dry yeast). Add the milk to the yeast and stir until yeast has dissolved.

Crush the cardamoms in a mortar and pestle.

Mix together flour, sugar, cardamom and salt before adding it to the milk and yeast mixture. Add in the butter in small cubes. Blend well, either by hand or by using a food processor. Knead it well for about 5-10 minutes.

Cover the dough and place in a draft free place and let it rise for at least 40 minutes.
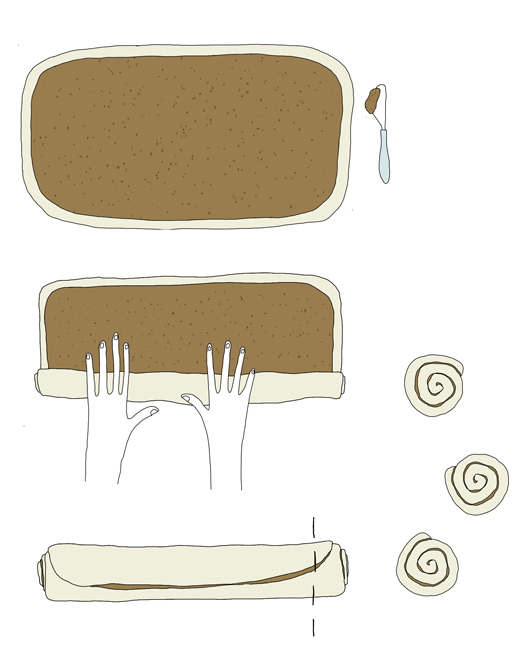
Filling: Mix all ingredients for the filling to an even batter. It is important for the butter to be at room temperature so it’s easier to spread.

Divide the dough into two pieces and using a rolling pin (or a wine bottle), roll each of them out separately to the shape of a rectangle (see diagram above).

Spread half of the filling onto each piece of rolled out dough so that it covers the entire area. Roll the dough up beginning with the long side. Slice the roll into about 20 equal sized (about 1 inch wide) slices and place them with their cut side up on baking sheet. Repeat above procedure with the last piece of dough.

Let them rise for about 30 minutes.

In a small bowl, whisk the egg and brush all buns and sprinkle pearl sugar or sliced almonds on top.

Bake them in the oven at 225ºC (about 440F) for 8-10 minutes.

Note: You can also fold the dough as shown below which is more common when making the bun with cardamom filling.
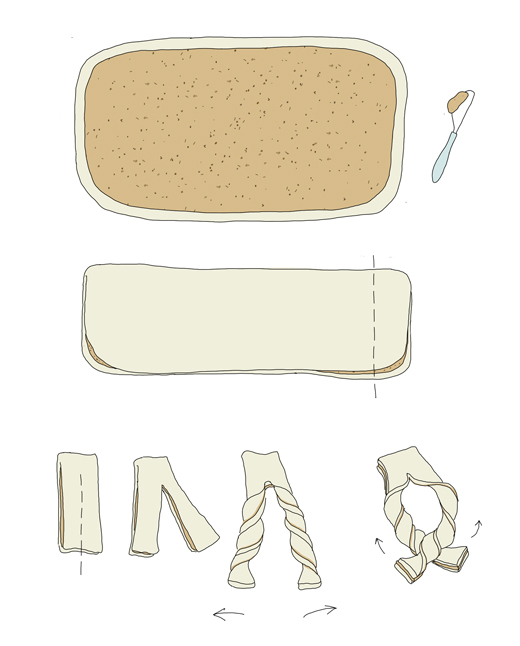
This dough recipe was adapted from Mia Örn’s recipe on Kardemummabullar.

More Swedish baked classics

Kardemummabullar – recipe from the Fika book
Semlor – cardamom rich bun is filled with almond paste and heavy whipped cream
Pepparkakor – Ginger Bread Cookies (at EcoSalon)
Lussebullar – Saffron Buns
Mazariner – Guest post by Anna Brones

Variations of my recipe: Swedish Cardamom Rolls by Fix Feast Flair

Autumn Foraging: Apples

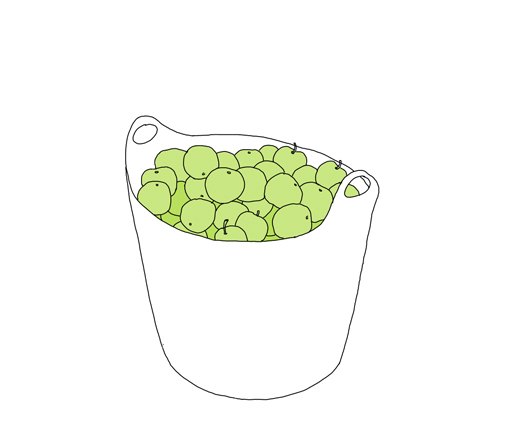
In my neighbor’s garden there is an old apple tree. The tree and the garden is in need of care. It always hurts my heart when I see fruit of any kind fall to the ground before anyone even thinks of taking care of them. As nobody actually lives next door I think its ok to pick them. So I went over there to have a look. The apples didn’t look that great and they would probably be terrible in most things, I thought. I took a bite and smiled. It was a crisp bite and the taste was sweet and sour at the same time. This abandoned tree was in fact a Granny Smith or at least something very close to it. Granny Smith may not be my absolute favorite but an apple like this is excellent in an apple tart or a nutty manchego salad.

Apples in general are very useful in cooking, for both savory or sweet dishes. A chicken for example is really flavorful when roasted whole filled with apples and prunes. Different kinds of preserves such as apple compote, apple butter and apple chutney are fantastic treats that can be served with many different things, such as a sweet flavor in oatmeal, as a side to meat or together with cheese on bread. While growing up I remember having only apple compote with cold milk as an afternoon snack.

Then there are endless amazing cakes and pies that can be baked with apples. There is of course always the classic Tarte Tartine that was created by two sisters after a successful accident in the kitchen. A more unusual apple pie is the south Swedish version (Skånsk Äpplekaka) that is made with rye bread crumbs. It may sound strange but its absolutely delicious served with vanilla sauce.

If you have a lots of apples you should really consider making your own apple juice or cider. If my neighbor’s tree would give me more apples, I would definitively brew hard apple cider. Sandor Ellix Katz says, in his book “wild fermentation”, to brew apple cider is one of the simplest alcohol fermentation you can make. You just need fresh good quality apple juice (preferably juiced by yourself), a jug, a cheese cloth and a rubber band. He calls it Spontaneous Cider.

Last year I got really inspired by Joanna at Zeb Bakes when she made apple cider vinegar with the scraps and pieces that were left over after making apple cake. I think it’s really clever to use something that normally would be thrown away. Joanna’s vinegar was inspired by Carl Legge‘s experiments which he describes very well in his post Fermenting Revolution 2 – Apple cider vinegar. The below recipe is pretty much the same as Carl’s formula (Sandor Katz suggests less sugar in his book).

I think my neighbor’s Granny Smith are perfect for this recipe.

Granny Smith Cider Vinegar

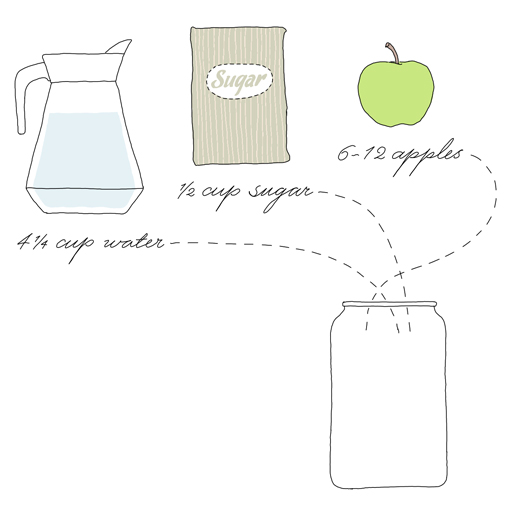
  • ½ cup (about 120 ml) sugar (I used half regular sugar and half brown)
  • 4 ¼ cup (one liter) water
  • 6-12 small Granny Smith apples* (more or less if you are using scraps or whole apples)

Heat up the water together with the sugar. When the sugar has dissolved into the water take off the heat and let cool. This is important as hot liquid will not let the natural yeast start the process. During this time you can prepare the apples. I used whole apples, which I rinsed and cut into one inch (2-3 cm) pieces. But you can use leftover bits and pieces as well. Place the apples in a large glass jar or other suitable container. It’s good if the jar has a wide opening, according to Sandor Katz a larger exposure to air helps the process.

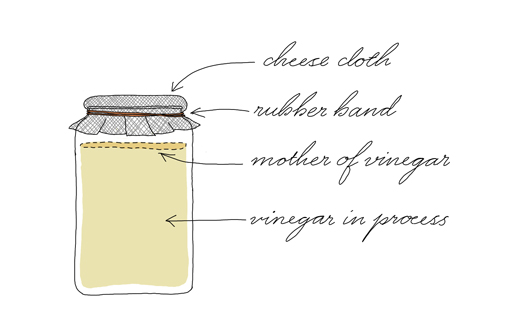
When the sugar solution is cool enough (about room temperature) pour it over the apple pieces. Place a plate on top to weigh down the apples (I took a bowl and a mortar). Place the container in a warm place. To avoid flies etc cover with a cheesecloth or kitchen towel (fastened by a rubber band). Stir and taste the apples every day. (After about 3 days I could see small bubbles and the flavor was sweet and fizzy. This as a good sign, the fermenting process is doing what it should do).

After 7-10 days, the apples have done their job and you will need to strain them through a sieve. Pour back into the jar and let stand for another 7-14 days. Continue to taste your batch regularly. It will soon start to taste more like vinegar than cider. When you are happy with the flavor, strain the liquid again and pour the liquid into sterilized bottles and seal them properly. The film that will be created on top is called “Mother of Vinegar” that can be used as a starter for your next vinegar.


* You can of course use any other kind of apple in this recipe. You can also make vinegar with other kinds of fruit and berries. Sandor Katz mentions in his book that almost any fruit scraps and peels etc can be used for making vinegar. He suggests pineapple, grapes or even overripe bananas.

This article was originally published at EcoSalon, 2 October 2012.

In this Autumn Foraging series see also Autumn Foraging: Rose Hips with a recipe of Rose Hip Sherry.


Autumn Foraging: Rose Hips

The other day I took my bike on a long long bike ride  to get to the sea through neighborhoods I never new existed. The idea was to get away from the city to breath fresh salty air and eat some newly caught clams. The bonus was that I got to pick ripe rose hips. The rose bushes where growing in the sand just at the edge of the beach. As a rose hip loving Swede, this was a happy moment and I picked as many as I could find.

Rose hips are very high in vitamin C and there are plenty of things to make with it. For example, the outer fruity part of the rose hip (often orange or red) can be dried and used for soup and tea (which can be done with the fresh fruit as well). A rose hip soup is very popular in Sweden especially among children. I love it. The soup can be eaten warm or cold, with ice cream or tiny almond cookies (mandel biskvier) that are best soaked in the soup. My favorite is to serve the soup while cross-country skiing, smoking hot directly from a thermos. I can’t think of a better energy treat than that!

If you ever have split open a rose hip you probably know that the hairy part that surrounds the seeds creates itchiness on your skin. Its annoying but totally harmless. (It’s actually used as an itching powder).

Fresh rose hips are often used to make jam, marmalade or jelly. You can also make schnapps, liqueur or, why not some rose hip sherry? My sister Anna Kindvall has become sort of an expert at making sherry out of rose hips. So well that a restaurant recently wanted to put it on their dessert wine list. In her wine cabinet you can find different vintages of the wine and like many other wines this wine gets better with age. The wine is sweet and flavorful. It works well with desserts or different kinds of cheeses. It’s also great in cooking and, I agree with my sister, a dash of rose hip sherry in a chantarelle sauce is heavenly.

My sister (and others) claims that the most flavorful rose hips are the once with long narrow fruits. I have also heard that the best time to pick them is after the 1st frost (however my sister picks them always before). Here in Brooklyn it’s still summer and the once I picked were all small and round (with a really nice aroma). I couldn’t get hold of winemakers yeast so I’m using instant yeast. Oh well, in time we will see how my batch of  wine will turn out.

Anna’s Rose Hip Sherry

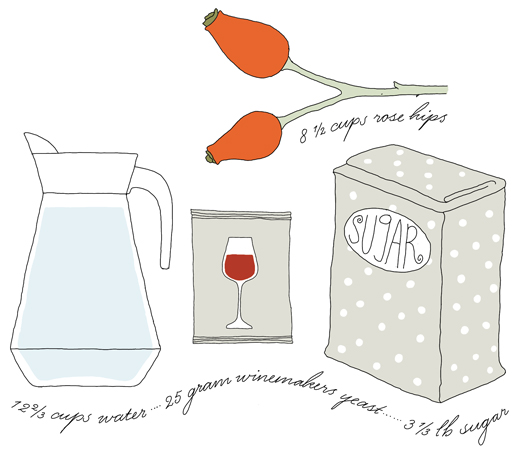
  • 8 ½ cups (2 liters) rose hips (preferably the long narrow fruits)
  • 3 1/3 lb (1 ½ kg) sugar
  • 12 2/3 cups (3 liter) water
  • 25 gr wine maker’s yeast (or fresh yeast, it might even work with instant yeast)

Roughly trim the rose hips but don’t rinse them with water as the surface contains natural yeast that are useful in the process (or that’s what I’ve heard). Make a sugar syrup by heating up the sugar together with the water. When the sugar has dissolved let it cool. Use some of the liquid to dissolve the yeast. Let the yeast start (there will be bubbles on the surface) before mixing with the rest of the sugar liquid and the rose hips in a bucket or a glass carboy. Cover the jar and let the wine sit still for three months. At this time the liquid should look clear and the rose hips have fallen to the bottom of the jar.

Tap the sherry into dark bottles (for example on 12 fl oz (33 cl) beer bottles). To avoid the sediment at the bottom Anna recommends spooning up the sherry instead of pouring (can be hard with a carboy). Seal with a suitable cork or cap. Let the sherry stand for at least one more month before drinking.

If you are patient enough to store it, or at least with some of it, my sister thinks it’s best to drink after 5 years.

This article was originally published at EcoSalon, 13 september 2012

In this Autumn Foraging Series also check out, Autumn Foraging – Apples with an Apple Cider Vinegar recipe

How to Make Kefir

My temporary landlord Russell Busch, who is also a good friend, just introduced me to kefir making. Kefir is a fermented milk drink that contains plenty of healthy probiotics. To make kefir from milk you need kefir grains which are a live and active culture of yeast and bacteria.

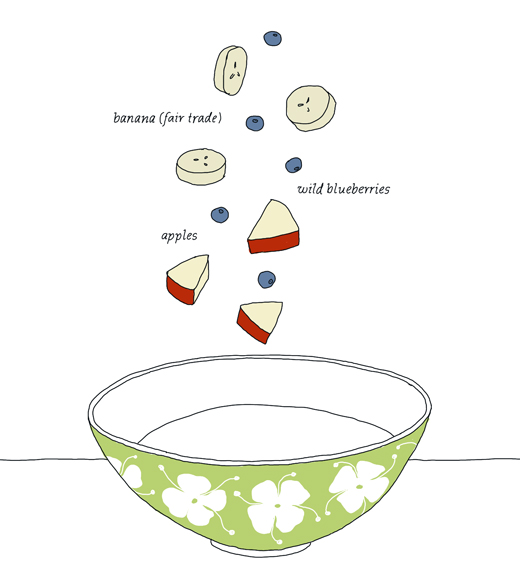
Kefir is a very common drink in Eastern Europe and the Nordic countries. I grew up with it and if I remember correctly, the Swedish kefir is thicker, more sour and has a slightly carbonated feel to it. Swedes often eat kefir (with a spoon) together with muesli, cornflakes, fruit or just with sugar and cinnamon. I like my kefir best just plain with fresh fruit or berries. Others prefer making smoothies with frozen berries and fruits as it takes off some of the strong sour flavor. Luckily Kefir has become increasungly common here in the US.

The kefir making process is super easy and you don’t really need to do much as the kefir grains do most of the work.

to make kefir you will need:

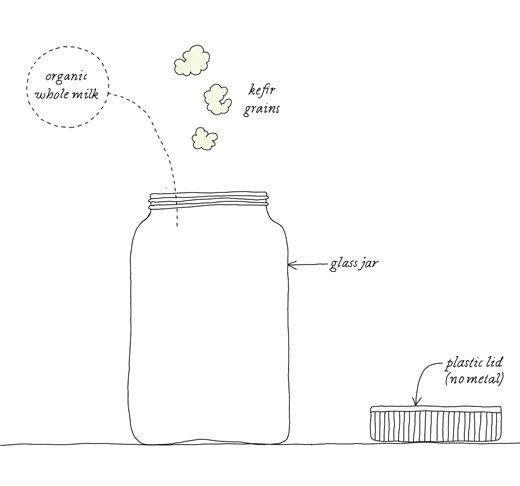
  • kefir grains (which you order online here or here or somewhere else)
  • organic whole milk from cow, sheep or goat
  • glass jar
  • small piece of cheese cloth + rubber band (or similar)
  • wood or plastic spoon/ spatula
  • fine mesh plastic strainer (or stainless steel)

note: no metal such as aluminum etc can be used as it will react with the kefir grains. Although, for some reason stainless steel seems to be OK.

Place the new kefir grains in a clean glass jar (about two tablespoons). Pour about 1 cup organic whole milk over the grains. Cover with the cheesecloth and fasten it with a rubber band to avoid flies (I actually just use a plastic lid that is just placed on top). Leave the jar on the counter in room temperature away from any sun.

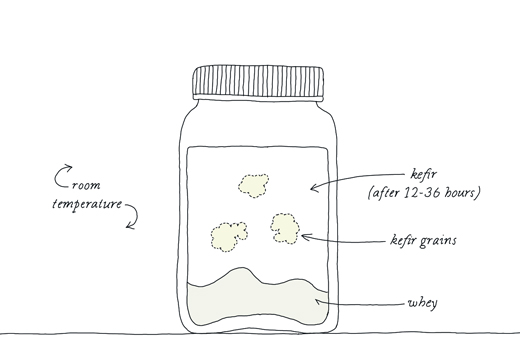
When the kefir has got thicker the kefir is probably done. It should smell pleasantly and have a mild sour taste. At this stage you will have a drinkable kefir. If it stays longer the kefir will start to separate the curdled milk from the whey. Don’t worry, the kefir is still fine, however it will be slightly thicker and have a richer taste. A longer fermentation will also create more probiotics and less lactose. The fermentation will take about 12-36 hours.

When you think you are ready, give the jar a shake and drain it through the plastic strainer to separate the kefir from the grains. It’s important to be gentle with the grains so don’t press them too hard. The kefir grains don’t have to be totally clean from curds for the next batch. The ready-made kefir can be stored in the fridge, preferably in a glass container. It will keep fresh for awhile. If you think the kefir is too loose you can strain it to reduce some of the whey. Leftover whey can be used for many things (see below).

next batch
Prepare the next batch by placing the strained kefir grains into a clean glass jar. This time you should add a little more milk and the fermenting process will probably go faster as the grains have grown larger and become more active.

The more kefir you make the bigger the grains will grow, you will therefore need to adjust the amount of milk depending on their size. At some point you need to split the grains up as there is a limit on how much kefir you can make. I suggest giving some grains to a friend or start making other things with it. You can, for example, make kefir drinks by using almond, soy or coconut milk instead of regular milk. In this kind of process the grains will not grow and therefore not last as long. I haven’t tried it yet but my landlord makes coconut kefir drinks daily.

what to do with the kefir
There are many other things you can do with the kefir if you don’t just want to drink or eat it. Kefir is excellent in dips, dressings, cakes and bread. It can also be used instead of yeast when baking bread or at least that’s what I’ve heard.

Recently I made my own cream cheese or rather fresh cheese by straining the kefir from the whey through a clean kitchen towel or several layers of cheese cloth (takes about 24 hours). This creamy cheese can be served plain or flavored with fresh herbs, garlic or anything you like. Its also great to make pierogi leniwe (Polish lazy pierogi).

You can do many things with the whey such as ferment vegetables, sauerkraut (cabbage) and when diluted 5 times with water it can be used as a fertilizer for your plants. For about a week I collected the leftover whey to make ricotta. I was amazed how well it worked out as the whey just looks like cloudy water.

storing the kefir grains
At some point you may want to have a break in your kefir making and it’s actually possible to store the kefir grains with some milk in your fridge. Just feed them with new fresh milk every now and again. When you start again the grains may not be as active as before the break, so you probably have to start again with just a small amount of milk.

 This article was 1st published at EcoSalon, 31 July 2012

Ginger & Lime Tart

Like several other countries Sweden celebrates name days, which means that every single day of the year has a specific name of a person. For some people (for example, my mother in law) the name day is more important than their own birthday. For others it’s just an ordinary day.

In the middle of July, Swedes celebrates fruntimmersveckan (the week of the ladies) which is a week when there are six women’s names in a row. This week is especially interesting if you are into cakes. Traditionally you need to bake a different cake for each woman who has their name-day this week. As I’m one of the six ladies I will celebrate as follows…

Cherry & Almond Clafoutis with Cognac for Sara on the 19 July

Red Currant Tart for Margareta on the 20 July

Lime & Ginger Tart for Johanna on the 21 July (see below)

Rhubarb & Meringue Cake for Magdalena on 22 July

Lemon & Strawberry Cake with White Chocolate for Emma on 23 July

Chocolate Caramel Tart for Kristina on 24 July

Johanna’s Ginger & Lime Tart

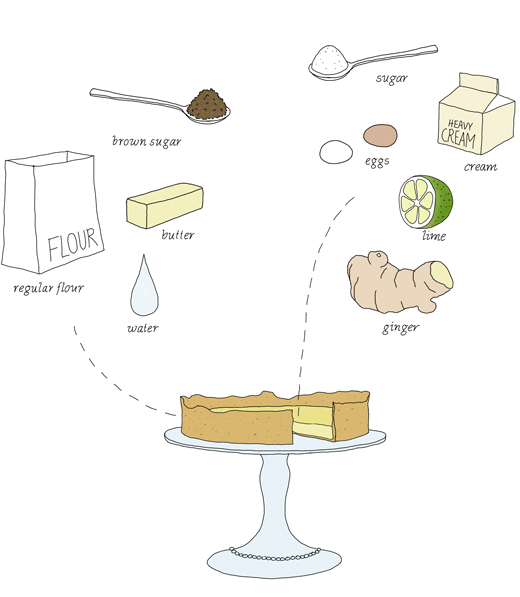
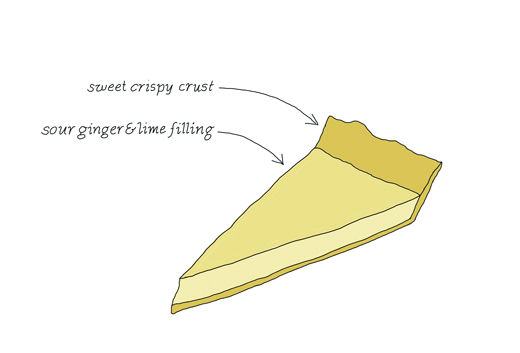
This Ginger & Lime cake has a nice combination of a sweet cookie like pie shell with a sour ginger-rich filling. It can be served as is or with freshly whipped cream.

Dough
1 ¼ cup (170 g) flour
100 g (3.5 oz) butter
4 tablespoon sucanat
a splash of cold water

Filling
3 eggs
2/3 cup (150 ml ) sugar (works with either white or brown)
7/8 cup (200 ml ) cream
Grated peel from one lime
Juice from 2 limes
1 inch (2 ½ cm) piece of ginger

Decoration (optional)
Powdered sugar

Mix together butter, flour and sugar with your bare hands. When the butter is well divided, add a splash of water and work the dough well. After the dough has rested for half an hour in the fridge, line the dough in a 9 ½ inch (24 cm) springform or similar. Bake the tart shell at 400ºF (200ºC) for about 15 minutes. The shell should start to get some nice color.

Let the pie shell cool while you whip together egg and sugar until fluffy. Add the cream and blend well together before adding lime and ginger. Adjust the flavor with more or less ginger and lime to your liking. Pour the filling into the pie shell and bake in the oven at 400ºF (200ºC) for about 20 minutes. The filling should have set. Let the cake cool down before dusting some powdered sugar over. Enjoy!

This article was originally published at EcoSalon on 19 July 2012